Do you have a question about the Check Point QUANTUM SMART-1 6000-L/6000-XL and is the answer not in the manual?
Details the default memory configuration for the Smart-1 6000-L Base model with 96GB.
Explains how to upgrade the Smart-1 6000-L from 96GB to 192GB by adding 8GB DIMMs.
Details the default memory configuration for the Smart-1 6000-XL Base model with 192GB.
Explains how to upgrade the Smart-1 6000-XL from 192GB to 384GB by adding 16GB DIMMs.
Steps to prepare the appliance before memory replacement, including shutdown and cable disconnection.
Instructions on how to safely remove the appliance's cooling air shroud.
Steps for safely removing a DIMM from the memory socket, including handling precautions.
Detailed procedure for installing a DIMM into the memory socket, with alignment and seating instructions.
Steps for reinstalling the cooling air shroud after DIMM installation, ensuring proper seating.
Instructions for reassembling the appliance cover and securing cables after component replacement.
Procedure to verify the installed memory configuration using the command-line interface (CLI).
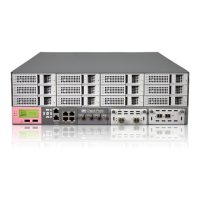
The Check Point Quantum Smart-1 6000-L/6000-XL Appliances are security management devices designed for robust network security. This document outlines the process for replacing memory modules within these appliances, ensuring optimal performance and adherence to best practices.
The Quantum Smart-1 6000-L/6000-XL appliances serve as central security management platforms. They are equipped with memory configurations ranging from 96GB to 384GB, depending on the specific model and upgrades. The memory modules, referred to as DIMMs (Dual In-line Memory Modules), are crucial for the appliance's operational speed and capacity to handle security tasks. The appliances are designed to support a maximum of 24 DIMM sockets, which can be populated with either 8GB or 16GB DIMMs to achieve the desired total memory. The architecture includes two CPUs, each managing a set of DIMM sockets, ensuring efficient memory access and processing. The cooling air shroud plays a vital role in maintaining the optimal operating temperature for the memory modules and other internal components, preventing overheating and ensuring system stability.
The appliances offer flexible memory configurations to cater to different security management needs. The Smart-1 6000-L Base model starts with 96GB (12x8GB DIMMs), which can be upgraded to 192GB by installing an additional twelve 8GB DIMMs, filling all 24 sockets. Similarly, the Smart-1 6000-XL Base model comes with 192GB (12x16GB DIMMs) and can be expanded to 384GB by adding twelve more 16GB DIMMs. These upgrade paths allow users to scale the appliance's memory capacity as their security requirements evolve. The memory socket numbers are clearly marked on the cooling shroud, facilitating easy identification and proper placement of DIMMs during installation or replacement. The system is designed to be user-friendly, with clear instructions for preparing the appliance, removing and installing components, and verifying the configuration.
Maintenance of the Quantum Smart-1 6000-L/6000-XL appliances, particularly memory replacement, is structured to ensure safety and prevent damage. Before any internal work, the appliance must be properly shut down, and power cables disconnected. For rack-mounted units, the appliance needs to be removed from the rack using the provided telescopic rails. An essential safety measure is the use of an Electrostatic Discharge (ESD) grounding strap to protect sensitive electronic components from static electricity. The appliance cover is secured by a latch release lock, which requires a flat or Phillips head screwdriver to open, and then slides back to expose the internal components.
The cooling air shroud, which covers the memory module sockets, is designed for easy removal and reinstallation. It is crucial for proper heat dissipation and cooling, especially for unoccupied memory sockets. When handling DIMMs, it is emphasized to hold them by the card edges and avoid touching the metallic contacts or the middle of the DIMM to prevent damage. The memory sockets feature ejectors that release the DIMMs and guide their insertion. During installation, DIMMs must be inserted simultaneously at both ends and pressed down until the socket levers firmly click into place, ensuring a secure connection. The memory sockets have an alignment key, ensuring that DIMMs can only be installed in the correct orientation.
After memory replacement, the appliance must be reassembled, ensuring all internal cables are correctly routed and connected, and no tools are left inside. The cover slides back into place and is secured by the latch and lock. Finally, the appliance is reinstalled into the rack, and power cables are reconnected. To verify the memory configuration, users can access the CLI, enter Expert mode, and run the free -g command. This command displays the total installed memory, allowing users to confirm that the new memory modules are recognized and functioning correctly. The documentation also highlights the importance of keeping DIMMs in the specified socket numbers in the default configuration diagrams to avoid potential performance impacts. Regular software updates are recommended to ensure the latest functional improvements, stability fixes, security enhancements, and protection against new and evolving attacks. Feedback mechanisms are in place to allow users to contribute to the continuous improvement of the documentation.
| Category | Network Hardware |
|---|---|
| Redundant Fans | Yes |
| Model | 6000-L/6000-XL |
| Power Supply | 650W |
| Form Factor | 1U |
| Redundant Power Supplies | Yes |