12
9.0 SEAL MAINTENANCE AND REPAIR
4
7
1
5
8
2
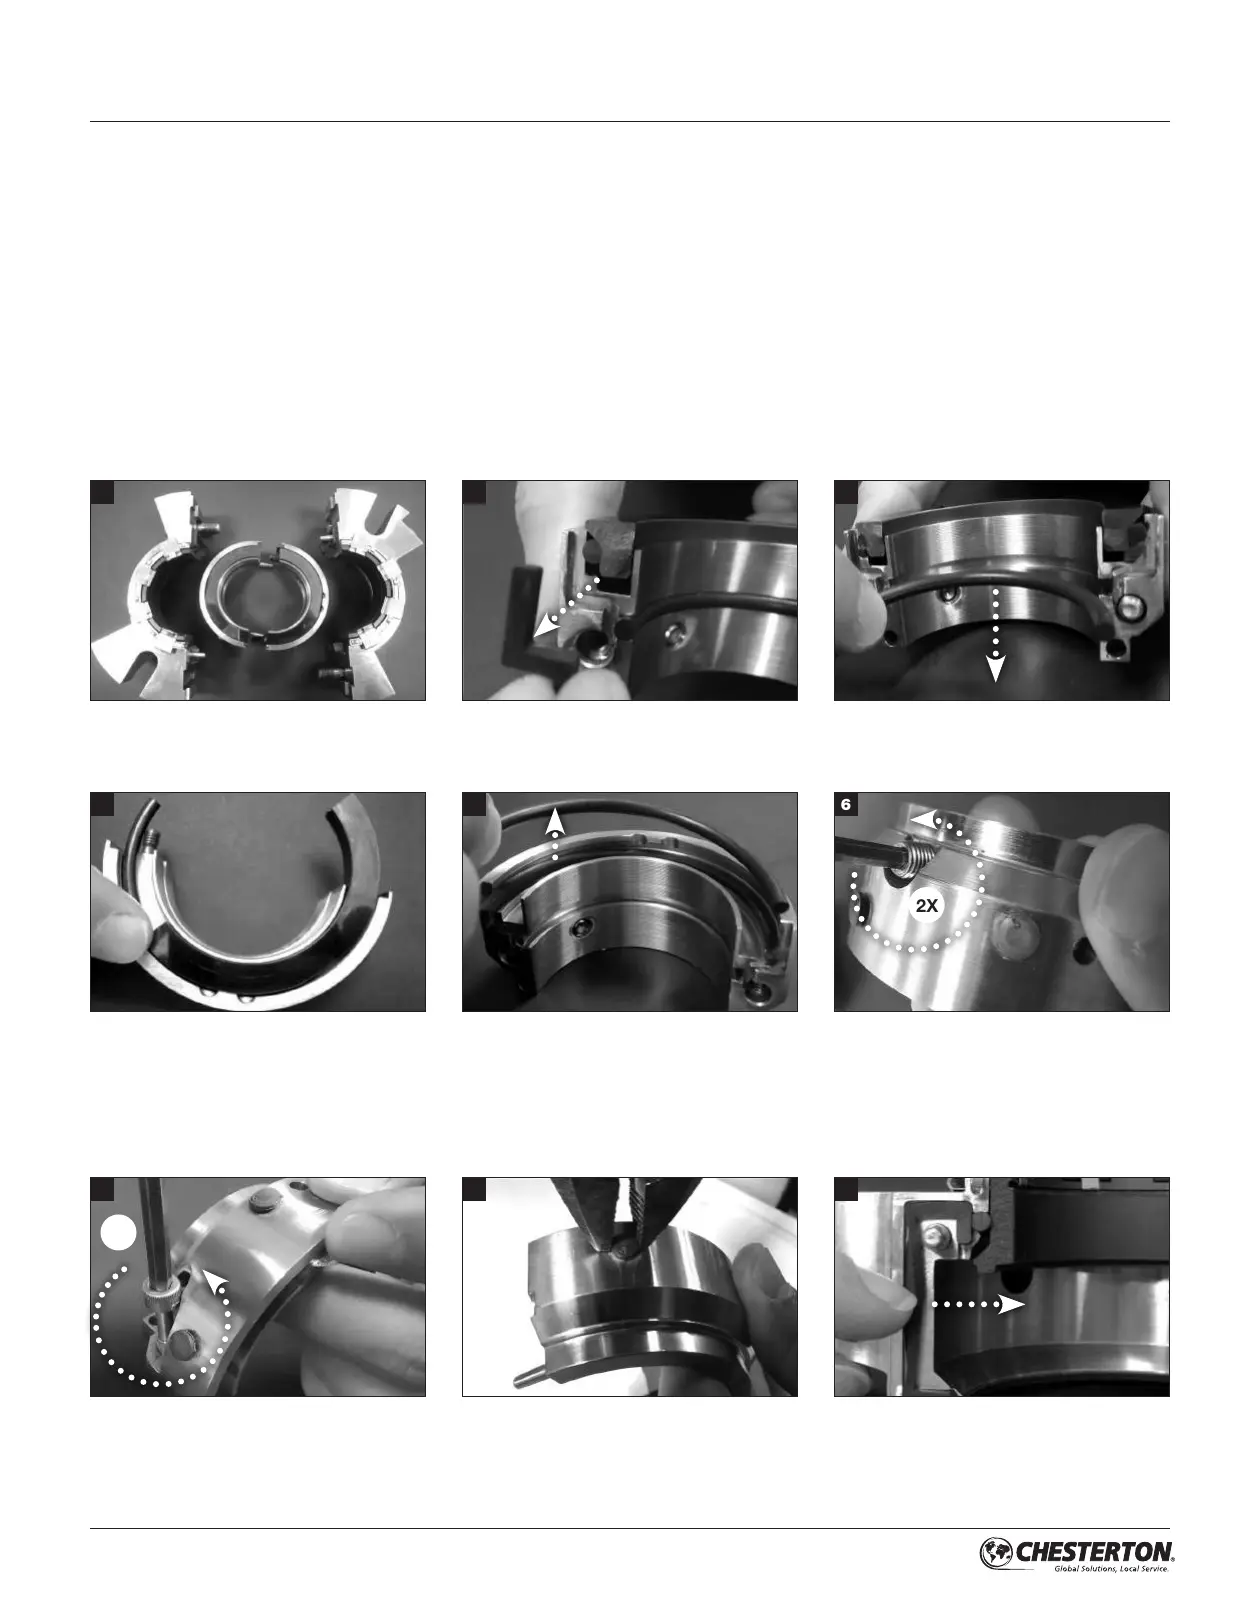
Remove used rotary face halves by pushing on
end of face and sliding out of rotary holder half.
Remove used holder cap screws from holder
halves.
Prepare a clean work surface for seal
disassembly and rebuild.
Remove used rotary face O-Ring halves.
Remove used centering buttons from outside
diameter of rotary holder.
Remove used rotary holder gaskets.
Remove used holder set screws (2 places) from
rotary holder.
Remove used shaft O-Ring halves.
6
3
2X
2X
9
Remove used gland gaskets from gland grooves.
A correctly installed and operated mechanical seal requires little
maintenance. It is recommended to periodically check the seal for
leakage. Wearing components of a mechanical seal such as seal
faces, O-Ring, etc., require replacement over time. While a seal is
installed and operating, maintenance is not possible. Therefore it
is recommended that a spare seal unit or a spare parts kit be held
in stock to allow quick repair.
1. Only the gland and rotary holder are reused. Caution: The
gland, rotary holder, face halves and O-Rings are matched
pairs; do not mix halves from different seals since this will cause
seal failure.
2. The following items, in addition to wrenches, grease and
cleaning wipes, will be required for rebuild:
• Small pliers (remove centering buttons)
• Small, flat-head screwdriver (set spring lifter location)
• Plastic tipped mallet or hammer (replace
centering buttons)
• Cleaning solvent (clean elastomer/gasket surfaces)
3. Note the condition of the parts, including elastomer surfaces
and gland springs. Analyze the cause of failure and correct the
problem, if possible, before reinstalling the seal.
4. Clean all elastomer and gasket surfaces with
cleaning solvent.


 To Next Page