15
39
Clean stationary face halves with cleaning wipe
to ensure there is no debris on face and at splits.
Stationary face half installed in gland half.
Important: Ensure that O-Ring splits are still
protruding evenly at both sides.
35a
Spring retainer installed.
36a
Seal components are ready for installation.
Proceed to Seal Installation Instructions.
40
9.0 SEAL MAINTENANCE AND REPAIR cont.
34
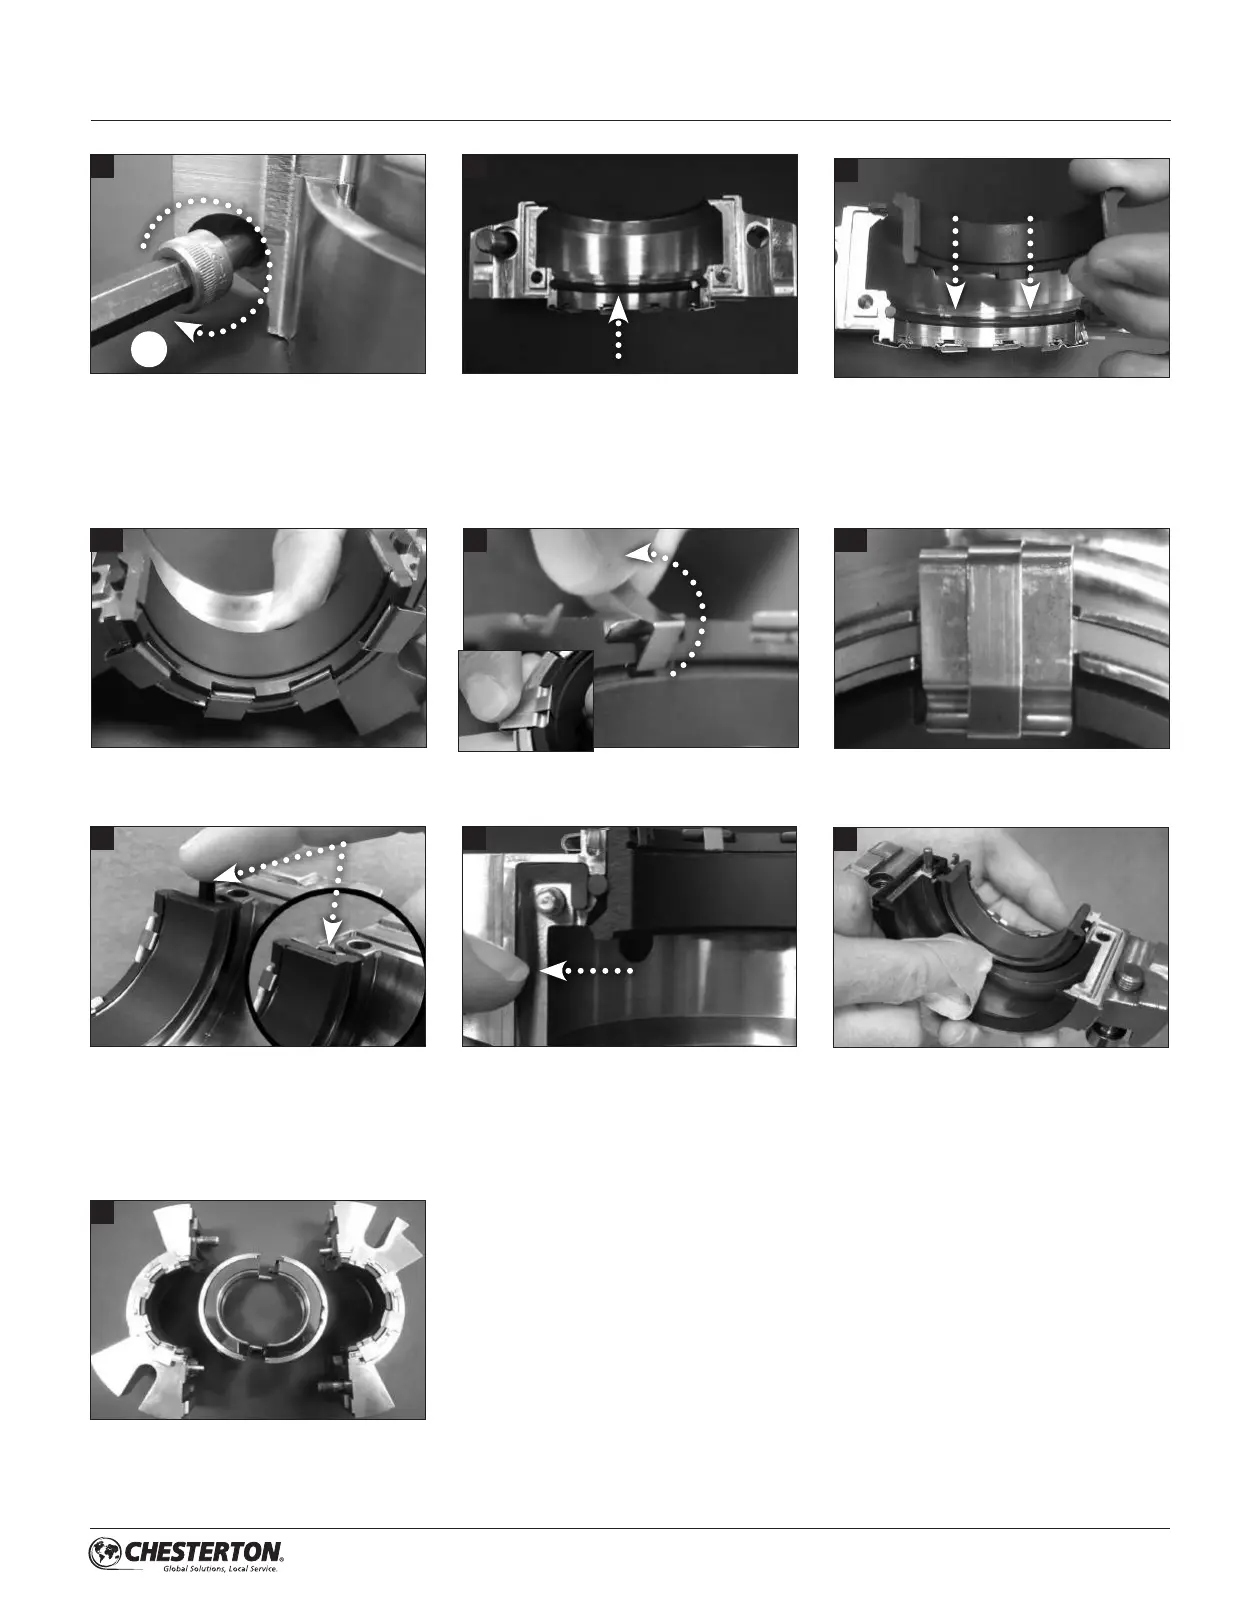
Apply a thin film of grease to the stationary face
O-Ring halves and install in gland halves; Ensure
that O-Ring splits are protruding evenly on both
sides.
Install stationary face halves into gland halves.
35
38
Apply a thin film of grease to gland gaskets and
install in grooves of gland halves. Note: Gland
gaskets must be installed on gland end where
stuffing box face gasket protrudes.
2X
2X2X
33
Install new gland cap screws in gland halves.
Note: Gland cap screws are installed in one end
of each gland half, in the ends away from the
mounting bolt slot.
2X
36
Install spring retainers in gland halves, holding
the stationary seal ring half in the gland.
Ensure that the stationary face O-Ring ends
are flush with and not below the stationary face
splits. Push on O-Ring ends if they protrude past
the stationary face splits.
37


 To Next Page