14
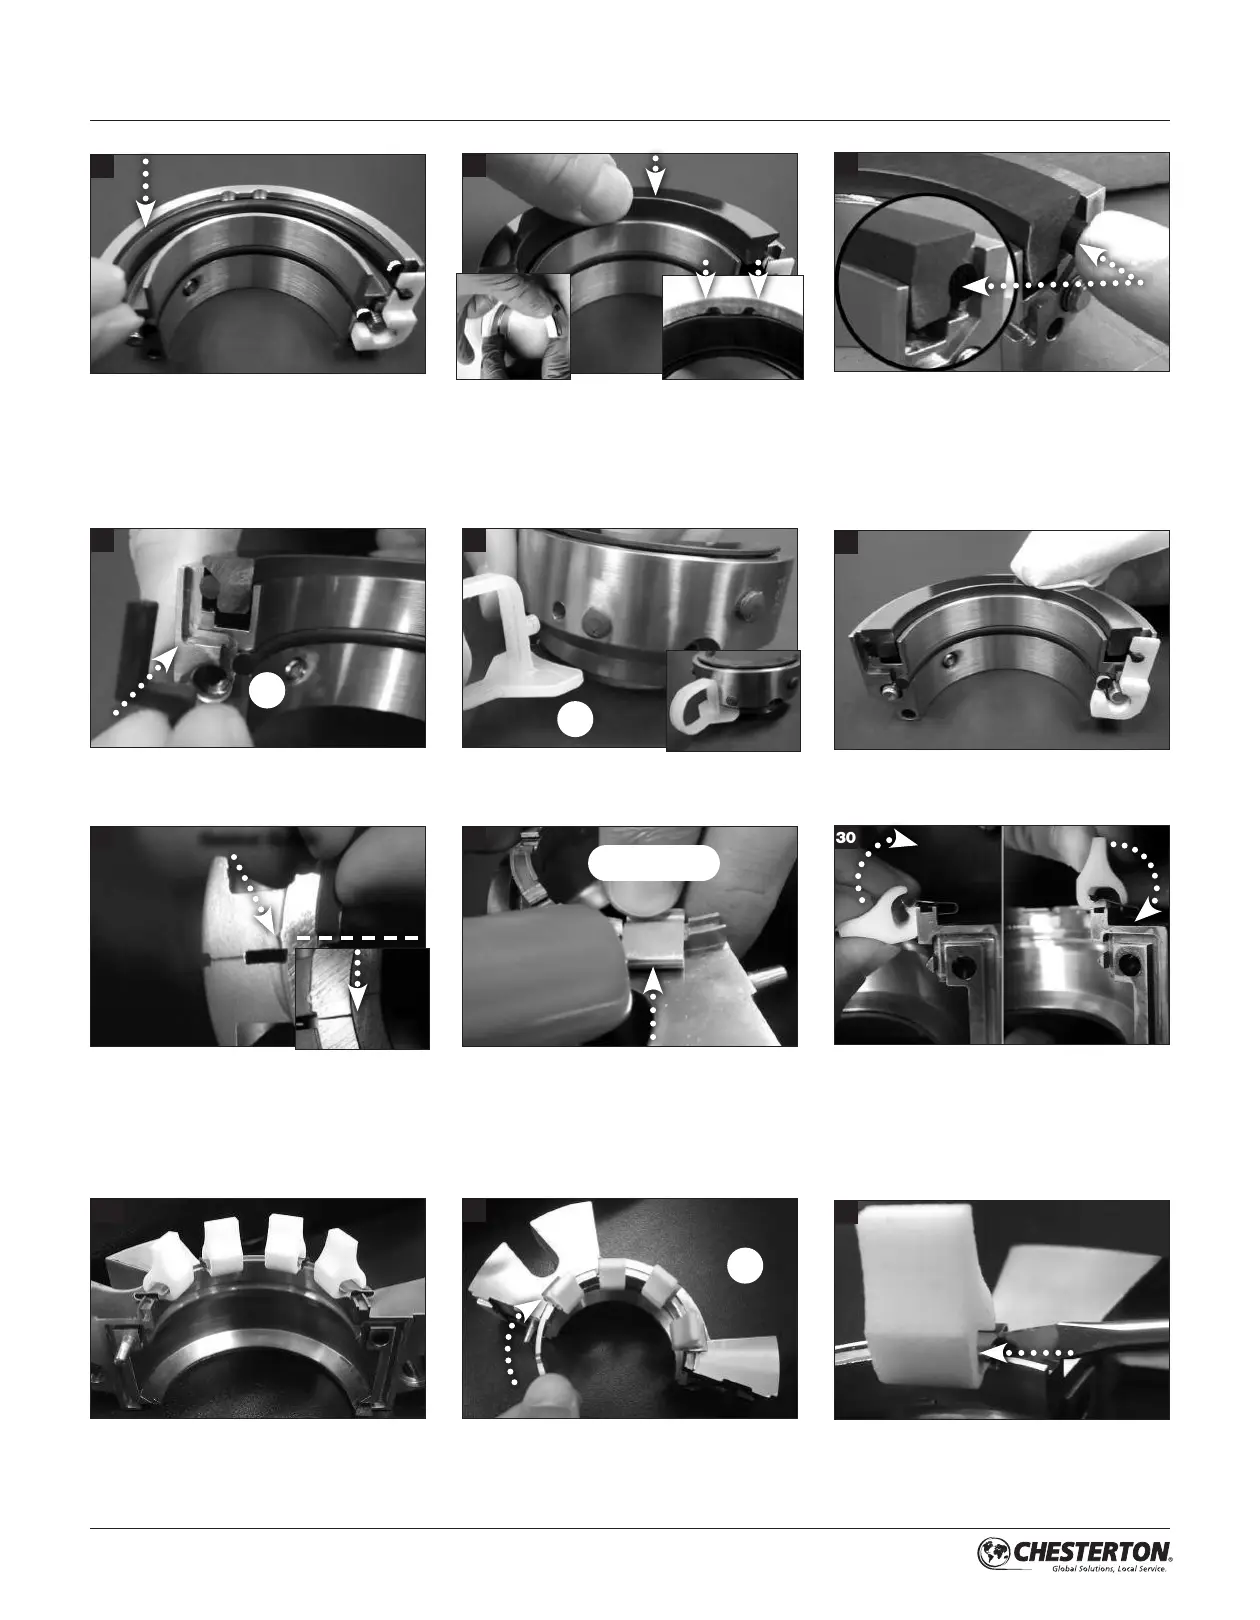
Clean rotary face halves with cleaning wipe.
27
9.0 SEAL MAINTENANCE AND REPAIR cont.
26
Install installation spacers on outside diameter of
holder halves.
2X
25
Apply a thin film of grease and install holder half
gaskets (1 per holder half).
2X2X
Install spring lifter clips in gland halves.
30
22
Apply a thin film of grease and install rotary face
O-Ring halves in rotary holder halves.
28
Bring gland halves together. After peeling off
protective backing, seat one gasket half in the
gland recess ensuring that cut end aligns with
gasket guide. Seat second gasket half into gland
recess, ensuring that it butts up to cut ends of
first half.
Gasket Guide
Set spring lifter location using a flat head
screwdriver. Important: End of spring lifter must
be aligned with edge of the end spring. Remove
all clips and retain for re-setting lifter location.
32
31
Install spring lifter in gland halves such that
leading end is exposed beyond last spring.
Important: Bent TAB on spring lifter must be
installed on the recessed side of the gland.
2X
29
Install springs into spring slots on gland. Use a
plastic tipped mallet to ensure springs are seated
into place.
6X, 8X or 10X
Spring lifter clips installed in gland halves.
30a
24
Ensure that the rotary face O-Ring ends are
flush, not below, with the face splits. Push on
O-Ring ends if they protrude past the face splits.
Install rotary face halves in rotary holder halves.
Important: Manually press to seat the rotary
face in the holder halves while keeping pressure
on the plastic spacer and protruding O-ring to
ensure the O-ring position is maintained.
Align flat on outside diameter of rotary face with
flat on inside diameter surface of rotary holder.
23


 To Next Page