Do you have a question about the Chicco Fit 2 and is the answer not in the manual?
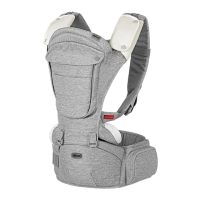
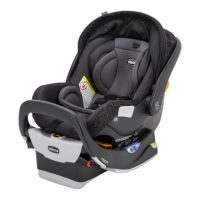
| Adjustability | Adjustable Straps and Waist Belt |
|---|---|
| Waist Belt | Yes |
| Head Support | Yes |
| Machine Washable | Yes |
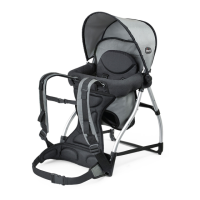
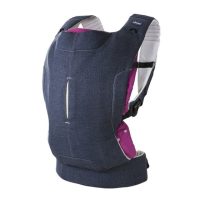
| Carry Positions | Back |
| Material | Polyester |
| Weight Range | 7.7 - 33 lbs (3.5 - 15 kg) |
Rotate carry handle, press button on canopy mount, remove canopy.
Undo hook and loop fasteners on both sides of the Comfort Kit.
Press harness adjuster button, loosen straps, undo buckle and chest clips.
Push tab through harness buckle slot and remove crotch strap pad.
Remove optional head rest insert and newborn positioner.
Remove shoulder pads and adjust head rest to lowest position.
Flip carrier, remove both shoulder harness straps from splitter plate.
Adjust head rest to highest position, un-tuck bottom fabric pocket.
Remove head rest fabric, adjust head rest to lowest position.
Place carrier on side, unhook fabric straps below handle hinge.
Unfold the fabric plastic tabs from the foot of the carrier.
Pull fabric around harness adjuster strap cover; cover is not removable.
Pull back seat pad, lift to unhook fabric plastic tab from carrier clip.
Remove seat pad, guide around head rest, push comfort kit pads through slots.
Thread comfort flex pads, place seat pad, slide opening around head rest frame.
Fold plastic tab under fabric, tuck into carrier frame, press firmly.
Guide fabric edge into groove around entire top of carrier frame.
Adjust head rest high, pull fabric behind back plate, ensure plate sits on seat pad.
Thread crotch and harness straps, wrap pads, re-attach hook and loop fastener.
Fit fabric around the edges of the harness adjuster strap cover.
Thread hook and loop fabric straps through the two slots on the carrier shell.
Pull fabric straps firmly, guide into shell, wrap around handle, and attach.
Fold the 2 plastic tabs under the edge of the carrier shell.
Flip carrier, push plastic tab fingers into correct slots, avoid interfering with latch points.
Locate pocket on back of head rest fabric, slide bottom edge of back plate into pocket.
Slide adjustment strap through button hole, wrap fabric around head rest frame.
Lay harness straps over seat back, thread ends into openings on head rest back plate.
Flip carrier, pull harness straps through openings, ensure they are above cross bar.
Attach both harness straps to the splitter plate, ensuring they are secure.
Re-attach shoulder pads, crotch strap pad, head rest insert, and canopy if needed.
Complete steps 1-14 before removing harness straps.
Lift and slide both harness strap attachment pins out towards the foot area.
Remove both harness straps from the carrier.
Spot clean fabrics with mild soap and water, or machine wash on delicate cycle.