How to assemble the backpack
Ensamblaje • Montage
How to assemble the backpack
Ensamblaje • Montage
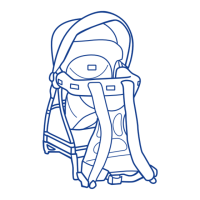
4. Fit the fabric inside the joints with the Velcro
straps.
4. Enganchar el tejido con el velcro dentro de las
articulaciones.
4. Accrocher le tissu à l’aide du velcro prévu à cet
eet à l’intérieur des articulations
6. It is recommended to close the legs,
when the backpack is used on the
shoulders. Push the leg, until is completely
closed. The leg will lock automatically. You
can now complete the assembly of the
backpack.
6. Se aconseja cerrar la estructura cuando
se está utilizando la mochila llevada en
hombros. Empujar la estructura hasta
cerrarla completamente. Quedará
automáticamente bloqueada. En este
punto, ya podemos terminar el montaje de
la mochila.
6. Nous conseillons de fermer la jambe
quand on utilise le porte-bébé en le
portant sur les épaules. Pousser la jambe
jusqu’à ce qu’elle soit complètement
fermée. La jambe se bloque
automatiquement en n de course.
On peut maintenant achever le montage
du portebébé
4
5
6
5. To open rear leg of the backpack, pull the leg
toward the rear of the backpack. The leg will lock
automatically into position.
5. Para abrir la estructura posterior de la mochila,
tirar de la estructura hacia la parte posterior de la
mochila que quedará automáticamente blo-
queada
5. Pour ouvrir la jambe arrière du porte-bébé, tirer
la jambe vers l’arrière du porte-bébé. La jambe se
bloque automatiquement en n de course.
WARNING
The use of the legs is for short
breaks only, not as a seat.
ADVERTENCIA
La estructura de apoyo se debe
usar sólo para breves descan-
sos y no como sillita.
MISE EN GARDE
N’utiliser le chevalet que pour
de courtes pauses et non
comme siège.