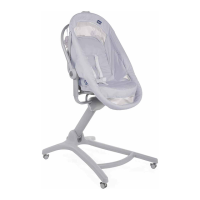
How to assemble the backpack
Ensamblaje • Montage
How to assemble the backpack
Ensamblaje • Montage
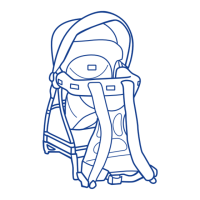
7. Fix the backrest to the joints of the
backpack, inserting the support tubes, as
shown in the diagram.
7. Fijar el respaldo en las articulaciones de
la mochila colocando los tubos de soporte
como indica la gura.
7. Fixer le dossier aux articulations du
porte-bébé en enlant les tubes de
soutien comme indiqué dans la gure
7
8
8. Ensure the tubes are tted correctly,
checking that the locking springs are visible
in the external holes, and pulling the back-
rest in an upward direction.
8. Asegurarse que los tubos queden per-
fectamente colocados, controlar que los
resortes de bloqueo resulten visibles en los
oricios externos y empujar hacia arriba el
respaldo.
8. S’assurer que les tubes sont correctement
xes en contrôlant si les ressorts de blocage
sont visibles dans les trous externes et en
tirant le dossier vers le haut.
WARNING
The sun canopy cannot be
removed, but it can be turned
backwards completely. Before
turning the sun canopy back-
wards, remove the supports
of the second arch to free the
canopy.
ADVERTENCIA
La capota no se puede
quitar pero se puede recoger
completamente hacia atrás.
Quitar primero los soportes
del segundo tensor dejando la
capota libre.
MISE EN GARDE
La capote n’est pas détachable
mais on peut la tirer complète-
ment vers l’arrière. Avant de la
turer, détacher les soutiens du
deuxième arceau pour libérer
la capote.
9. Fix the supports of the sun canopy’s second small
arch, as shown in the diagram.
9. Fijar los soportes del segundo tensor de la capota
como indica la gura.
9. Fixer les soutiens du deuxième arceau de la capote
comme indiqué dans la gure.
9
10
10. Hook the bag/belt bag included at the rear of the
backpack, with the specic spring catches.
10. Colocar el bolso/riñonera (incluido) en la parte tra
sera de la mochila con los enganches especiales.
10. Accrocher le sac/banane compris sur l’arrière du
porte-bébé à l’aide des mousquetons prévus à cet eet