14
7. Insert the legrest supports in the lower part of the lining (g. 7).
8. To nish tting the seat lining attach the fabric to the 4 buttons
on the back of the backrest (g. 8), and the two buttons on the
sides of the seat (g. 8A). Fasten the fabric to the base of the
seat with the two buttons circled in red (g. 8B).
To remove the lining, follow the same steps in reverse order.
WARNING: After removal of the safety harness (e.g. for wash-
ing), ensure that the harness is reassembled correctly using the
anchorage points. The harness must be re adjusted. To make
sure the harness straps are
tted correctly (on the rear surface of the seat), place your child
inside, fasten the straps and then pull the ends of the straps rmly.
COMFORT KIT
The Comfort Kit comprises 2 padded shoulder straps and a
crotch strap.
9. Insert the shoulder pads on the straps and insert the buckle
in the padded crotch strap (g. 9).
SAFETY HARNESS
10. The stroller comes with a ve-point safety harness which
consists of two shoulder straps, a waist strap and a crotch
strap with buckle.
WARNING: when using with children aged 0 to 6 months, you
may have to shorten the length of the straps to adjust them to
your baby; to do so, rstly pass the shoulder straps through the
two adjustment slots (g. 10).
11. Make sure the shoulder straps are at a suitable height for
your child. Adjust if necessary (g. 11).
12. After placing your child in the stroller insert the two forks in
the buckle (g. 12) and adjust the width of the waist belt if
necessary by pressing on the buckles. To unfasten the waist
belt press the two lateral forks at the same time (g. 12A).
WARNING: The use of the crotch strap, waist strap and safety
harness is necessary to guarantee the safety of your child.
WARNING: After removing the safety harness (e.g. to wash it),
ensure that the harness is reassembled correctly using the an-
chorage points. The harness must be re adjusted.
BUMPER BAR
13. The seat is equipped with a bumper bar. To attach the bar in-
sert it in the terminals of the armrests (g. 13) and check that
it is rmly in place by pulling it towards you. To remove the
bumper bar press the two buttons on the inside as shown in
gure 13A and extract it from the armrests. You can undo just
one side of the bumper bar to seat your child. The bumper
bar can be used both forward facing and parent facing.
WARNING: Always fasten your child with the safety harnesses.
The bar IS NOT a device for restraining your child.
WARNING: The bar must not be used to lift the product with
the child inside.
FITTING THE SEAT ON THE STROLLER
14. To attach the stroller seat, insert it in the relevant vertical
fastening devices until you hear the click which conrms
that it has been fastened (g. 14). To make it easier to attach
the seat to the stroller there are arrows on the sides of the
seat showing you the correct alignment of the seat with the
fasteners (g. 14A). The seat can be assembled both forward
facing (g. 14B) and parent facing (g. 14C).
WARNING: Before using, make sure that the seat is properly
locked on by pulling it upwards.
WARNING: If it is not properly locked, press both white keys on
the tting devices of the structure and repeat the tting pro-
cedure checking that it is completely locked. Contact Chicco
customer service if you have any problems.
15. To remove the seat press the two armrest buttons at the
same time (g. 15) and lift.
WARNING: Do not remove/attach the seat when your child is
sitting in it.
HOW TO ADJUST THE BACKREST
16. Press the button on the back of the stroller backrest to re-
cline it to the desired position (g. 16). Release the button
and the backrest will click into the closest lock position.
WARNING: These operations may be more dicult if your
child is leaning on the backrest.
HOW TO ADJUST THE LEGREST
17. The legrest has two positions. To adjust it, use the buttons
under the legrest (g. 17).
HAND GRIP
18. Press the round buttons to the side of the handgrip to ro-
tate it to the required position, adapting it to the height
and most comfortable position of the user (g. 18). The
handgrip can be adjusted to 3 dierent positions (g. 18A).
WARNING: never use the hand grip to lift the stroller with the
child inside.
HOOD
19. The stroller is equipped with a sun canopy and windshield
that can be adjusted to various positions. The seat features
two rails positioned behind the armrests to which the can-
opy can be attached. To x the canopy to the stroller insert
the specic fasteners in the rails at the side of the seat (g.
19). To nish tting the canopy to the seat, fasten the back
of the canopy on the back of the stroller backrest using the
relevant buttons (g 19 A). To open the canopy, push the
front arch forward (g. 19B). Once fastened to the seat, the
canopy can be used in the forward facing or parent facing
position without having to remove it. The hood has a rear
opening so you can check on your child. To open it, lift the
fabric ap at the top of the hood (g. 19C). To make sure
your child is even more protected it is possible to increase
the surface of the hood by opening the zip between the
aps (g. 19D-19E). To take o the canopy remove the fas-
tening device from the rails and undo the buttons.
WARNING: The hood must be xed on both sides of the stroll-
er. Ensure that the hood is correctly secured in position.
PARKING BRAKE
20. The parking brake acts on both of the stroller's rear wheels at
the same time. To activate the braking system push down on
one of the two levers. (g. 20).
WARNING: Always apply the brakes when the stroller is sta-
tionary. Never leave the stroller on a sloping surface with your
child inside it, even if the parking brake is engaged.
WARNING: After pressing down on the the brake lever, make
sure the brakes are properly engaged on both rear wheels.
SWIVEL WHEELS
21. The stroller has front swivel/xed wheels. It is advisable to
use the wheels in the xed mode on particularly changea-
ble surfaces. Use the wheels in swivel mode on normal road
surfaces to have greater control over the stroller. To use the
front wheels in swivel mode, push the side lever down as
shown in g. 21. To block the front wheels position the le-
ver as shown in gure 21A. When the stroller is moved the
wheels will lock in the straight position, regardless of the
position they are in.
FOLDING THE STROLLER
WARNING: When carrying out this operation make sure that
your child and other children are at a safe distance. Make sure
that during these operations the moving parts of the stroller
do not come into contact with your child. The stroller can be
closed in either the forward or parent facing position. The in-
structions are the same for both positions.
WARNING: You must remove all contents from the basket be-
fore closing the stroller, and remove the bag if it is attached to
the handle.
22. To close the stroller fold down the backrest by pressing the
button on the back and the canopy (g. 22), then engage
the closing mechanism by moving the lever in the direc-
tion indicated by the arrow and pressing the button under
the handle at the same time (g. 22A). Holding the button
down, pull up to close. When closing the stroller the front
wheels automatically align so the closed stroller is able to
stand up on its own, in both the forward facing (g. 22B) and
parent facing (g. 22C) conguration.
The stroller can also be closed without the seat so it takes up
less room.
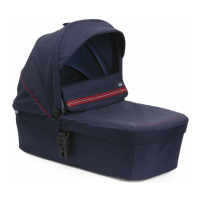
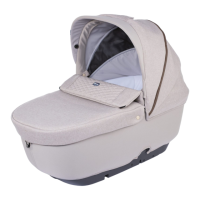
USING THE CARRYCOT AND CAR SEAT
This stroller can only be tted with the OASYS 0+ UP/OASYS
I-SIZE child car seat and/or the CHICCO STYLEGO UP carrycot,
which use the fastening system. To fasten and release the car-
rycot or child car seat, read the related instructions. Before at-
taching the child car seat or carrycot, remove the stroller seat.
WARNING: Before using the stroller with the carrycot or child
car seat, always make sure that the fastening system is properly
locked.
WARNING: CAR SEAT: If one of the elements is not proper-
ly locked, press both white keys on the tting devices of the
structure and repeat the tting procedure checking that it is
completely locked. If you are unable to successfully lock the
component contact Chicco customer service.
WARNING: before using, make sure that the carrycot is proper-
ly attached by pulling it upwards.
LEG COVER
23. The leg cover can be used in two dierent ways: it can be
placed over the bumper bar and fastened within the slots
(g. 23) or, for the increased protection of your child, you
can pass the upper part of the leg cover under the bumper
bar and fasten it in the highest position by inserting the but-
tons in the slots at the sides of the hood (g. 23A). In both
congurations complete the attachment of the leg cover by
fastening the button on the bottom of the seat (g. 23B).
BAG
24. It is possible to attach the bag to the stroller handle using
the two buttons on the shoulder strap (g. 24).
WARNING: The bag must not weight more than 2 kg.
RAIN COVER
25. The stroller is equipped with a rain cover. Attach the rain
cover to the hood by fastening the buttons in the holes on
the hood and complete by fastening the buttons on the
straps by the wheels (g. 25).
After use, hang the rain cover to dry (if it is wet) before folding
it and putting it away.
The rain cover can be used both forward facing and parent facing.
WARNING: The rain cover cannot be used on the stroller with-
out the hood as it may cause suocation. When the rain cover
is tted on the stroller, never leave it exposed to direct sunlight
with the child inside, as the temperature will rise considerably.
Important Note: the pictures and instructions contained in
this booklet refer to a specic version of the stroller. Some com-
ponents and functions described here may vary according to
the model purchased.
 Loading...