Home
Christie
Projector
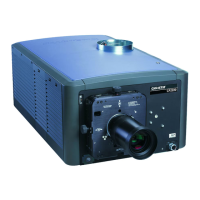
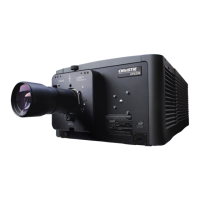
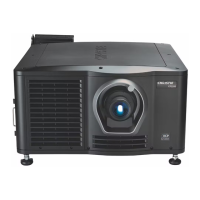
CP2000
Christie CP2000 - User Manual
160 pages
Manual
Specs
Ask a question
Save Page as PDF
To Next Page
To Next Page
Loading...
CP2000
USER’S
M
A
N
UA
L
020-100032-04
2
Table of Contents
Main Page
Default Chapter
3
Table of Contents
3
Introduction
6
The Projector
6
Features
6
List of Components
7
How the Projector Works
7
Variations between CP2000 Models
7
Purchase Record, and Service Contacts
8
Ethernet Settings for this Projector
8
Who Should Use this Manual
9
Installation and Setup
10
Servicing Live Equipment
10
Safety Precautions
10
Assembly and Connection of Components
11
Before You Begin
11
Projection Head and Pedestal
11
Secure Projection Head to Pedestal
11
Position CP2000 at Port Window
12
Assembling Projection Head with Pedestal
12
Centering
12
Extend All Feet
13
Install TPC
13
Connect Pre-Installed Cabling
13
Adjust Feet
13
Open Projector for Access
14
Connect Ballast RS-232 and Interlocks to Projection Head
14
Connect “Projector” Breaker Power Cables to Projection Head
15
Check TPC and Ethernet Hub Connections to Power
16
Route Lamp Leads up and Connect
16
Accessing Cathode End
17
Feed Black Lead into Compartment
17
Connector Nut
17
Connect 2 Cooling Hose Ends
18
Secure Lamp Lead and 2 Igniter Wires
18
Fill the Reservoir Completely
19
Check Lead Dressing and Hoses
19
Connecting the Hoses
19
Exhaust Ducting
20
Airflow Requirements
20
Install First Lamp
21
Primary Zoom Lens
21
Anamorphic Lens Installation
21
Connecting to Power
22
Lamp Cradle Position
22
Connect Incoming Ground Wire
23
Special Adjustments for some AC Supplies
25
Check Voltage and Position Jumper
26
Check Voltage between 115V and Common
26
Installing and Connecting Sources
27
Connecting an External Cinema Server/Source
27
Connecting an External Non-Cinema Source
27
Connecting an Internal Cinema Server/Source
28
Connecting an Internal Non-Cinema Source
28
Connecting for Communications
29
Support for Internal Servers/Sources
29
Security for Internal Servers/Sources
29
Communication Links with Projector
29
Adjusting Tilt and Leveling
30
Tilt Projector to Match Screen
30
Adjust 4 Feet for Tilt and Leveling
31
Open Rear of Pedestal
31
Initial Power-Up
32
Adjust Rear Extender Legs
32
Maximizing Light Output
33
Check Hose for Airlock Problem
33
Align the Lamp
33
Basic Image Alignment
34
Offset and Boresight Alignment
34
Determining Screen Brightness
34
Basic Optical Alignment Procedure
34
Adjust Offset
35
Anatomy of the Lens Mount
35
Adjust Left/Right Boresight
36
Vertical Offset Range
36
Adjust Focus at Left Edge
36
Adjust Top/Bottom Boresight
37
Example of Poor Left/Right Boresight
37
Adjust L/R Boresight
37
Adjust Top Focus
37
Fold Mirror and Convergence Adjustments
38
Add Anamorphic Lens
38
Calibrating the System Using DCP Librarian Setup Software
39
Fold Mirror Adjustment
39
Phase Balancing
40
Basic Operation
42
Projector Basics
42
Components/Features
42
Basic Projector and Related Components
43
Power-Up Procedure
48
Power-Down Procedure
49
Introduction to the Touch Panel Controller
49
User Access and Rights
49
TPC User Access Rights
50
Using the Touch Panel Controller
51
TPC Power-Up Defaults
51
Failed TPC Connection
51
TPC Main Menu
52
Main Menu Functions
52
TPC Status Menu
53
Status Menu
54
Summary of Status Menu
55
TPC Alarm Window
56
Flashing Alarm Window
56
Alarm Conditions and Solutions
57
TPC about Menu
58
TPC Custom Menu
58
Responding to an Alarm Window
58
Can Alarm Conditions be Ignored?
58
Processing Path for DVI Sources
60
Summary of Custom Page 1 and Page 2 Menu Functions
61
Using the Custom 3D Control Menu
62
L/R Input Reference Notes
62
Summary of Custom 3D Control Menu Functions
62
L/R Display Reference Notes
64
L/R Output Polarity Notes
64
Examples of Frame Rate N:M
64
TPC Advanced Menu
65
Dark Time and Output Delay Notes
65
Summary of Custom: Lamp Menu Functions
65
Summary of Advanced Preferences Menu Functions
66
Advanced: Lamp History Menu Functions
67
Advanced/ Test Pattern Menu
68
Advanced/ User Menu
68
TPC Admin Submenus
70
Admin/Source Submenu
70
Admin: Source Menu Functions
70
Resolution Notes
71
Offset Notes
71
Aspect Rstio Notes
71
Pre-Configured Source Setups
71
Admin/Screen Submenu
72
Presentation Notes
72
Cropping Notes
73
Letterbox Notes
73
Screen Presentation Coordinates
73
Simple Cropping Example
73
Admin/Gamut Submenu
74
Letterbox Vs. Non-Letterbox
74
Meaqsured Notes
75
Create MCGD Notes
75
Target and Create TGD Notes
76
Gain Notes
76
White Tolerance Notes
76
DLP or TPC Configuration
77
SNMP Configuration
77
Restore Notes
77
Admin/Ip Config Submenu
77
How to Change Your Projector's IP Address
78
Admin/General and Admin/Lamp Submenus
79
Selecting a Display
80
Summary of Admin:general Menu Functions
80
Summary of Admin:lamp Menu Functions
80
Errors and Alarms
81
Admin/Gpio Submenu
81
Other Methods of Source Selection
81
Remote Control of the Touch Panel Controller
82
Understanding ASCII Message Formats
82
Message Components and Structure
82
The 3 Message Formats
82
Sample Messages and Their Meaning
83
Special Characters for Text
83
Working with the Lamp
84
What Is Actually Sent in a Message?
84
Available ASCII Codes
84
Setup and Shutdown
84
Turning the Lamp On/Off
85
If the Lamp Won’t Turn on
85
Adjusting Lamp Power
85
Using “Lamp Power”
86
Lamp Current Ranges
86
Adjusting Lamp Position Lamploc
87
Stand-By Mode
87
Use the “Do Auto” Button for Lamploc
87
When to Use the Individual Lamploc Buttons
87
How Old Is My Lamp?
88
When to Replace the Lamp
88
Maintaining Footlamberts
88
When to Replace Your Lamp
88
Working with the Lens
89
Zoom
89
Offsets
89
Working with 3D
90
Focus
90
Anamorphic Lens
90
3D Description
90
Supported Hardware Setup
91
Other Hardware Setups
92
3D Instructions
93
Single-Input 3D Systems
93
Increasing Frame
94
3D Troubleshooting
95
Internal Test Pattern for 3D
95
Working with Servers and Diagnostics
96
TPC Server Menu
96
Status:server Menu
96
TPC Diag Menu
97
TPC Interrogator Menu
97
Cinema Operation
98
Compatible Cinema Sources
98
Cinema Source Connections
98
Image Formats
99
Compatible Formats for Cinema
99
Standard Cinema Formats
99
Projector Variables: Electronic and Anamorphic Resizing
100
Theatre Variables: Masking
100
Typical Method for Achieving “Scope”
100
Top Masking for Scope
100
Side Masking for Flat
101
Basic Ways to Achieve Flat and Scope Displays
102
Selecting the Cinema Source
103
Adjusting the Cinema Display
103
Via Touch Panel Controller
103
Other Methods
103
Non-Cinema Operation
104
Compatible Non-Cinema Sources
104
Non-Cinema DVI Source Connection
104
Dual- and Twin-Link DVI
105
Compatible Non-Cinema DVI Sources
105
Proposed Dual-Link and Twin-Link DVI Configurations
105
Selecting the Source
106
Maintenance
108
Warnings and Guidelines
108
Labels and Markings
108
General Precautions
108
AC / Power Precautions
109
Lamp Precautions
109
Wear Protective Clothing
109
Maintaining Proper Cooling
110
Ventilation
110
Air Filter
110
Liquid Cooler
110
Maintenance and Cleaning
111
Exhaust Duct and Lamp Fan Interlocks
111
Electrical
111
Optical
111
When to Check
112
Cleaning the Lens
112
Cleaning the Reflector
112
Replacing the Lamp and Filter
113
Other Components
113
Lamp Replacement Procedure
114
Install Bulb
115
Secure Bulb at Cathode and Anode Connectors
116
Replacing a Lens
117
Filter Replacement Procedure
117
Troubleshooting
118
Power
118
Lamp
118
Tpc
119
Ethernet
119
Cinema Displays
120
Non-Cinema Displays
120
Specifications
124
Cinema Inputs
125
Control Ports
125
Touch Panel Controller
125
Audible Noise
127
Operating Environment
127
Standard Components
129
A Glossary
130
Function Codes
140
B ASCII Messages
140
Messages with Multiple Parameters
146
Error Messages
146
P3 Codes for “001” System Error Messages”
147
P3 Codes for “002” System Warning” Error Messages
148
P4 Codes
148
For Your Information
149
History
149
System Status
149
System Status Messages
149
3D Controls
151
Serial Communication Cables
152
Serial Links to Projector
152
The GPIO Port
154
GPIO Connector Pinouts
154
D GPIO System Integration
154
Circuit for Power Supply
155
Packing the Pedestal and Projection Head
156
E Repacking the Projector
156
Index
157
Other manuals for Christie CP2000
Setup Guide
64 pages
Technical Bulletin
7 pages
Need help?
Do you have a question about the Christie CP2000 and is the answer not in the manual?
Ask a question
Christie CP2000 Specifications
Print Specification
General
Contrast Ratio
2000:1
Technology
DLP
Brightness
2000 lumens
Lamp
Xenon
Input Connectors
HDMI, VGA
Resolution
2048 x 1080
Related product manuals
Christie CP2000-M
176 pages
Christie CP2000-ZX
164 pages
Christie CP2000-XB
66 pages
Christie CP2000-SB
203 pages
Christie CP2210
164 pages
Christie CP2220
174 pages
Christie CP2230
150 pages
Christie CP2215
104 pages
Christie CP2308
111 pages
Christie CP2208-LP
66 pages
Christie CP2309-RGB
94 pages
Christie CP22 Series
2 pages