Vanity Unit Type A
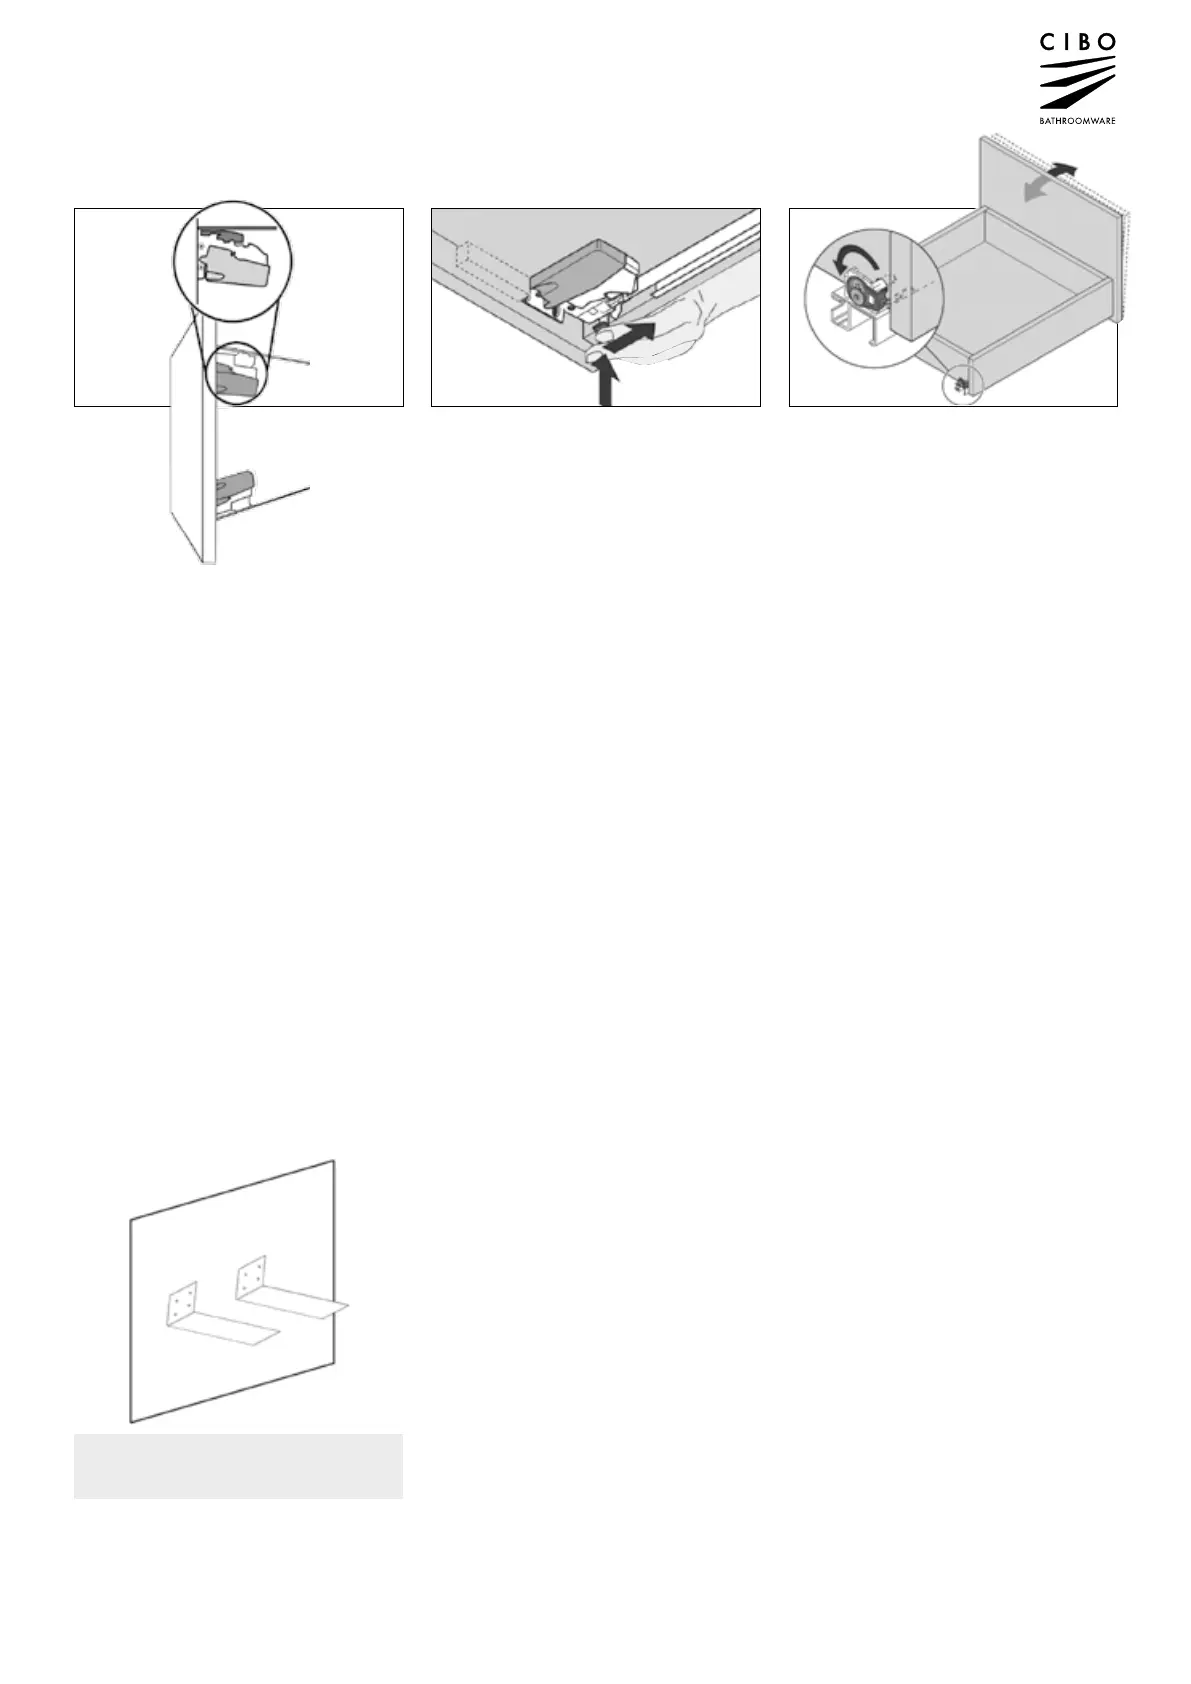
Drawer Front Adjustment
5
Special Notes
Vanities that are between two walls (or against a wall to the left or right)
It’s sometimes necessary to construct
the unit with a removable trimming piece
or ller on the side(s) of the cabinet.
This is to allow the installer to trim the
ller should the walls be out of level.
It also is necessary where drawers
are against a wall to prevent the
drawers scraping on the wall.
Units that are between two walls
even when check measured are
unlikely to t immediately.
The llers should be removed by
unscrewing the internal screws.
The llers can be trimmed with an
electric planer to ensure a snug t.
Once the llers have been trimmed,
they are simply reattached to the
vanity with the original screws.
1 Remove vanity drawer and cover
runners (refer to page 3).
2 Detach the chocks (melamine feet)
from the underside of the vanity
(if applicable). They are simply
pinned into the carcass and can be
removed with a chisel and pliers.
3 The unit is to be placed onto the
brackets. Calculate the nished
height of the basin and work space
out where the bottom of the unit will
be (in terms of height). The brackets
should be tted at this level.
4 Screw-x metal brackets to wall
making sure to x into studs
or ample support behind it.
5 Place vanity (without drawer, refer
page 2/3) onto metal brackets and
screw x the vanity to the wall.
6 Remove all debris from drilling
etc. in the vanity cavity; uncover
runners and replace drawer.
7 Seal around unit with silicone.
Vanity Units with a height less than 250mm
THESE UNITS ARE SUPPLIED WITH A PAIR
OF LARGE METAL ANGLED BRACKETS.
1 & 2 To raise the drawer front on the
runner, shift the grey clip towards
the back of the drawer.
1
2
3 To change the tilt of the drawer front,
adjust the runners at the back.
3
 Loading...