98
Control Unit Installation
Important!
Plan your installation carefully. First, find a
convenient place to position the ON/OFF
switch—preferably within the driver’s
reach. Make sure that after routing the
wiring harness from the +12V switched
circuit to the control unit’s power plug you
have enough cable to connect the wiring
harness to the switch.
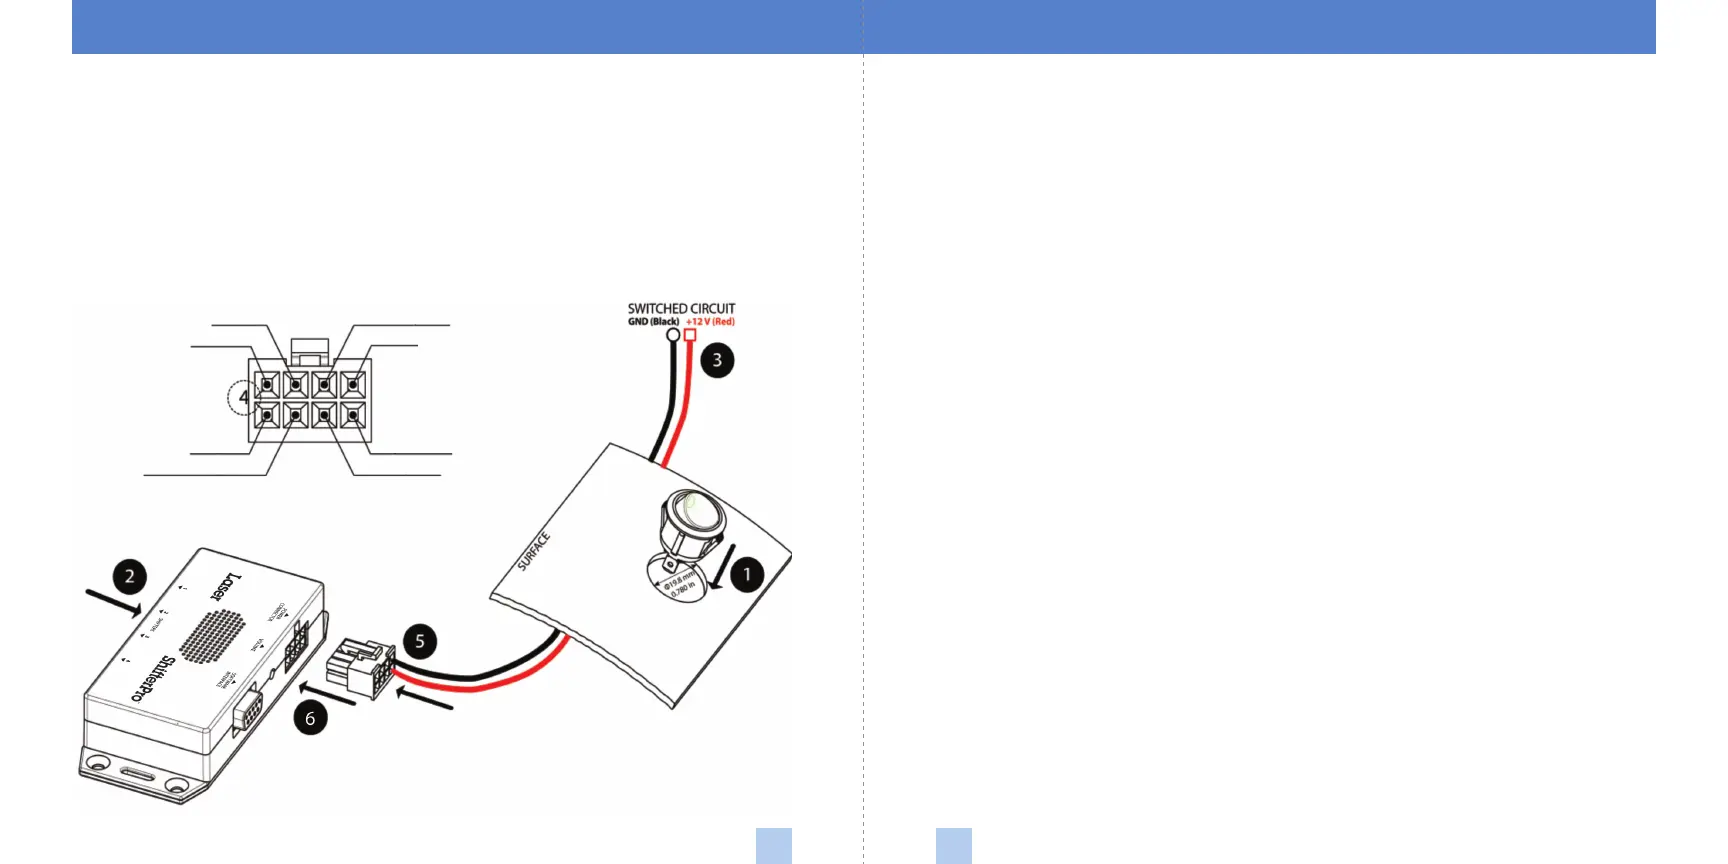
1 Locate an appropriate place for drilling a
hole for the power switch. It is
recommended that you place it within
the driver’s reach. If you’d like to receive
visual warnings (i.e., LED blinks during
an alert), ensure you choose a location
where it will be visible to the driver. Drill
a hole at least 19.8 mm (0.78 in) in
diameter, so the switch can fit snugly
through the hole.
2 Position the control unit inside the cabin,
somewhere under the dashboard, in such
a way that you can easily connect the
sensor cables you previously routed.
Connect front sensor cables into ports 1
and 2. (If applicable, connect rear sensor
cables into ports 3 and 4.)
3 Connect the black wire from the wiring
harness to the negative ground power
supply or to the vehicle chassis. Locate
access to power supply and connect the
red wire from the wiring harness to the
+12V switched circuit power supply
(typically, the car radio power supply).
4 Optional: To automatically mute the
radio audio during an alert, connect the
blue audio wires to the audio mute input
of your car radio.
5 Plug in power connector until it “locks,“
and power on your device.
6 To adjust volume, insert a thin flathead
screwdriver into the volume adjustment
hole on the control unit and turn.
6 GREY: Switch Output (+12V)
3 BLACK: Radio Mute (Open Collector)
5 BLACK: GND
4 BLUE: Speaker (–)
8 BLUE: Speaker (+)
7 GREEN: LED (–)
1 RED: Ignition On (+12V)
2 RED: Switch Input (+12V)
 Loading...