EasyManua.ls Logo

Cisco MERAKI MR36 User Manual

Cisco MERAKI MR36
18 pages
To Next Page IconTo Next Page
Page #1 background imageLoading...
Page #1 background image
MR36 Installation Guide
The Cisco Meraki MR36 are dual-band enterprise class 802.11ax cloud-managed access points. Designed for highest capacity and highest density, the
MR36 meets the needs of the most demanding environments. The access point also includes a third radio dedicated to optimizing the RF environment
and securing the airwaves.
About this Guide
This guide provides instruction on how to install and configure your MR36 access points. This guide also provides mounting instructions and limited
troubleshooting procedures. For more wireless installation guides, refer to the wireless installation guides section on our documentation website.
Product Overview
Physical Specifications
MR36
Interfaces
1x 10/100/1000 BASE-T Ethernet (RJ45)
1x DC power connector (5.5 mm x 2.5 mm, center positive)
Power
Power over Ethernet: 37 - 57 V (802.3af compatible)
Alternative: 12 V DC input
Power consumption: 15W max (802.3af)
Power over Ethernet injector and DC adapter sold separately
Environment
Operating temperature: 32 °F to 104 °F (0 °C to 40 °C)
Storage and Transportation Temperature: -4 °F to 158 °F (-20 °C to 70 °C)
Humidity: 5 to 95% non-condensing
Physical Security
Two security screw options (included) (10 mm long and 2.5 mm diameter and 4.7 mm
head)
1
Question and Answer IconNeed help?

Do you have a question about the Cisco MERAKI MR36 and is the answer not in the manual?

Cisco MERAKI MR36 Specifications

General IconGeneral
ModelMR36
CategoryWireless Access Point
Frequency Bands2.4 GHz and 5 GHz
Operating Temperature0°C to 40°C (32°F to 104°F)
Wi-Fi StandardsWi-Fi 6 (802.11ax)
Power over Ethernet (PoE)802.3af/at
SecurityWPA3
ManagementMeraki Cloud Management
Antenna Gain4 dBi (2.4 GHz), 5 dBi (5 GHz)
Maximum Clients256
MountingWall or ceiling

Summary

Product Overview

Physical Specifications

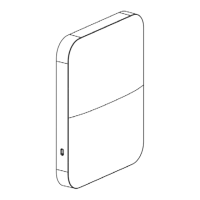
Details the physical characteristics of the MR36 access point, including interfaces, power, and environment.

Product View and Physical Features

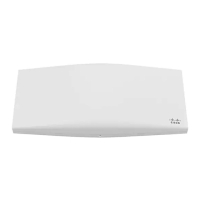
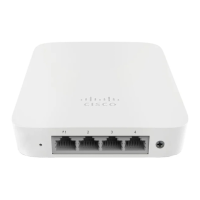
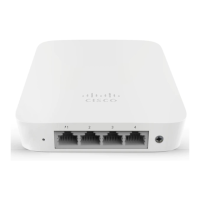
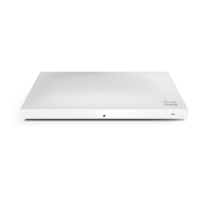
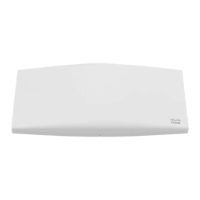
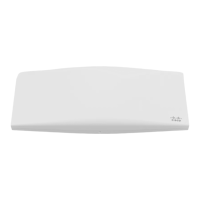
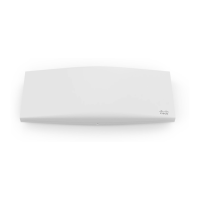
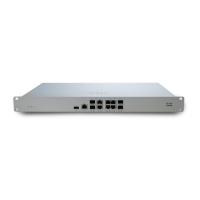
Illustrates the physical features and components of the MR36 access point.

Security Features

Security Screw

Explains the use of security screws for physically securing the MR36 to its mount cradle.

Kensington Lock

Describes how to use a Kensington lock to secure the MR36 to a permanent structure.

Power Source Options

Factory Reset Button

LED Indicators and Run Dark Mode

Package Contents

Safety and Warnings

Pre-install Preparation

Configure your Dashboard Network

Steps to add and configure an access point within the Meraki Dashboard network.

Check and Set Firmware

Ensures the MR36 access point has the latest firmware before or immediately after installation.

Check and Configure Upstream Firewall Settings

Details firewall configuration needed for the MR36 to connect to the internet and Meraki services.

IP Address Configuration

Explains IP address assignment via DHCP or static methods, including dynamic and static assignments.

Installation Instructions

Choose Your Mounting Location

Guidance on selecting the optimal mounting location for the MR36 access point for best performance.

Mounting the Access Point

Covers attaching the mount cradle to various surfaces and then mounting the AP to the cradle.

Desk or Shelf Mount

Physical Security

Security Screw

Explains the use of security screws for physically securing the MR36 to its mount cradle.

Kensington Lock

Describes how to use a Kensington lock to secure the MR36 to a permanent structure.

Verify Device Functionality and Test Network Coverage

Check LEDs

Instructions for interpreting the MR36's LED indicators to verify status and functionality.

Verify Access Point Connectivity

Confirms proper network connectivity and access by connecting a client device to the MR36.

Check Network Coverage

Assesses the signal strength and coverage provided by the MR36 throughout the deployment area.

Basic Troubleshooting

Check Radio Functionality by Making the AP a Repeater

Tests the MR36's wireless radio by configuring it temporarily as a repeater.

Check Ethernet Port Functionality by Connecting to the AP

Verifies the MR36's Ethernet ports are functioning correctly by connecting a computer.

Check Static IP Address Configuration

Warranty

Support and Additional Information

Related product manuals