2-26
Cisco Integrated Services Router Hardware Installation Guide
Chapter 2 Installing the Router
Installing the Cisco 810 ISR
To mount the router on a wall, follow these steps:
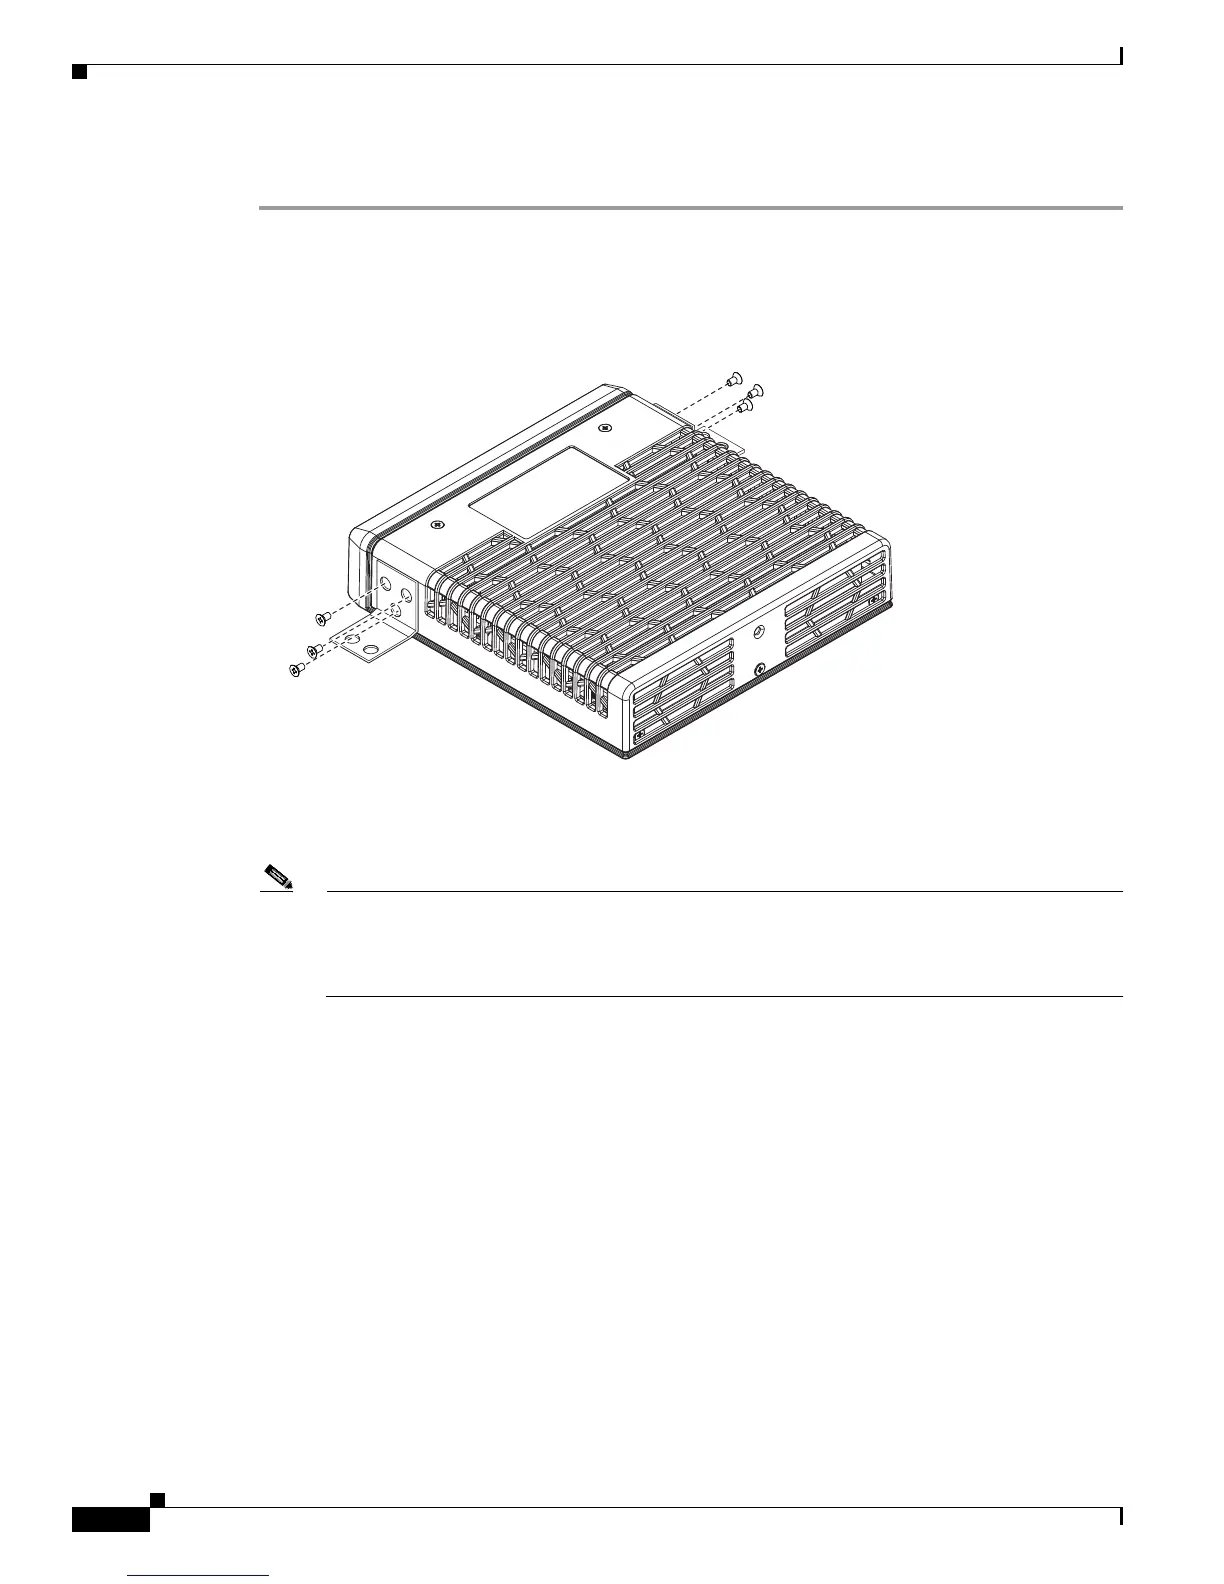
Step 1 Remove the screws on the sides of the routers.
Step 2 Attach the standard brackets to the chassis using the three screws provided for each bracket. (See
Figure 2-21.)
Figure 2-21 Attaching the Standard Brackets
Step 3 Install the router to a wall stud using two number-10 wood screws, round- or pan-head, with number-10
washers or two number-10 washer-head screws. The screws must be long enough to penetrate at least 1.0
inch (25.4 mm) into the supporting wood or metal wall stud. (See Figure 2-22.)
Note The orientation of the Cisco 819 ISR products is critical when wall-mounting. The router must
be oriented as shown in Figure 2-22 with the left side of the router rotated up (as viewed from
the IO side) to comply with IP41 and safety criteria. No other wall mounting orientation is
supported.
282622
 Loading...