EasyManuals Logo

Cisco ASA 5512-X Hardware Installation Guide

Cisco ASA 5512-X
74 pages
To Next Page IconTo Next Page
To Previous Page IconTo Previous Page
Page #38 background imageLoading...
Page #38 background image
Installing and Connecting the ASA 5500-X
Rack Mount the Chassis
Cisco ASA 5512-X, ASA 5515-X, ASA 5525-X, ASA 5545-X, and ASA 5555-X Hardware Installation Guide
38
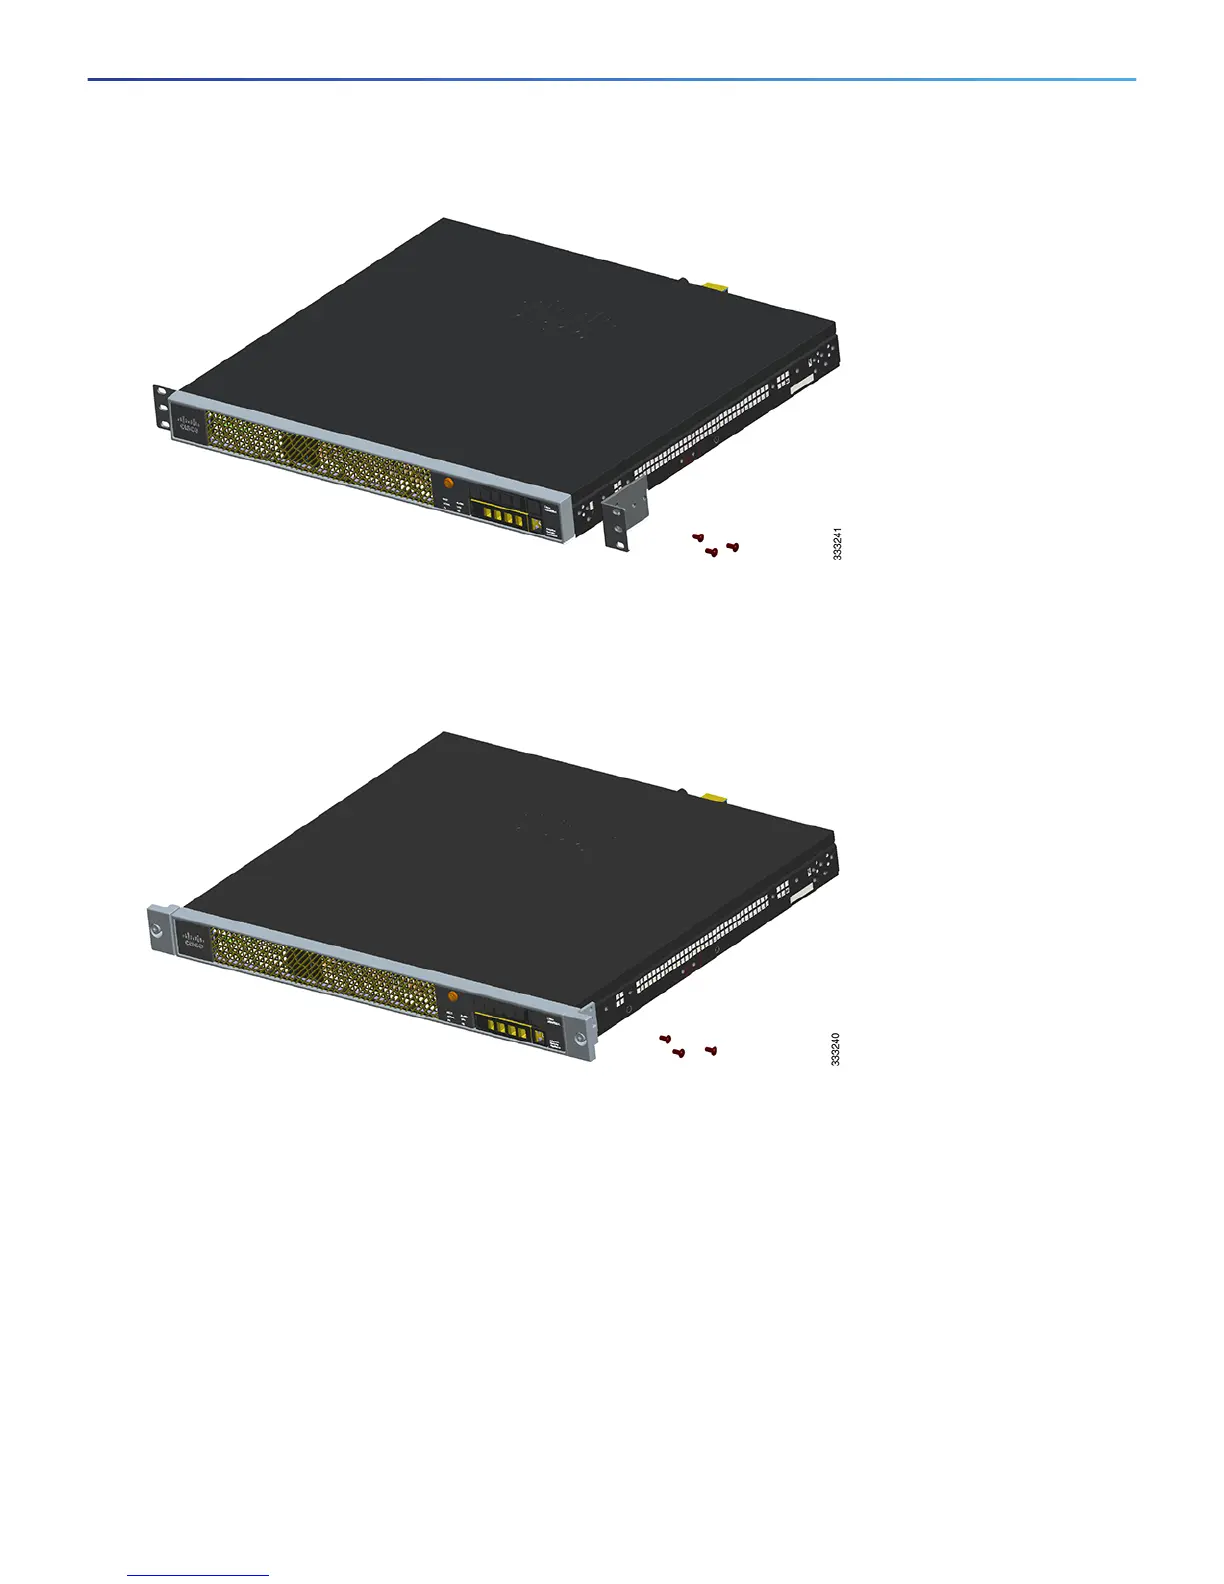
Figure 5 Remove Preinstalled Screws and Brackets on Either Side of Chassis
3. Install a die-cast bracket to either side of the chassis by aligning and inserting the tab at the end of the bracket
into the hole on the chassis and then hinging it into position so that the bracket is flush with the front face plate
(bezel) of the chassis. Secure each bracket to the chassis with three screws.
(See Figure 6.)
Figure 6 Install Die-Cast Brackets with Three Screws
4. Install two shoulder screws into the threaded hole locations on either side of the chassis (see Figure 7 for one
side), and ensure that they are tight.

Other manuals for Cisco ASA 5512-X

Questions and Answers:

Question and Answer IconNeed help?

Do you have a question about the Cisco ASA 5512-X and is the answer not in the manual?

Cisco ASA 5512-X Specifications

General IconGeneral
Firewall Throughput1.2 Gbps
VPN Throughput200 Mbps
Maximum VPN Peers250
Integrated IPSYes
IPS Throughput250 Mbps
RAM4 GB
Power SupplyAC, 100-240V
Security Contexts2 (Standard), 50 (with Security Contexts license)
Interfaces6 x Gigabit Ethernet
Dimensions (H x W x D)1.75 x 17.5 x 14.5 inches
Weight16 lbs

Related product manuals