Maintenance and Upgrade Procedures for the ASA 5500-X
Remove and Install the Power Supply
Cisco ASA 5512-X, ASA 5515-X, ASA 5525-X, ASA 5545-X, and ASA 5555-X Hardware Installation Guide
60
Procedure
1. If you are adding an additional power supply, from the back of the chassis, push the lever on the slot cover to
the left to release it, grasp the handle of the slot cover and pull it away from the chassis. (See Figure 16.) Save
the slot cover for future use. Continue with 3..
Figure 16 Removing the Slot Cover
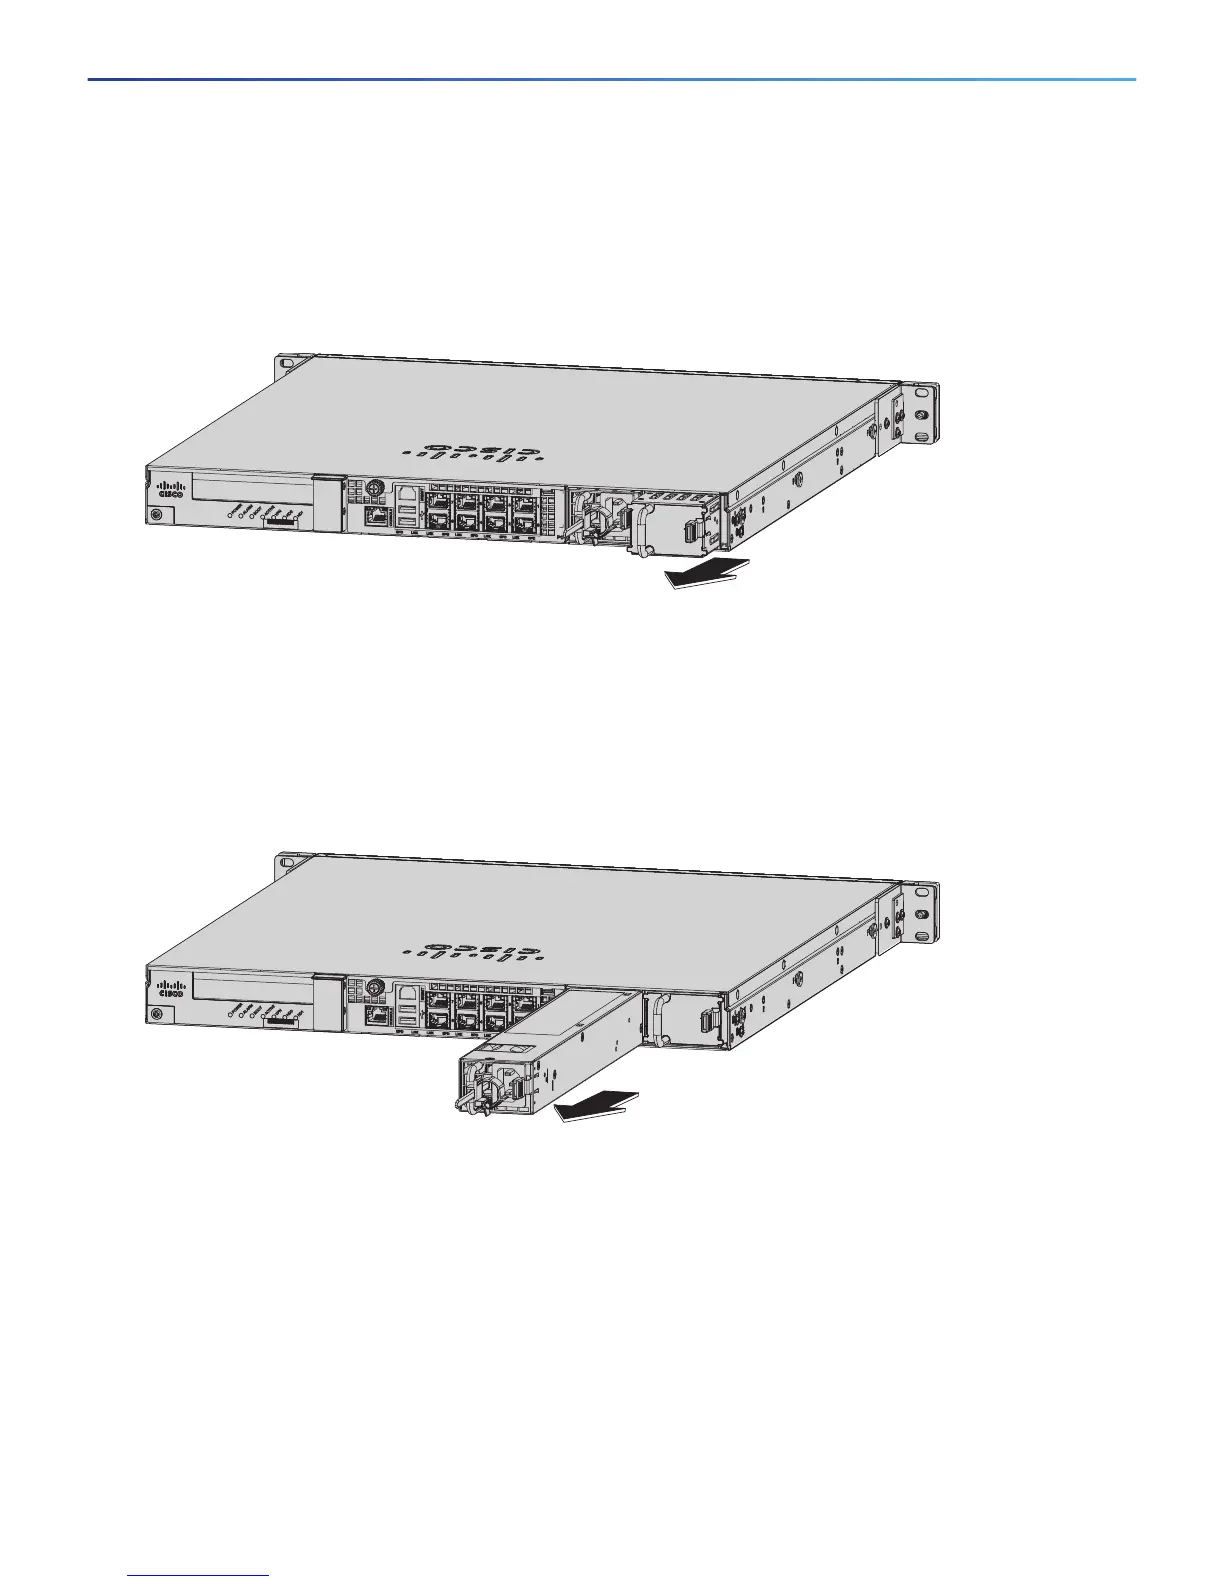
2. If you are replacing a power supply, follow these steps:
a. Power off the chassis.
b. From the back panel of the chassis, unplug the power supply cable.
c. Push the lever on the power supply to the left and remove the power supply by grasping the handle and
then pulling the power supply away from the chassis while supporting it from beneath with the other hand.
(See Figure 17.)
Figure 17 Removing the AC Power Supply
3. Install the new power supply by aligning it with the power supply bay and pushing it into place until it is seated
while supporting it from beneath with the other hand. (See Figure 18.)
 Loading...


