4-39
Cisco ASA 5585-X Adaptive Security Appliance Hardware Installation Guide
OL-22567-02
Chapter 4 Maintenance and Upgrade Procedures
Mounting the Chassis Using a Fixed Rack Mount
Mounting the Chassis Using a Fixed Rack Mount
If you are not able to use the slide rail kit in your rack installation, an optional fixed rack-mount solution
is available. You can install fixed front and rear rack-mount brackets on the ASA 5585-X so that you can
easily mount it in a rack.
To fixed-mount the ASA 5585-X, follow these steps:
Step 1 If the adaptive security appliance is already operational and not rack-mounted, or if you are replacing an
adaptive security appliance with the ASA 5585-X, do the following:
• Power off the adaptive security appliance.
• Remove the power cable from the adaptive security appliance.
• Remove the old adaptive security appliance from the rack.
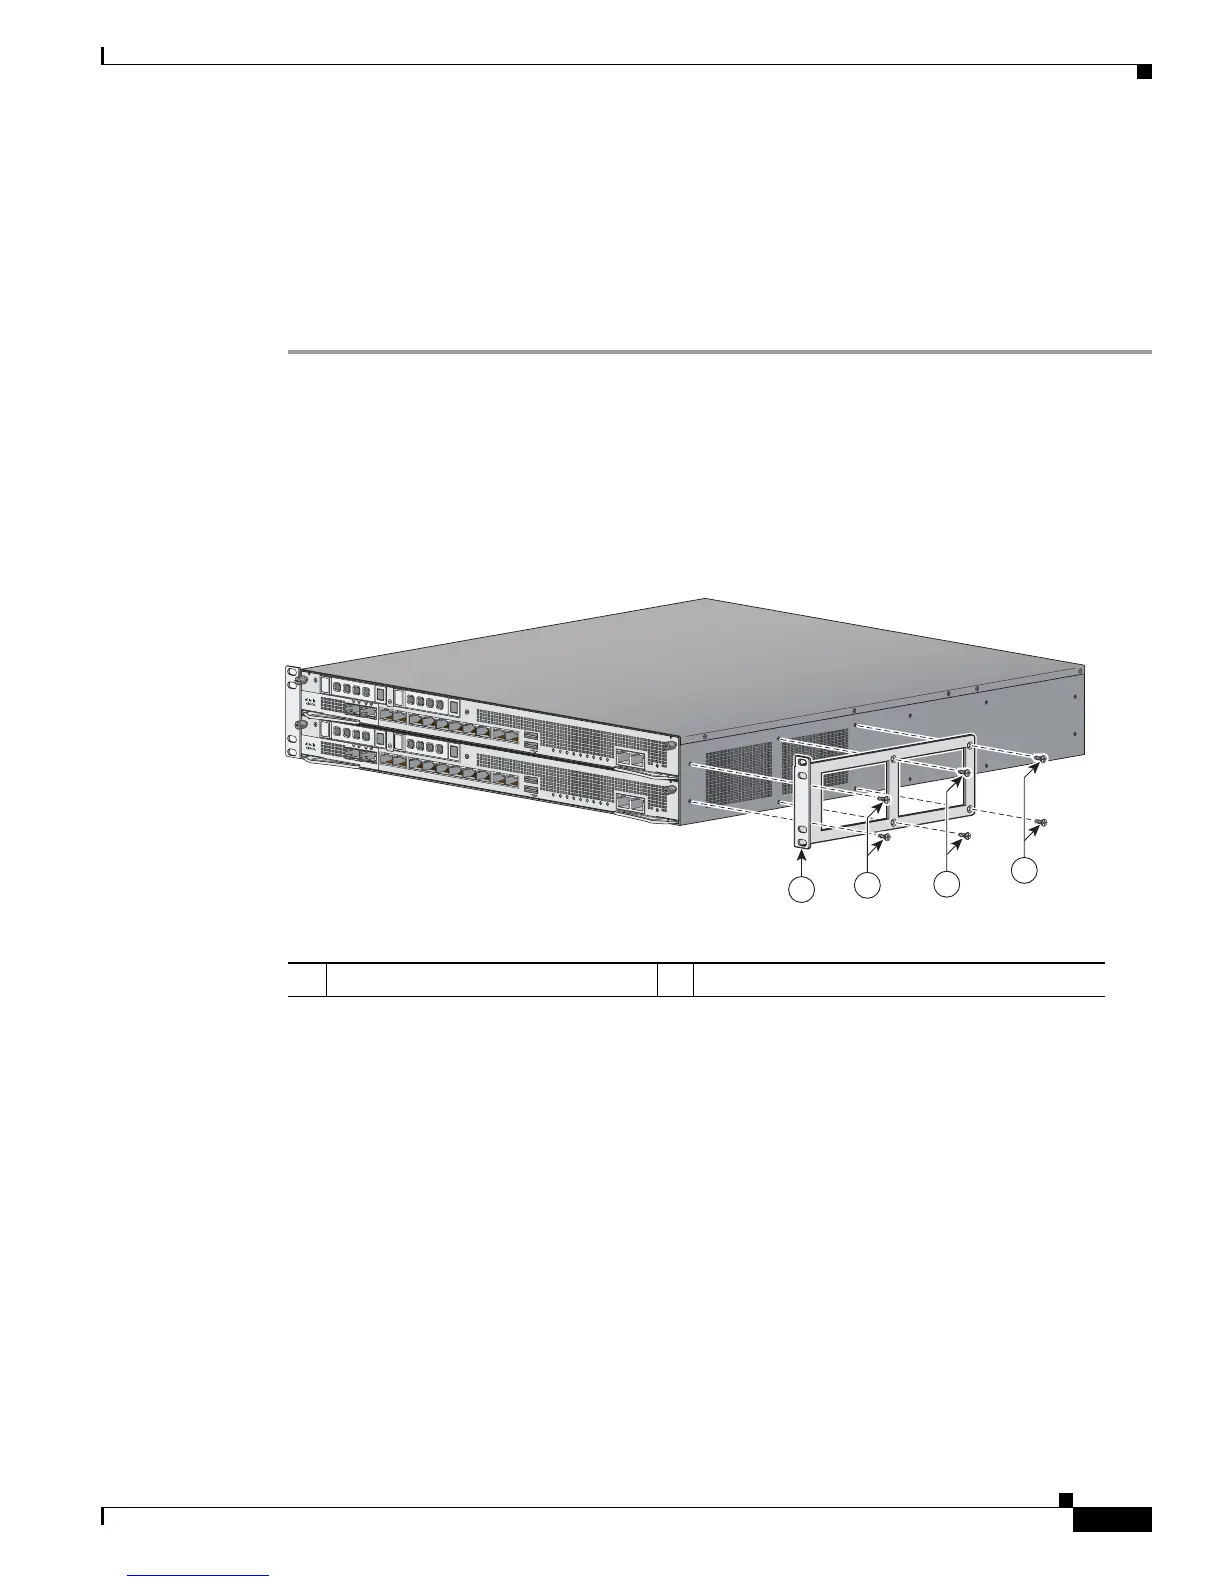
Step 2 Position the front bracket on the side of the adaptive security appliance and line up the bracket screws
with the screw holes on the adaptive security appliance.
Step 3 Tighten the screws into the chassis.
Step 4 Repeat this procedure on the other side of the chassis.
Step 5 You can now mount the chassis in a rack; go to Step 12. If using the optional rear rack rails, continue
with Step 6.
Step 6 Attach one of the rear brackets using three M4 screws.
1 Bracket 2 Bracket screws
253901
1
2
2
2
PWR
BOOT
ALARM
ACT
VPN
PS1
HDD1
PS0
HDD0
USB
RESET
0
SFP1
SFP0
1
0
12
34567
MGMT
0
1
AUX CONSOLE
PWR
BOOT
ALARM
ACT
VPN
PS1
HDD1
PS0
HDD0
USB
RESET
0
SFP1
SFP0
101234567
MGMT
0
1
AUX CONSOLE

 Loading...


