4-40
Cisco ASA 5585-X Adaptive Security Appliance Hardware Installation Guide
OL-22567-02
Chapter 4 Maintenance and Upgrade Procedures
Mounting the Chassis Using a Fixed Rack Mount
Step 7 Repeat to attach the second bracket to the other side of the chassis.
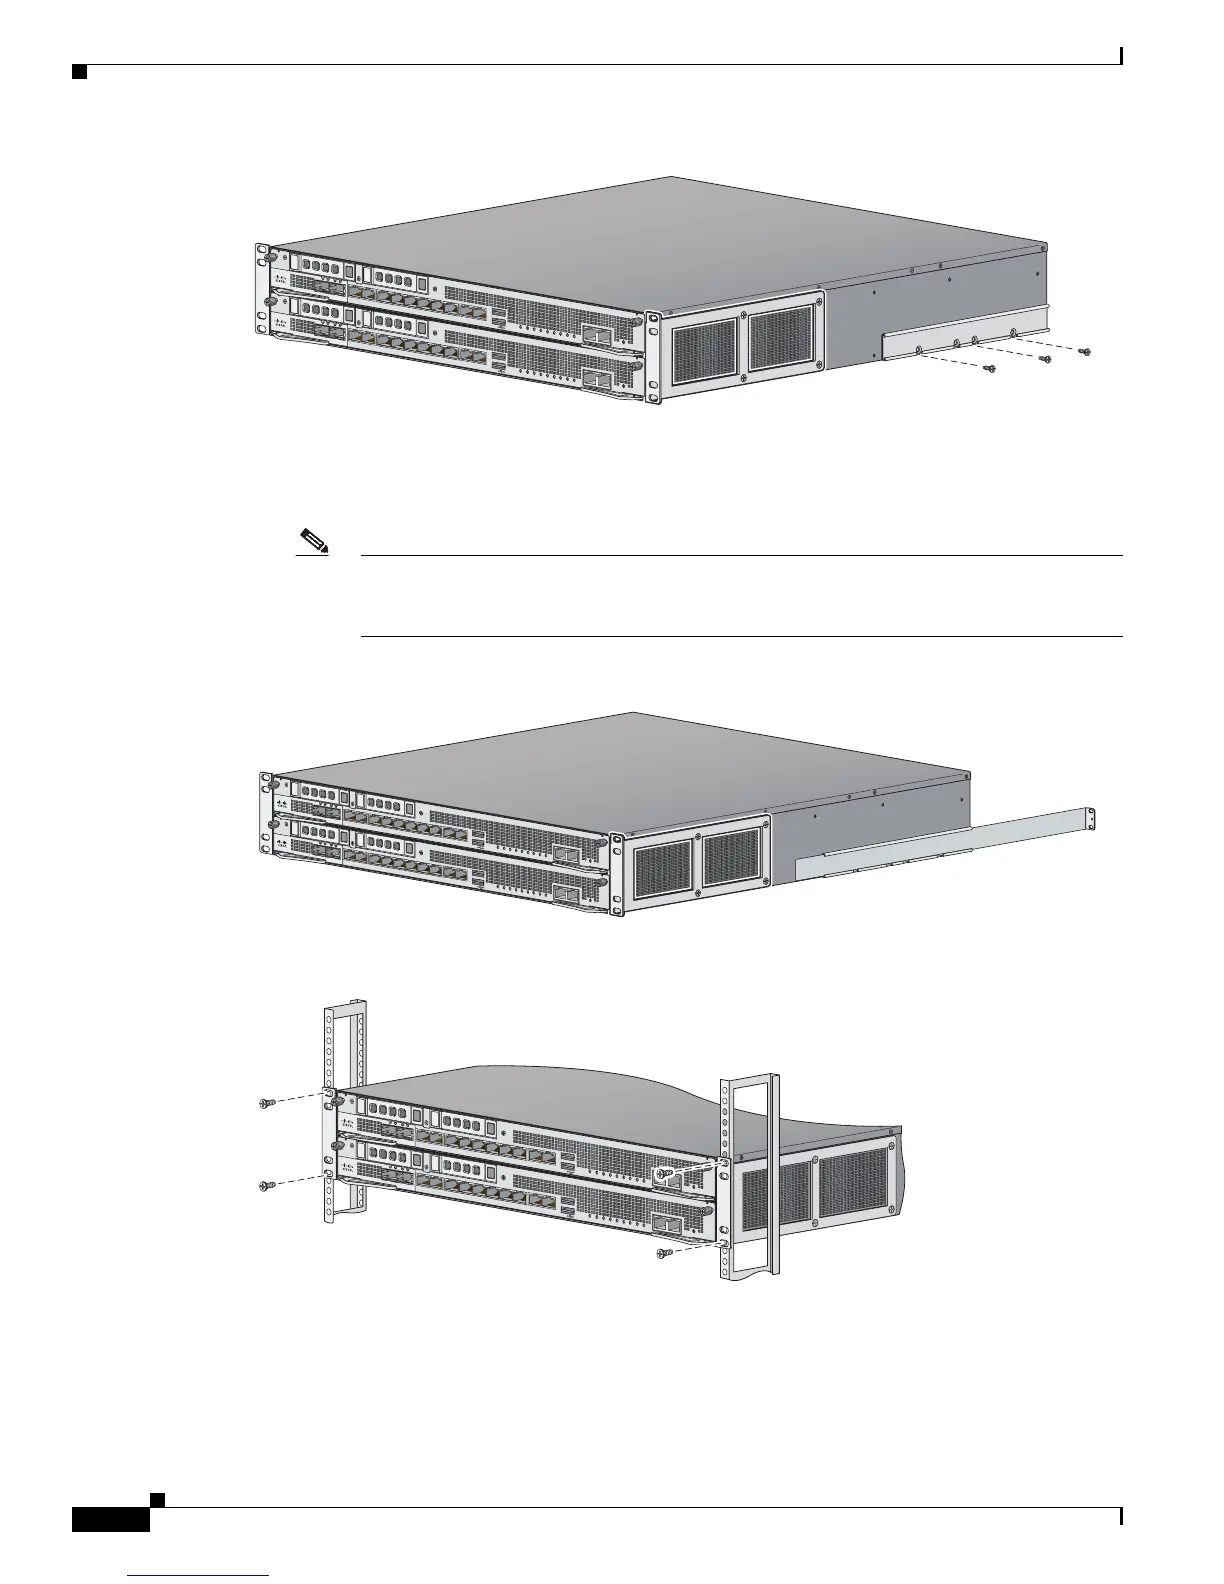
Step 8 Measure the distance between the front and rear rack rails and select the proper slide-mount brackets.
Note The slide-mount brackets let you install the rear of the chassis to the rear rack rails. The
brackets are designed to slide within the installed rear brackets and accommodate a range of
rack depths.
Step 9 Install the proper slide-mount brackets on to the rear bracket on the chassis.
Step 10 For added security, screw in the front slide rail brackets to the rack.
Step 11 Secure the slide brackets to the corresponding holes in the rear rack rail using the screws provided.
330136
PWR
BOOT
ALARM
ACT
VPN
PS1
HDD1
PS0
HDD0
USB
RESET
0
SFP1
SFP0
101234567
MGMT
0
1
AUX
CONSOLE
PWR
BOOT
ALARM
ACT
VPN
PS1
HDD1
PS0
HDD0
USB
RESET
0
SFP1
SFP0
101234567
MGMT
0
1
AUX CO NSOLE
330137
PWR
BOOT
ALARM
ACT
VPN
PS1
HDD1
PS0
HDD0
USB
RESET
0
SFP1
SFP0
101234567
MGMT
0
1
AUX CONSOLE
PWR
BOOT
ALARM
ACT
VPN
PS1
HDD1
PS0
HDD0
USB
RESET
0
SFP1
SFP0
101234567
MGMT
0
1
AUX CONSOLE
330138

 Loading...


