3
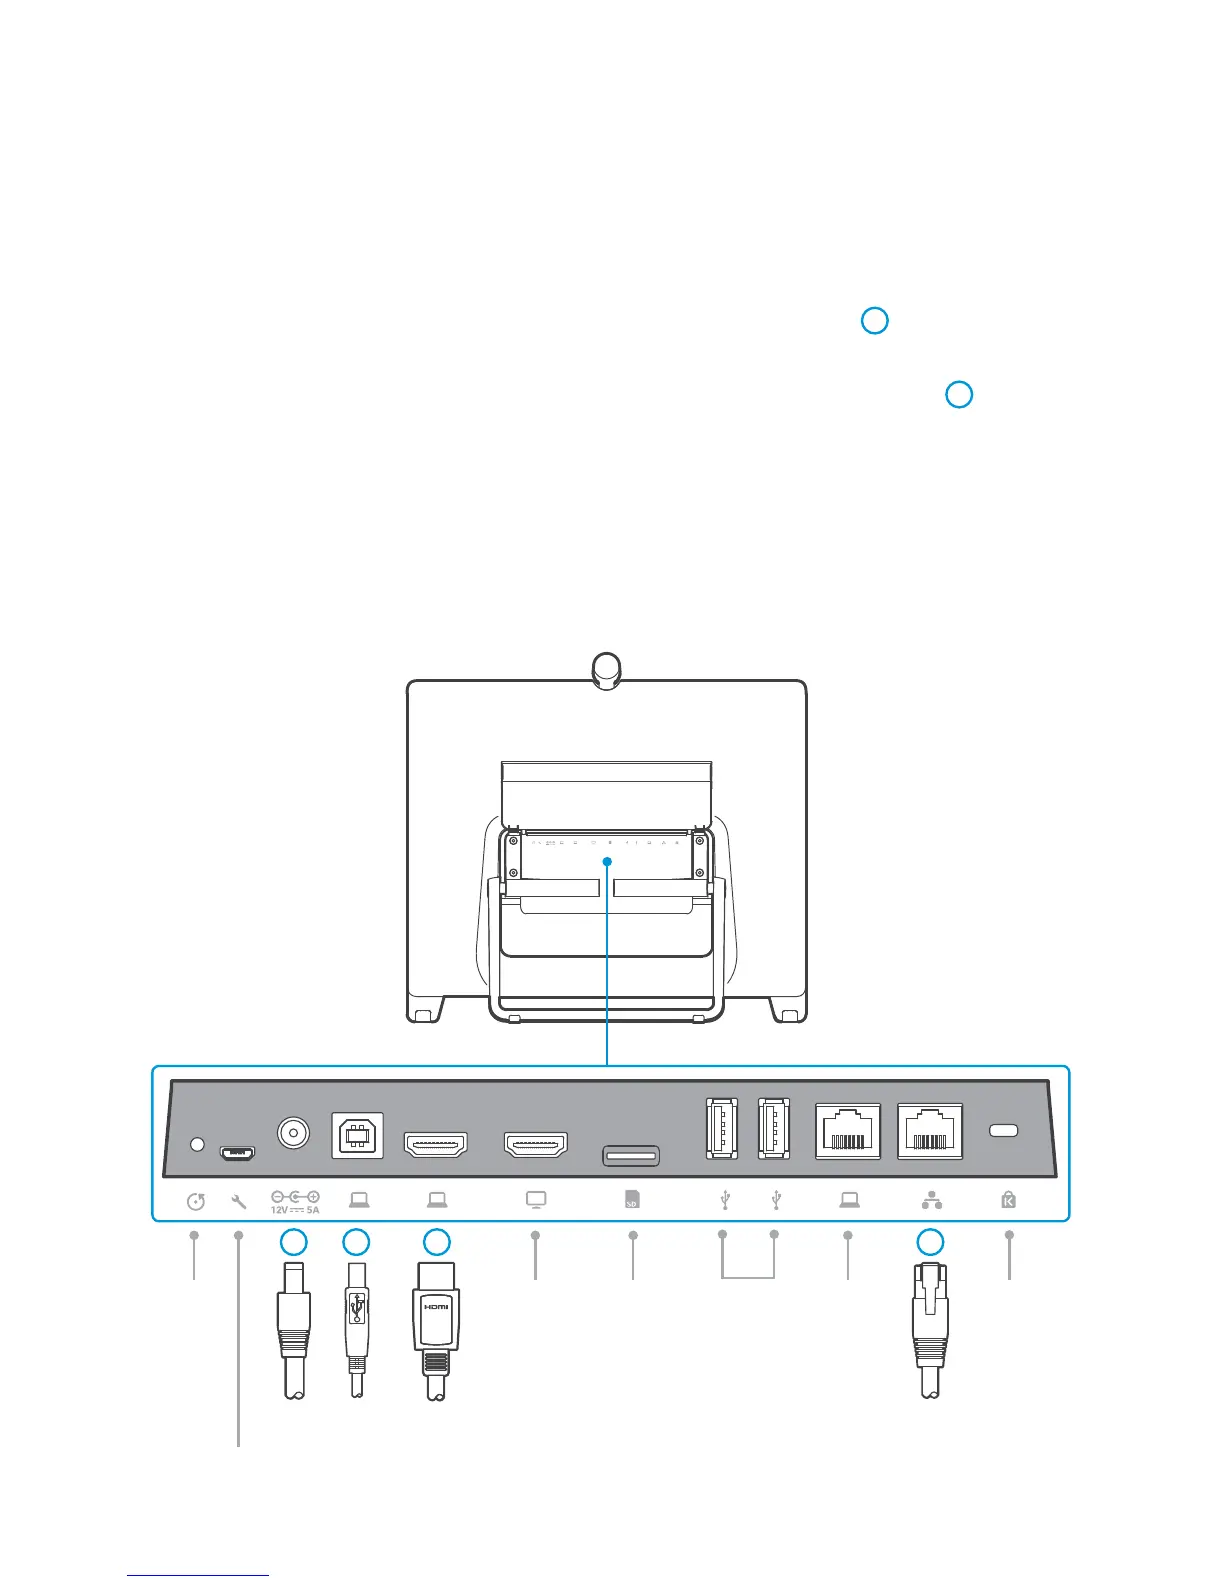
Connect Cables
1.
Place the DX80 face down on a flat surface to connect the cables. Do not exert force
on the camera as this may damage it.
2.
Flip the connector cover up to access the connector panel and lead the cables under
the strain relief bar.
3.
Connect the Ethernet cable (A) between the network connector
1
and a network
wall socket.
4.
Connect the provided power adapter and cable (B) between the DX80
2
and a
power socket.
5.
Pull the foot stand, set the DX80 in an upright position and adjust the angle. The foot
stand is stiff to open at first.
To use the same network wall socket for both your computer and DX80, connect your
computer to the computer network port on the DX80, and the DX80 to the network wall
socket (see step 3).
Computer
network
Micro-SD
slot
Network
Kensington
lock
USB
HDMI in
Factory
reset
pinhole
Power USB
Type B
HDMI out
(not in use)
Service port
2 3 4 1
 Loading...