• #1 Phillips screwdriver
• The following items from the FIPS kit:
• One FIPS opacity shield
• Four 8-32 x 0.375-inch screws used to attach the FIPS opacity shield to the cable management
brackets
• 15 tamper-evident labels (TELs)
• The following items from the Firepower 4100 series accessory kit:
• Two cable management brackets
• Four 8-32 x 0.375-inch screws used to attach the cable management brackets to the slide rail locking
brackets
Step 1 Copy the serial number on a label and attach it to the chassis where it can be retrieved easily for future use if needed.
To find the serial number, see Serial Number Location.
Step 2 Pull the chassis out of the rack until the release latches catch.
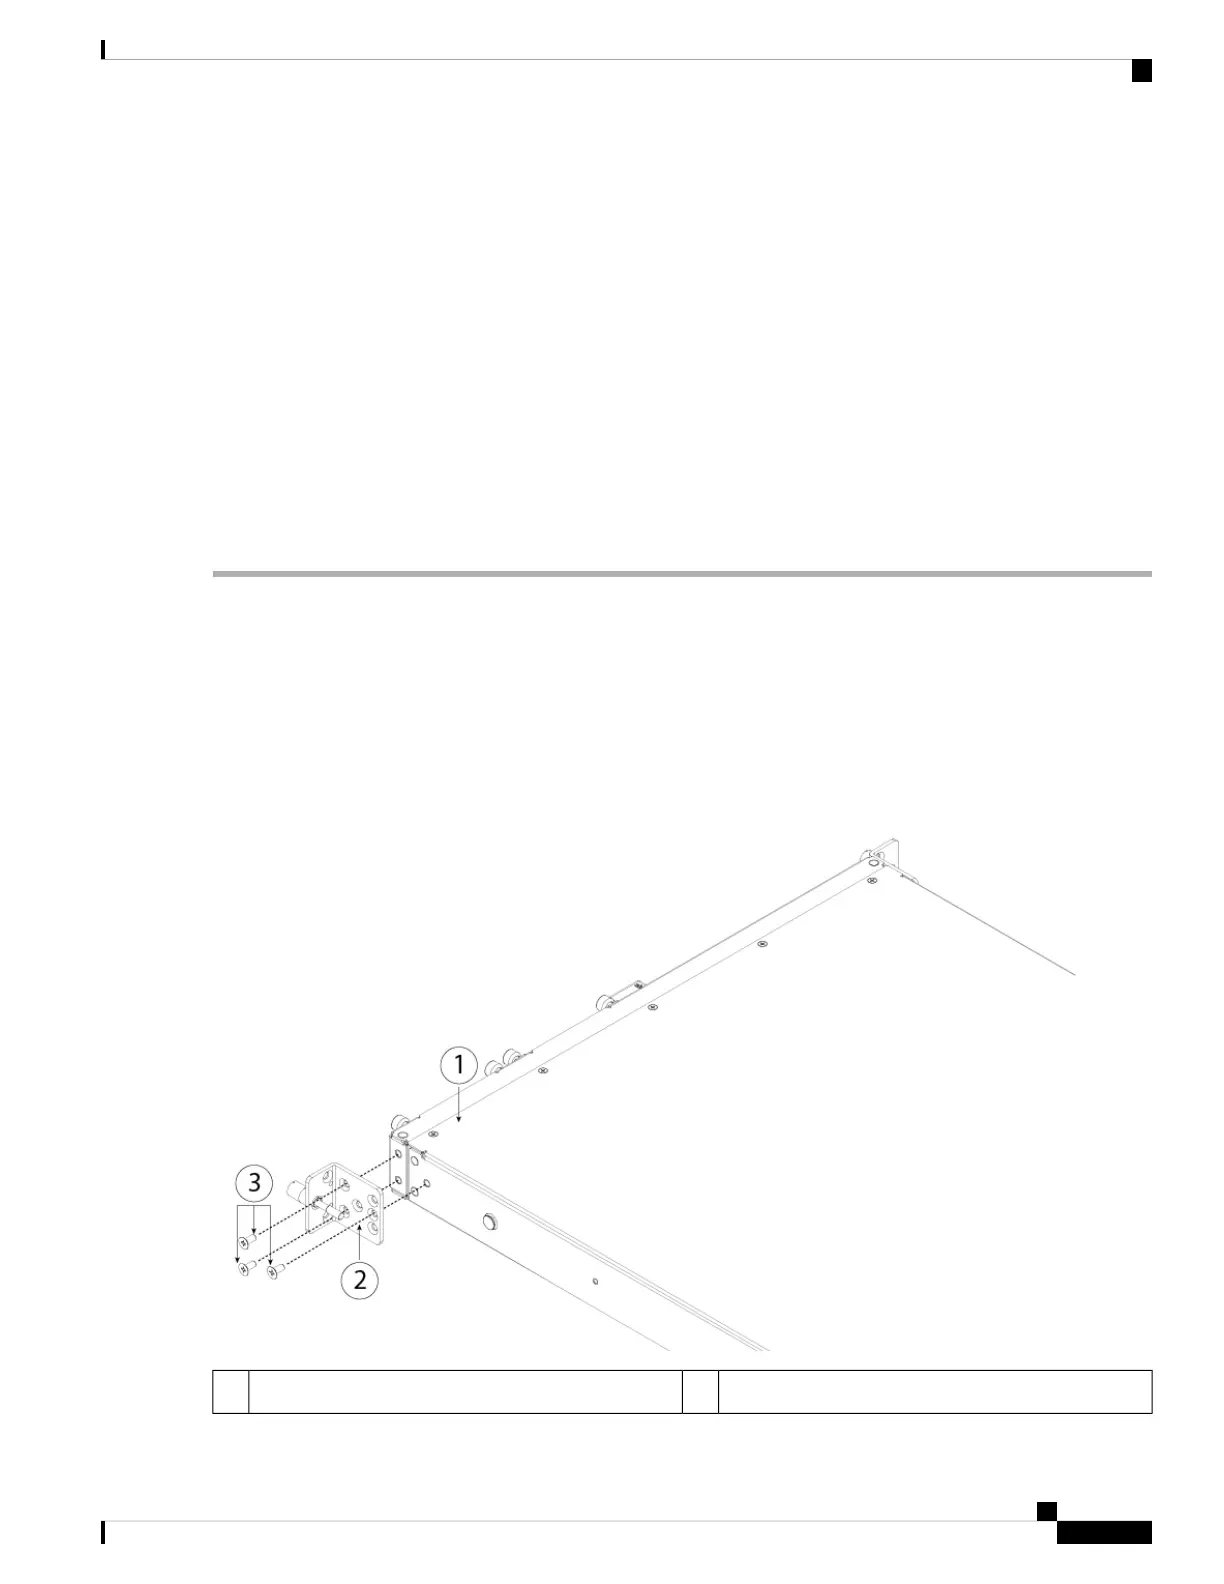
Step 3 If you have not already done so, attach a slide rail locking bracket to each side of the chassis using the six 8-32 x
0.375-inch Phillips screws provided in the accessory kit.
You should have completed this step while preforming the procedure described in Rack-Mount the Chassis.
Note
Figure 15: Attach the Slide Rail Locking Bracket to the Side of the Chassis
Slide rail locking bracket2Chassis1
Installation, Maintenance, and Upgrade
23
Installation, Maintenance, and Upgrade
Install the FIPS Opacity Shield
 Loading...


