RV0xx Series Routers Quick Start Guide 7
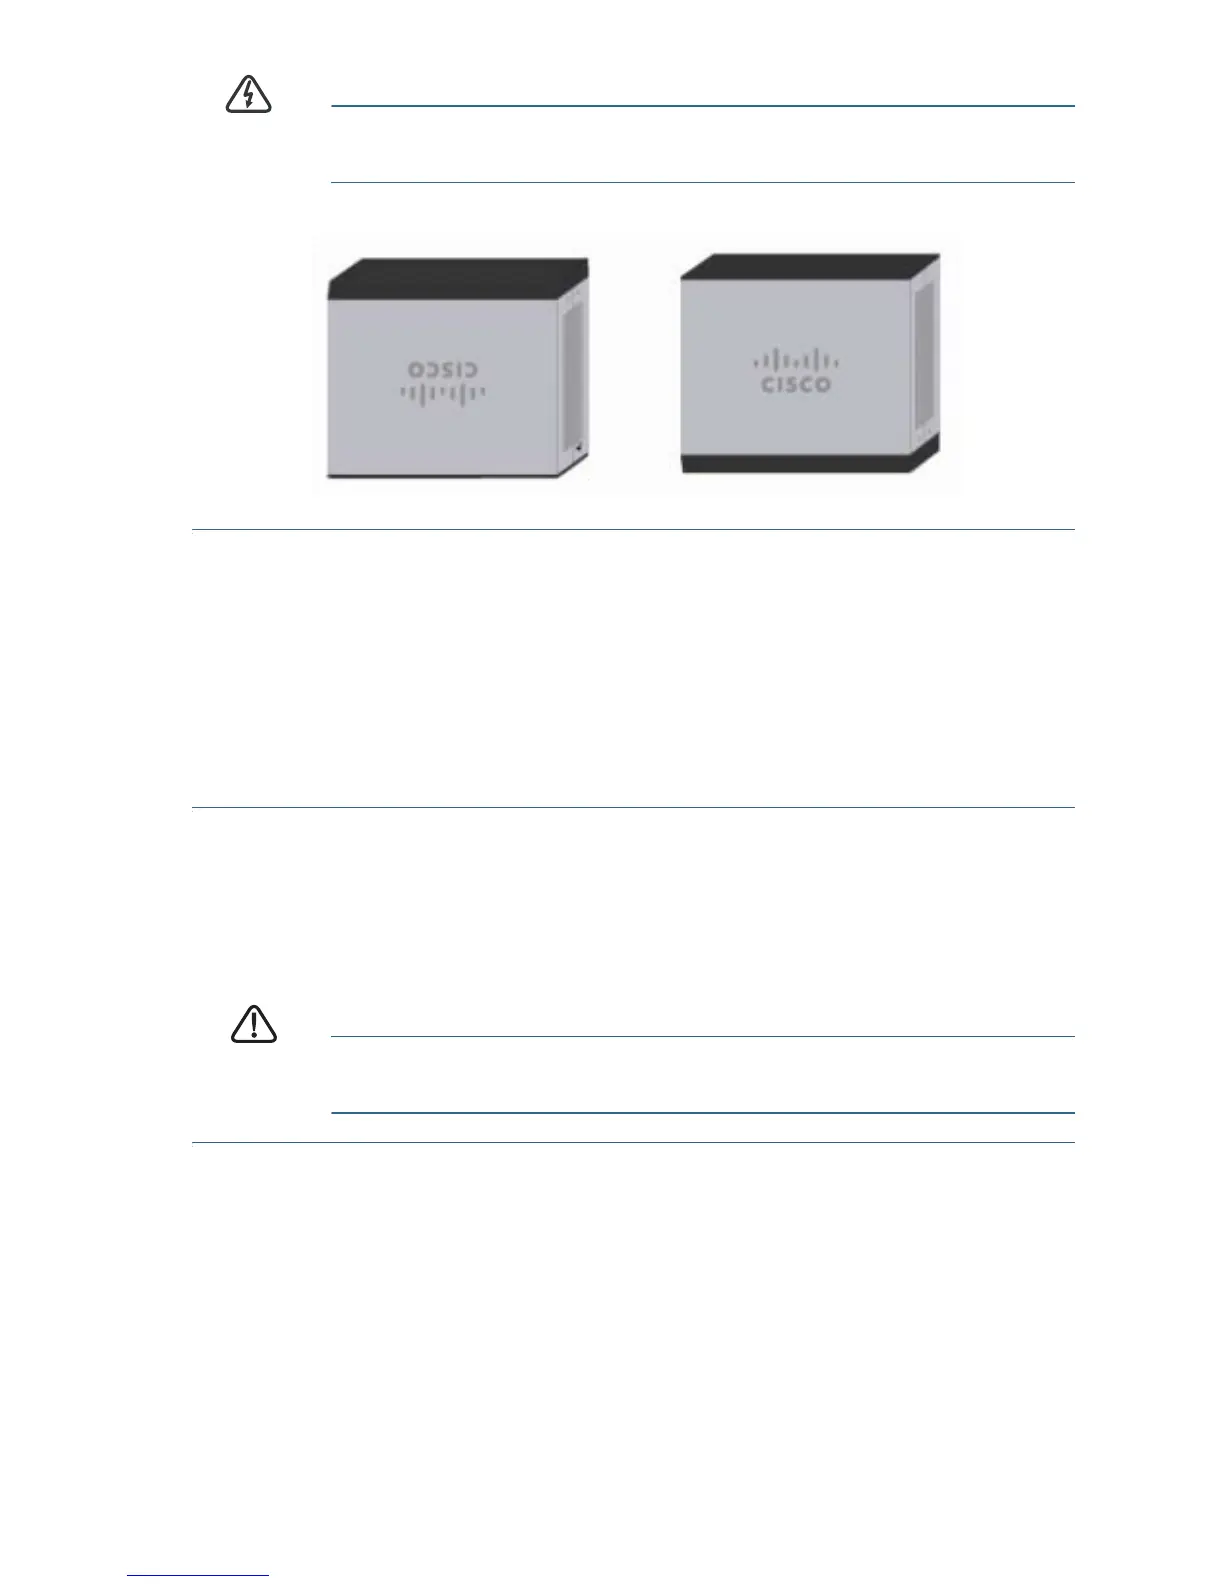
WARNING
For safety, ensure that the heat dissipation holes are facing
sideways
.
STEP 1 Drill two pilot holes into the surface.
• RV042 and RV042G: 58 mm apart
• RV082 and RV016: 94 mm apart
STEP 2 Insert a screw into each hole, leaving a gap between the surface
and the base of the screw head of 1 to 1.2 mm.
STEP 3 Place the router wall-mount slots over the screws and slide the
router down until the screws fit snugly into the wall-mount slots.
Rack Mounting RV082 or RV016
You can mount the RV082 or RV016 in a standard size, 19-inch (about 48
cm) wide rack. The router requires 1 rack unit (RU) of space, which is 1.75
inches (44.45mm) high. Mounting brackets are provided.
CAUTION Do not overload the power outlet or circuit when installing
multiple devices in a rack.
STEP 1 Place the router on a hard, flat surface.
STEP 2 Attach one of the supplied rack–mount brackets to one side of the
router with the supplied screws. Secure the bracket tightly.
STEP 3 Follow the same steps to attach the other bracket to the opposite
side.
 Loading...