EasyManua.ls Logo

Cisco RV082

Cisco RV082
2 pages
To Next Page IconTo Next Page
Loading...
Model No.
Quick Installation
Quick Installation
A Division of Cisco Systems, Inc.
®
Model No.
WIRED
RV082
VPN Router
10/100 8-Port
Package Contents
10/100 8-Port VPN Router
User Guide CD-ROM
AC Power Cable
Rack Mounting Kit
Quick Installation
Registration Card
1
A Before you begin, make sure
that all of your hardware is
powered off, including the
Router, PCs, hubs, switches,
and cable or DSL modem.
B Connect one end of an Ether-
net network cable to one of
the numbered ports on the
front of the Router (see Figure
B). Connect the other end to
an Ethernet port on a network
device, e.g., a PC, print server,
hub, or switch.
Repeat this step to connect
more PCs or other network
devices to the Router.
C Connect your cable or DSL
modem’s Ethernet cable to
the Router’s Internet port. If
using the DMZ/Internet port,
connect a second cable to it,
and the other end to the net-
work device , e.g., modem or
public server. See Figure C.
D Power on the cable or DSL
modem and the other network
device if using one.
2
Connect the Router
In Step 2, you will need the setup
instructions provided by your Inter-
net Service Provider (ISP). If you do
not have this information, then con-
tact your ISP before proceeding.
The instructions from your ISP tell you
how to set up your PC for Internet
access. Because you are now using
the Router to share Internet access
among several computers, you will
use the setup information to config-
ure the Router instead of your PC.
A Open your PC’s web browser.
Enter http://192.168.1.1 (the
Router’s default local IP
address) in the web browser ’s
Address field. Then press the
Enter key.
B A screen will appear and ask
you for a User Name and Pass-
word. Enter admin (the default)
in the the User Name and Pass-
word fields. Then click the OK
button.
C The Router’s Web-based Utility
will appear with the System
Summary screen showing.
Click on the Setup tab, which is
the next tab over, then con-
E
B
Configure the Router
B
A
E
Connect the included AC
power cable to the Router’s
Power port on the back of the
Router, as shown in Figure E,
and then plug the other end of
the power cable into an elec-
trical outlet.
The System LED on the front
panel will light up as soon as
the power adapter is con-
nected properly.
C
NOTE:: Make sure your PC’s Ethernet
adapter is set to obtain an IP address
automatically. For more information,
refer to Windows Help.
C

Other manuals for Cisco RV082

Question and Answer IconNeed help?

Do you have a question about the Cisco RV082 and is the answer not in the manual?

Cisco RV082 Specifications

General IconGeneral
WAN Ports2
LAN Ports8
VPN SupportYes
FirewallYes
QoSYes
Power Supply12V DC, 1.5A
Operating Temperature32 to 104°F (0 to 40°C)
Storage Temperature-4 to 158°F (-20 to 70°C)
Humidity10% to 85% Non-condensing
DHCP ServerYes
Device TypeVPN Router

Summary

Connect the Router

Prepare Hardware for Connection

Ensure all network hardware, including the router and PCs, is powered off before starting connections.

Connect Network Devices to Router

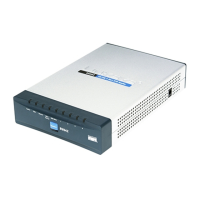
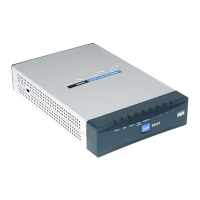
Connect Ethernet cables from PCs or other network devices to the router's numbered ports.

Connect Modem to Router Internet Port

Connect the modem's Ethernet cable to the router's designated Internet port for network access.

Power On Network Devices

Power on the modem and other connected network devices after physical connections are made.

Connect Router Power Supply

Connect the AC power cable to the router and then to an electrical outlet to power it on.

Configure Router Network Settings

Access Router Web Configuration

Open a web browser and navigate to the router's default IP address (192.168.1.1) to access its utility.

Login to Router Utility

Enter 'admin' for both User Name and Password to log into the router's web-based utility.

Navigate to Setup Tab

Access the 'Setup' tab within the router's web utility to proceed with configuration settings.

Configure Internet Connection Types

Obtain IP Automatically Setup

Configure router for DHCP or dynamic IP from ISP, and optionally set DNS servers.

Static IP Address Setup

Enter static IP address, subnet mask, gateway, and DNS server details provided by your ISP.

PPPoE Connection Setup

Configure PPPoE connection with ISP-provided username and password, and manage idle timeouts.

PPTP Connection Setup

Configure PPTP connection, typically used in Europe and Israel, with ISP-specific information.

Save Settings and Restart Devices

Save configuration changes and restart PCs and modem to apply new router settings.

Test Internet Connectivity

Test router configuration by opening a web browser and visiting a specified URL.

Related product manuals