6 Cisco SPA500DS
STEP 1 Attach the first Cisco SPA500DS to the IP phone and connect the
auxiliary cable as described in Section 1, Connecting the
Equipment.
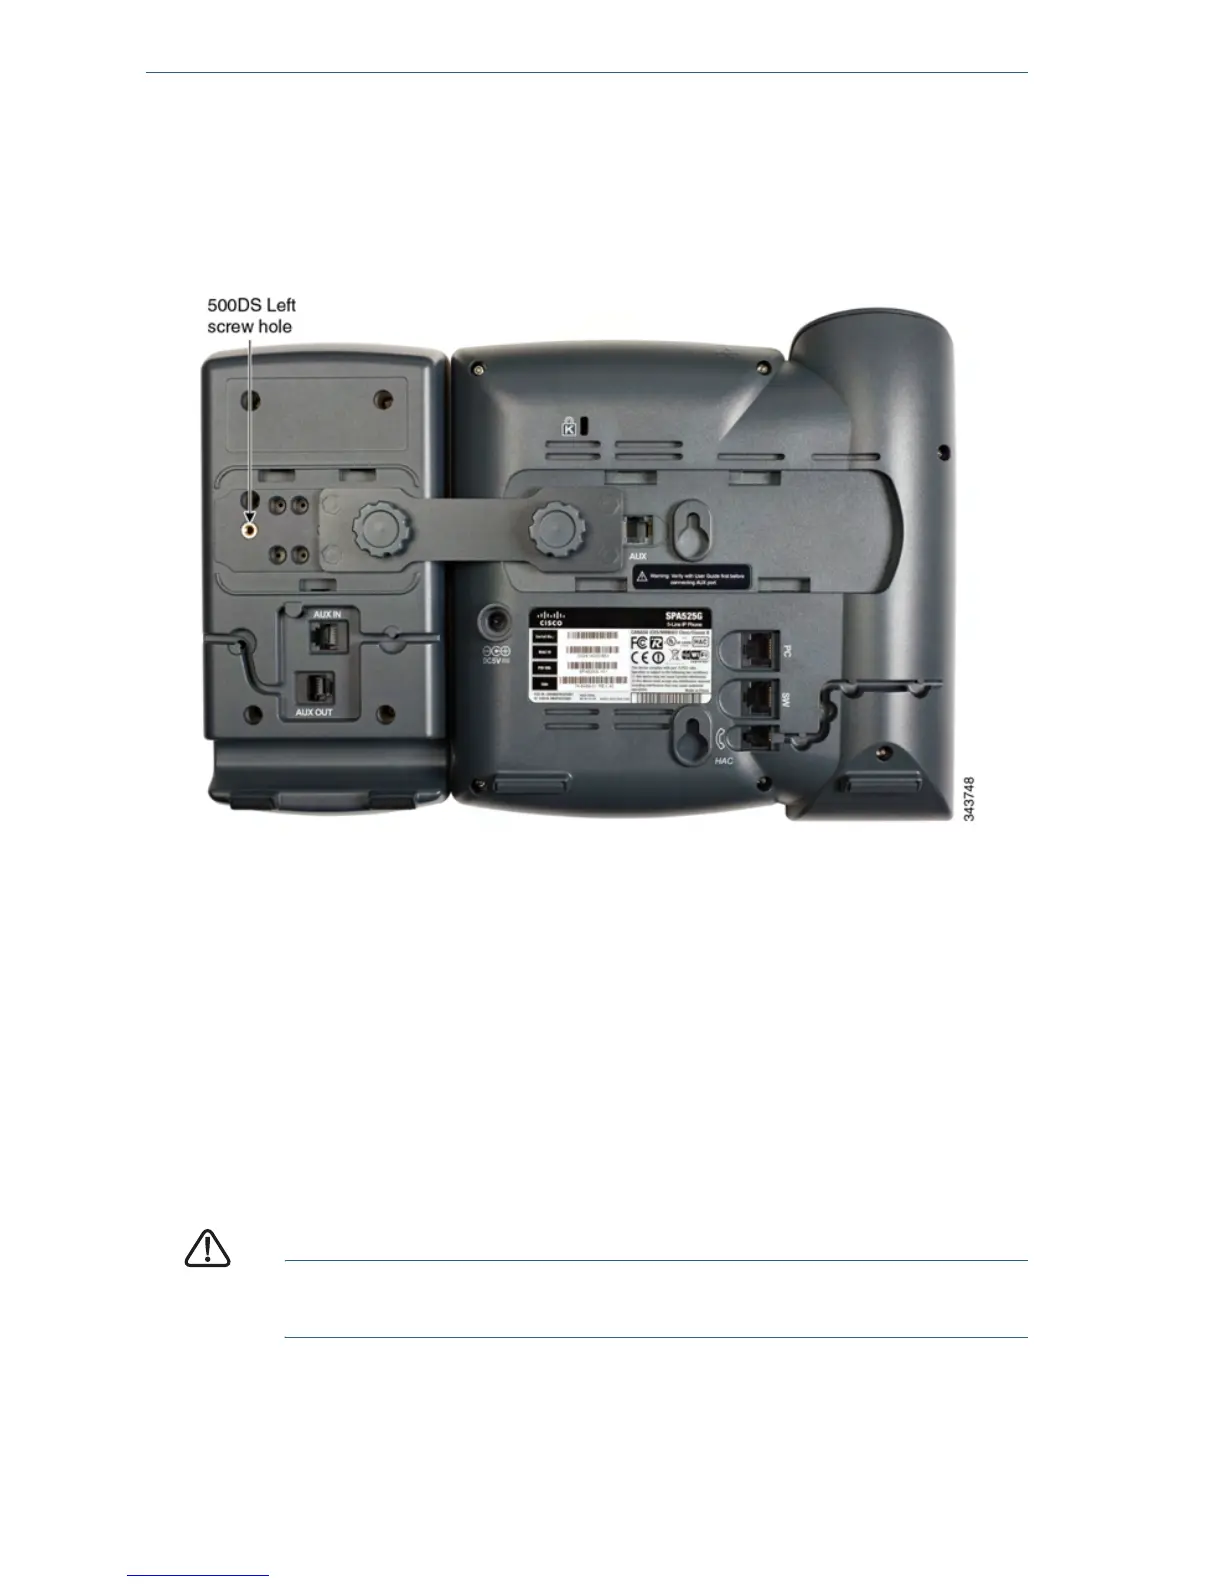
STEP 2 Align the left screw hole in the first Cisco SPA500DS with one of the
holes on the attachment arm.
STEP 3 Insert the pegs on the attachment arm into the peg holes on the
Cisco SPA500DS.
STEP 4 Using the attachment arm screw, secure the attachment arm to the
first Cisco SPA500DS.
STEP 5 Align the right screw hole in the second Cisco SPA500DS with the
unused hole on the attachment arm.
STEP 6 Insert the pegs on the attachment arm into the peg holes on the
Cisco SPA500DS.
STEP 7 Using the attachment arm screw, secure the attachment arm to the
second Cisco SPA500DS.
CAUTION Do not plug a telephone line cord into the AUX port. Use only
the auxiliary cable provided with the Cisco SPA500DS.