6 www.cistermiser.co.uk
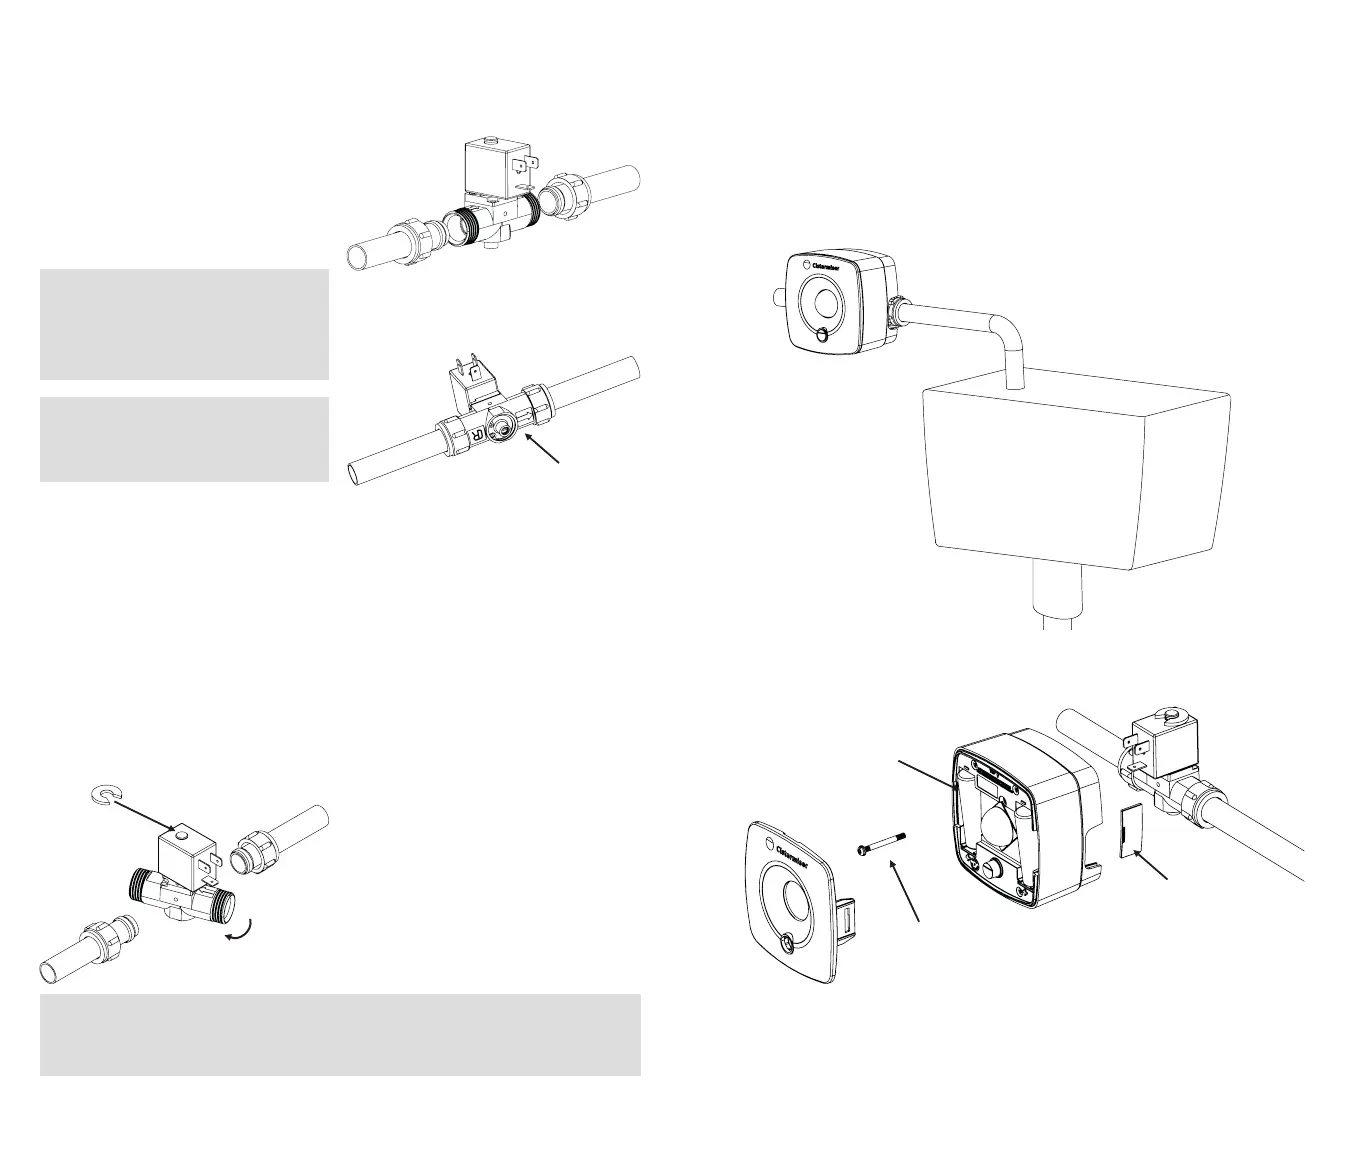
Changing the flow
direction
In some installations the solenoid
head may be facing the wall and the
sensor cannot be fitted. You can turn
the head around using the following
action:
• Remove the solenoid coil clip (1)
• Lift the solenoid (2) and rotate the
valve body (3)
• Replace the solenoid coil clip (1)
3. Valve installation
Install the valve on the 15mm pipe
feeding the cistern.
It is good plumbing practice to install
anisolation valve upstream from the
IRCvalve.
NOTE: The valve should be
positioned with the directional
arrow pointing in the same
direction
as the flow of the water
with the solenoid on top.
NOTE: There should be no
restriction, such as a petcock or
bibtap, after the valve.
1
2
NOTE: Where one cistern feeds multiple
urinal outlets, ensure the urinal
outlets are evenly distributed and balanced so the cistern gives equal flush.
NOTE: One IRC is required for every cistern.
Water
flow
direction
3
www.cistermiser.co.uk 7
4. Sensor installation
Pipe Mounted
(Battery-powered only)
Solenoid
Mounting
Screw
Remove
Side
Covers
Insert
Batteries