


S
Steven TaylorAug 14, 2025
How to fix a Citizen CT-S2000 cutter lock?
- VVickie HallAug 14, 2025
To resolve a cutter lock issue on your Citizen Printer, first identify and remove the cause of the problem. Then, press the FEED button.
How to fix a Citizen CT-S2000 cutter lock?
To resolve a cutter lock issue on your Citizen Printer, first identify and remove the cause of the problem. Then, press the FEED button.
What to do if there is a power switch operation error on my Citizen CT-S2000 Printer?
If you encounter a power switch operation error on your Citizen Printer, power off the printer and wait until the POWER LED goes off completely before turning it on again.
Why does my Citizen Printer thermal head overheat?
The thermal head of your Citizen Printer may overheat when printing dense characters or dark images, causing the head temperature to rise. Printing will resume automatically once the head temperature lowers.
What to do if my Citizen CT-S2000 Printer is out of paper?
If your Citizen Printer runs out of paper, refill the paper.
What to do if the Citizen CT-S2000 cover is open?
If the cover of your Citizen Printer is open, check the paper, gently pull several centimeters of paper straight out of the printer, and then close the printer cover.
What to do if my Citizen Printer cover is open?
If the printer cover is open, check the paper, pull the paper straightforward by several cm out of the printer, and then close the printer cover.
What to do if Citizen CT-S2000 Printer shows thermal head overheat?
If the thermal head overheats, wait until the head temperature has lowered.
What to do if my Citizen CT-S2000 shows a paper end error?
If you encounter a 'Paper end' error, refill the paper.
What to do if Citizen CT-S2000 Printer cutter is locked?
If the cutter is locked, remove the cause of the trouble and press the FEED button.
Lists the key features and capabilities of the printer models.
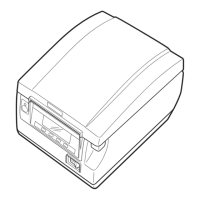
Details the items included in the printer package and how to unpack them.
Explains the naming convention used to classify different printer models.
Provides detailed technical specifications of the printer.
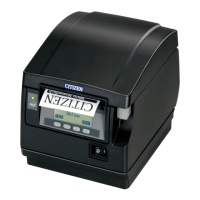
Describes the external views and identifies key parts of the printer.
Details the internal components visible when the printer cover is opened.
Explains additional functionalities like buzzer, user memory, and memory switch.
Instructions for connecting the power cord for both AC and DC power types.
Guidance on connecting various interface cables like Serial, Parallel, and USB.
Steps for connecting a cash drawer to the printer's kick-out connector.
Important safety warnings and operational restrictions for printer installation.
Instructions on how to adjust the partition for different paper roll widths.
Details on how to configure the DIP switches on the serial interface board.
Guide to adjusting the paper near-end sensor for different paper roll diameters.
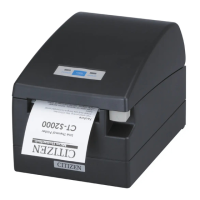
Step-by-step instructions for setting or replacing the paper roll.
Procedures to follow when paper gets jammed in the printer.
How to properly clean the printer's thermal print head.
Instructions on how to perform a self-test print to check printer status.
Explains how to print data in hexadecimal format for debugging.
Describes how to interpret LED and buzzer signals for error conditions.
Provides diagrams and measurements of the printer's physical dimensions.
Details the recommended thermal paper rolls and their specifications.
Guide to manually configuring the printer's memory switch settings.
Procedure for selecting the correct paper type for the printer.
Guide to adjusting the paper sensor sensitivity for specific paper types.
Details on label paper specifications, dimensions, and layout.
Specifications and dimensions for black mark paper used with the printer.
| Maximum resolution | 203 x 203 DPI |
|---|---|
| Autocutter | Yes |
| Autocutter durability | 2 million cuts |
| Maximum roll diameter | 102 mm |
| Supported paper width | 58, 60, 80, 82.5 mm |
| Standard interfaces | Ethernet |
| Connectivity technology | Wired |
| Dimensions (WxDxH) | 147 x 207 x 147 mm |
| Certification | UL, C-UL, FCC A, TUV-GS, C |
| Internal memory | 0.375 MB |
| Built-in barcodes | Code 39, Code 93 |
| Mean cycles between failures (MCBF) | 200000000 |
| Compatible operating systems | Windows 2000 / XP / VISTA / 2003 Server, OPOS1.8, CUPS |
| Product color | Black |
| Power requirements | 100 - 240 V, 50/60 Hz, 150 VA |
| Storage temperature (T-T) | -20 - 60 °C |
| Operating temperature (T-T) | 5 - 40 °C |
| Operating relative humidity (H-H) | 10 - 90 % |
| Weight | 2000 g |
|---|