EasyManua.ls Logo

Citizen Promaster Tsuno Chrono Racer - User Manual

Citizen Promaster Tsuno Chrono Racer
2 pages
Print Icon
To Next Page IconTo Next Page
Loading...
1/2
E210 Abbreviated instruction
This watch is solar-powered. Expose the dial to light and use it sufficiently charged.
To see details of charging time, specifications and operations, refer to the instruction manual:
E210 instruction manual
English
Component identification
Models with the crown at the 3 o'clock position
7
60
3
12
ON
OFF
500
400
300
250
120
130
140
150
160
180
200
220
80
85
90
95
100
11
0
65
70
75
T
A
C
H
Y
M
E
T
E
R
60
CHARGE
45 159
Button
B
Button
A
Chronograph second
hand
Hour hand
Alarm hand
Second hand
Minute hand
Date indication
Crown
Chronograph minute
hand
Power reserve indication
hand
Button
C
(recessed
button)
Chronograph hour hand
Alarm indicator hand
Alarm crown
Models with the crown at the 12 o'clock position
Button
B
Button
A
Chronograph second
hand
Hour hand
Power reserve
indication hand
Minute hand
Alarm hand
Crown
Chronograph minute
hand
Button
C
(recessed
button)
Chronograph hour
hand
Alarm crown
Alarm indicator hand
Second hand
Date indication
Actual appearance may differ from the illustrations.
The crown has two positions when pulling it out.
Refer also to our web page for detail of usage of the
scale and bezel on the watch.
(
http://www.citizenwatch-global.com/support/pdf/
enhanced/e.pdf
)
Checking the power reserve
You can see current power reserve level by referring to the power reserve
indication hand. Use the watch with sufficiently charged.
Level
3 2 1 CHARGE
Indication
(Models with the
crown at the 3
o'clock position)
CHARGE
CHARGE
CHARGE
CHARGE
Indication
(Models with the
crown at the 12
o'clock position)
Duration (approx.)
8 ‒ 7 months 7 ‒ 5 months
5 months ‒ 7
days
7 days or
shorter
Meaning
Power reserve is
sufficient.
Power reserve is
OK.
Power reserve is
getting low.
Insufficient
charge warning
has started.
OK for normal use.
Charge immediately.
Setting the time
1.
Pull the crown out to position
2
when the second hand points
0 second.
The second hand stops.
2.
Rotate the crown to set the time.
Change of date indication shows it just became AM. Take care the time set
is AM or PM.
Move the hands 4 or 5 minutes forward and move them back to the right
time to set the time more precisely.
3.
Push the crown in to position
0
in accordance with a reliable
time source to finish the procedure.
The second hand starts moving.
Setting the date indication
Do not adjust the date indication while the watch shows 9:00 PM ‒ 1:00 AM.
Otherwise, the date indication may change incorrectly thereafter.
Date indication adjustment is required on the first days of March, May, July,
October and December.
1.
Pull the crown out to position
1
.
2.
Rotate the crown counterclockwise to set the date indication.
3.
Push the crown in to position
0
to finish the procedure.
Crown's position
0 1 2
Question and Answer IconNeed help?

Do you have a question about the Citizen Promaster Tsuno Chrono Racer and is the answer not in the manual?

Summary

Component Identification

Checking Power Reserve

Setting Time and Date

Setting the Time

Instructions for setting the watch time, including pulling out the crown and adjusting hands.

Setting the Date Indication

Guide for adjusting the date, with a caution for specific time periods to avoid errors.

Using Watch Functions

Using the Chronograph

Steps to start, stop, and reset the chronograph for measuring time intervals up to 12 hours.

Using the Alarm

Procedure to set, stop, and toggle the alarm function, including setting time and ON/OFF states.

Resetting the Watch

All Reset Procedure

Instructions for performing a full reset of the watch, including preconditions and post-reset setup.

Overview

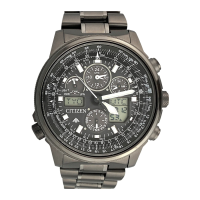
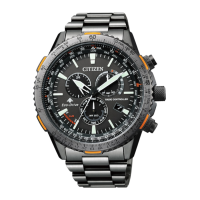
This document provides an abbreviated instruction manual for the Citizen E210 watch, a solar-powered timepiece with chronograph, alarm, and date functions.

Function Description

The E210 watch is primarily a time-telling device, displaying hours, minutes, and seconds. It also incorporates a chronograph for measuring elapsed time, an alarm function, and a date indication. A key feature is its solar-powered mechanism, which means it charges by exposure to light, eliminating the need for battery replacement. The watch includes a power reserve indicator to show the current charge level, ensuring the user is aware of when charging is required.

Usage Features

Time Setting:

To set the time, the crown is pulled out to position 2 when the second hand is at 0. Rotating the crown adjusts the hour and minute hands. It's important to note that the date indication changing signifies the transition to AM. For precise time setting, the hands should be moved slightly past the desired time and then rotated back. Once set, the crown is pushed back to position 0.

Date Setting:

The date can be set by pulling the crown out to position 1 and rotating it counterclockwise. It's crucial to avoid adjusting the date between 9:00 PM and 1:00 AM to prevent incorrect changes. Date adjustments are also necessary for months with fewer than 31 days (March, May, July, October, and December).

Chronograph Usage:

The chronograph can measure events up to 12 hours in 1/5 second increments. To start a measurement, the crown is pushed in to position 0, then button A is pressed to start/stop. To reset the chronograph, button B is pressed while it is stopped. If a measurement exceeds 12 hours, the chronograph hands will stop, but the measurement continues internally. A reset is still required after such an event.

Alarm Usage:

The alarm time is set on a 12-hour basis. To set the alarm, the alarm crown is pulled out and rotated to adjust the alarm indicator hand. It's recommended to move the hand past the desired time and then back for accuracy. The alarm may sound with a slight variation (approximately ±5 minutes) from the set time, so the hand's position serves as an approximate reference. After setting, the alarm crown is pushed in. The alarm can be toggled ON/OFF by pressing the alarm crown; if set to "ON" and stopped, it will sound again within 20 minutes. To stop a sounding alarm, simply press the alarm crown. The alarm typically sounds for 20 seconds.

Power Reserve Check:

The power reserve indication hand shows the current charge level.

  • Level 3 (8-7 months): Power reserve is sufficient.
  • Level 2 (7-5 months): Power reserve is OK.
  • Level 1 (5 months - 7 days): Power reserve is getting low.
  • Level 0 (7 days or shorter): Insufficient charge warning has started, requiring immediate charging.

Maintenance Features

Solar Charging:

As a solar-powered watch, regular exposure to light is essential for its operation. The power reserve indicator helps monitor the charge level, prompting the user to charge the watch when the reserve is low.

All Reset Procedure:

In cases where the watch needs to be reset, an "All Reset" procedure is available. Before performing this, ensure the power reserve indication hand points to level 3 or 2, and the chronograph has been reset.

  1. Pull the crown out to position 2 when the second hand is at 0.
  2. Press and release both button B and the recessed button at the same time. This will cause the alarm to sound, the power reserve indication hand to move to level 3, and the reference position of each hand to be adjusted automatically.
  3. Push the crown in to position 0. The power reserve indication hand will move back and forth, and the second hand will start moving. After an All Reset, the time, date, and alarm must be set again.

General Care:

The manual emphasizes that the actual appearance of the watch may differ from illustrations. For detailed information on using the watch's scales and bezel, users are directed to the Citizen Watch Global support website.

Citizen Promaster Tsuno Chrono Racer Specifications

General IconGeneral
ModelTsuno Chrono Racer
BrandCitizen
Case MaterialStainless Steel
Case Diameter45mm
CrystalMineral
Water Resistance200 meters
FunctionsChronograph, Date
Strap MaterialStainless Steel
Dial ColorBlack
LuminescenceYes
MovementEco-Drive
FeaturesTachymeter

Related product manuals