EasyManua.ls Logo

claber Dual Select 8488 - User Manual

claber Dual Select 8488
6 pages
Print Icon
To Next Page IconTo Next Page
Loading...
Dual Select
Dual Select
Pag. 1
CLEANING THE FILTER. The timer is protected by a wire mesh lter that ensures long-lasting and trouble-free
operation. The lter should be inspected periodically and washed at the beginning of every season.
Simply remove the lter from the connector and rinse clean under running water.
FITTING/REPLACING THE BATTERIES.
To t or replace the batteries, press the locking tab fully in to release the front part of
the timer, which can then be detached. Fit 2 new batteries in the holder, observing the correct polarity. As long as the batteries
are replaced within 2 minutes, the current settings will remain stored. Ret the front part of the timer to the back and press,
ensuring that the locking tab clicks into place. Important: always replace the batteries at the beginning of each season!
For Dual Select (cod.): 8488
User manual
User manual
1
1
2
2
3
3
1
1
2
2
3
3
Washing at start
of season
a
a
b
b
b
b
+
AA
+
AA
NEW!
1,5V - AA - Alkaline
click!
Question and Answer IconNeed help?

Do you have a question about the claber Dual Select 8488 and is the answer not in the manual?

Summary

Cleaning and Battery Management

Cleaning the Filter

Procedure for inspecting and rinsing the timer's wire mesh filter.

Fitting and Replacing Batteries

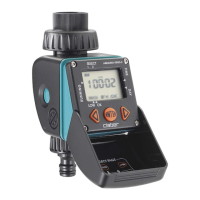
Instructions for fitting or replacing the timer's batteries while retaining settings.

Installation and Programming

Timer Installation

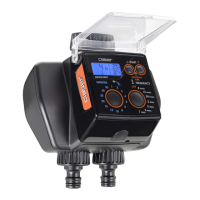
Steps to connect the timer to a cold water tap and watering lines.

Watering Programme Selection

Guide to setting watering time and frequency using the display buttons.

Immediate Start

How to initiate an immediate watering cycle after programming.

Delayed Start

Procedure for setting a delayed start for the automatic watering cycle.

Manual Operation and System Control

Manual Watering

How to manually start and stop watering for a set duration.

Resetting the Timer

Restoring the timer to its factory settings by pressing specific buttons.

Switching Off the Timer

Method to turn off the timer, typically for storage or inactivity.

Sensor Integration and Seasonal Protection

Wired Rain Sensor Installation

Connecting a wired rain sensor to the timer for automatic suspension.

RF Rain Sensor Installation

Installing the RF rain sensor interface for wireless rain detection.

Winter Protection

Steps to disconnect and store the timer safely during winter.

Overview

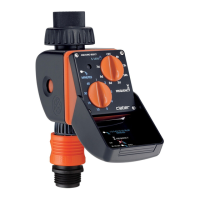
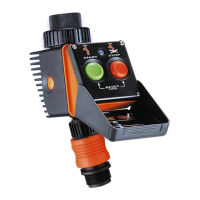
The Claber Dual Select is an electronic water timer designed for automated watering systems, offering a range of features for efficient and flexible garden irrigation.

Function Description:

The Dual Select timer is a sophisticated device that connects to a cold water tap to control two independent watering lines. It automates the watering process based on user-defined schedules, allowing for both immediate and delayed starts, as well as manual watering. The timer can be integrated with a rain sensor (wired or RF) to automatically suspend watering during rainfall, conserving water and preventing overwatering. Its primary function is to provide reliable and customizable irrigation for gardens, terraces, or other outdoor spaces.

Important Technical Specifications:

  • Power Source: The timer operates on 2 x 1.5V AA alkaline batteries. These batteries are crucial for the device's operation, and it's recommended to replace them at the beginning of every season.
  • Tap Connection: Designed to fit a 3/4" male threaded cold water tap. Adapters can be used if the tap thread differs. The clamp collar should be tightened by hand only, avoiding wrenches or other tools.
  • Watering Lines: The "Dual Select" name indicates its ability to manage two separate watering lines (Line A and Line B) independently.
  • Watering Duration: Selectable watering times range from 1 minute up to 90 minutes.
  • Watering Frequency: Customizable intervals include every 8, 12, or 24 hours, or every 2, 3, 4, 5, or 7 days.
  • Rain Sensor Compatibility: Supports both wired (Claber cod. 90915) and RF (Claber cod. 90831 with interface cod. 8480) rain sensors. The rain sensor suspends watering when rainwater exceeds 5 mm.
  • Filter: Equipped with a fine mesh filter to prevent impurities from entering the system. This filter should be inspected periodically and washed at the beginning of every season.

Usage Features:

  • Display and Buttons: The timer features a clear display and multiple buttons ("M" for minutes/duration, "F" for frequency, "A-START" for line A, "B-START" for line B) for easy programming and interaction. Pressing any button lights up the display.
  • Programming Watering Schedule:
    • Setting Watering Time: Press the "M" button repeatedly until the desired watering duration (e.g., 5 minutes) appears in display field "D".
    • Setting Watering Frequency: Press the "F" button repeatedly until the desired interval (e.g., 24 hours) appears in display field "E".
    • Immediate Start: Within 10 seconds of setting the program, press "A-START" (for line A) or "B-START" (for line B) once. The "0 h" message will blink, and the cycle will begin immediately. The display will show the "watering in progress" symbol, remaining time, and the active line (A or B).
    • Delayed Start: Within 10 seconds of setting the program, press "A-START" or "B-START" repeatedly until the desired delay (between 1 and 23 hours) appears in display field "C". The delay will blink, and then the countdown to the automatic start will begin, shown above the "watering in progress" symbol.
  • Manual Watering:
    • To initiate manual watering, simultaneously press and hold "A-START" and "B-START" for at least 3 seconds. The display will show "OFF" blinking.
    • Press "A-START" to activate line A for a fixed duration of 5 minutes. The "watering in progress" symbol will confirm activation.
    • To stop manual watering before 5 minutes, press "A-START" again.
    • The same procedure applies to line B using the "B-START" button.
    • To exit manual mode, ensure both valves are OFF, then press and hold "A-START" and "B-START" simultaneously for at least 3 seconds.
  • Changing Program: To modify an existing watering program, simply repeat the programming procedure (setting duration and frequency). The new settings will override the previous ones.
  • Rain Sensor Integration:
    • Installation: Remove the protective jumper from the rain sensor contacts.
    • Wired Sensor: Connect the sensor lead's connector, ensuring the cable enters through the slot at the rear of the housing.
    • RF Sensor: Install the RF Rain Sensor Interface and route the wire antenna through the clips.
    • If a rain sensor is not used, the jumper must remain in place.
  • Switching Off the Timer: To turn off the timer (e.g., for winter storage), press the "F" button repeatedly until "OFF" appears, then press "A-START" (and repeat for line B if necessary).

Maintenance Features:

  • Battery Replacement: The timer indicates when batteries are low. To replace them, open the battery compartment, remove the old batteries, and insert two new 1.5V AA alkaline batteries, observing polarity. It's recommended to replace batteries at the beginning of each season.
  • Filter Cleaning: Periodically inspect and wash the fine mesh filter to remove any impurities. This should be done at the beginning of every season.
  • Resetting to Factory Settings: To restore the timer to its original factory settings, simultaneously press and hold the "A-START" and "B-START" buttons for at least 10 seconds.
  • Winter Protection: Before winter or the end of the watering season, disconnect the timer from the tap, remove the batteries, and store the device indoors in a frost-free and dry place. This protects the timer from damage and ensures its longevity.

claber Dual Select 8488 Specifications

General IconGeneral
Brandclaber
ModelDual Select 8488
CategoryLawn and Garden Equipment
LanguageEnglish

Related product manuals