EasyManua.ls Logo

claber Oasis 8053 - User Manual

claber Oasis 8053
7 pages
Print Icon
To Next Page IconTo Next Page
Loading...
Oasis
Oasis
Page 1
Position. Oasis® must be installed in closed environments, protected from atmospheric agents and poor weather conditions. To
prevent the water in the internal tank from overheating, position Oasis® in a shaded and cool area, away from windows or glass parti-
tions and in any case, away from direct sunlight.
Once the installation position has been selected, lift Oasis® holding it at the bottom with both hands and place it on a unit or a shelf,
at a height of approximately 70-80 cm from the ground: the unit or the shelf must be stable, level and be able to support the weight
of Oasis® when full of water (approximately 30 kg). Also, make sure that Oasis® is at least 50 cm from the edge of the tallest pot.
Position. Position the plant pots on the oor near the unit where Oasis® is positioned.
Remember to place a pot saucer below the plants to collect any excess water.
Plant the plastic stakes provided in the soil: each stake will correspond to a dripper (the maximum number of
drippers which can be used with Oasis® is 20). Useful suggestions: place the stakes close to the stems of the
plants; use one or more stakes per pot, depending on the pot size and individual plants' water requirements.
For Oasis (cod.): 8053
60
120
ml
30
40
20 DAYS
10 DAYS
OFF
40 DAYS
30 DAYS
70 - 80 cm (MIN)
50 cm (MIN)
User manual
User manual
1
1
2
2
1
1
2
2
60
120
ml
30
40
20 DAYS
10 DAYS
OFF
40 DAYS
30 DAYS
Question and Answer IconNeed help?

Do you have a question about the claber Oasis 8053 and is the answer not in the manual?

Summary

Positioning and Initial Setup

Optimal Location and Height

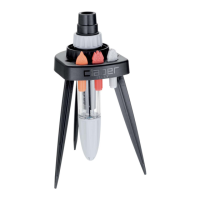
Position Oasis® in a shaded, cool area away from direct sunlight and place at 70-80 cm height.

Plant Pot Placement

Place pots near the unit, use saucers, and insert stakes close to plant stems.

Battery Installation and Connection

Fitting the Battery

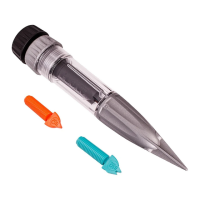
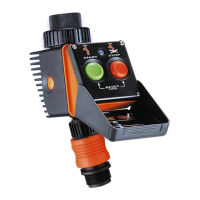
Install a 9V battery, ensuring correct polarity, and check the charge via the LED indicator.

Hose and Dripper Connection

Connect hoses to the tank panel and insert into stakes, ensuring no kinks.

Circuit Assembly and Filling

Connecting Drippers

Cut distribution hose and attach drippers, ensuring outlet faces downwards.

Water Tank Filling

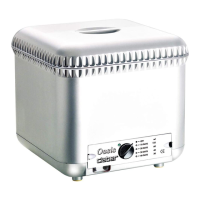
Set selector to OFF, refill tank with 25 litres water; add fertilizers to soil, not tank.

Watering Programme Selection

Understanding Programmes

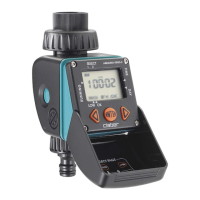
Oasis offers 4 programmes for 10, 20, 30, or 40 days autonomy with different water distribution.

Setting the Programme

Select desired programme by moving the selector switch from OFF to the chosen day setting.

System Operation and Cleaning

Venting Air from Circuit

Expel air by disconnecting hose, sealing ends, and allowing water flow before reconnecting.

Filter and Dripper Maintenance

Clean the filter by rinsing under water. Clean drippers by separating and rinsing their components.

End of Use Cleaning and Storage

Draining the System

Set switch to OFF, disconnect hoses, blow water out into a container.

Emptying and Storing the Unit

Remove cover, lift unit, empty into sink. Store parts in the empty tank for convenience.

Ongoing Maintenance

Filter and Battery Checks

Check filter for impurities and remove the battery before long-term storage.

Drying and Final Storage

Dry unit inside/outside, reattach cover, and store parts in the tank.

claber Oasis 8053 Specifications

General IconGeneral
Brandclaber
ModelOasis 8053
CategoryLawn and Garden Equipment
LanguageEnglish

Related product manuals