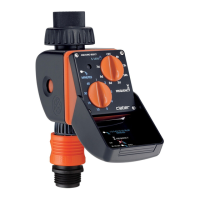
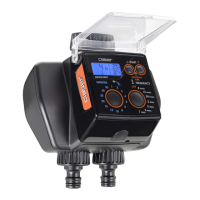
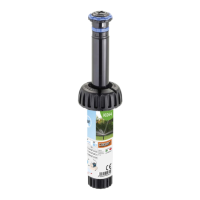
The Claber Hydro 4 is a water timer designed for automatic irrigation systems, capable of managing two independent watering programs (A and B) across up to four separate lines. It is suitable for outdoor installation, either buried at ground level or resting on the surface, ensuring the cover opening is clear for easy programming.
Function Description:
The Hydro 4 allows users to set up comprehensive watering schedules. Each program (A or B) can be configured to start watering on any day of the week (Weekly Schedule), up to four times a day (Start Time), with a maximum run time of 60 minutes for each line (Run Time). This flexibility enables tailored irrigation based on specific needs, such as different watering requirements for various plants or seasonal adjustments. For instance, Program A could be set for summer's maximum watering, while Program B handles spring's lower requirements. The device also offers a "setting to OFF" feature, which temporarily stops watering without losing the programmed settings.
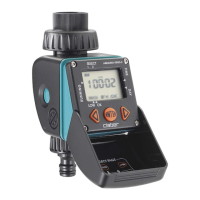
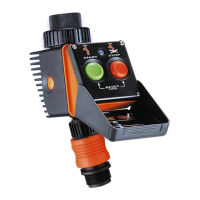
The device features a user-friendly keypad with three keys for navigation and parameter editing. The display provides clear feedback on programmed start times, battery level, the line being programmed, active programs (A, B, both, or neither), test/manual watering page, current time/run time/start time, watering in progress indicator, and the day of the week for scheduling.
Important Technical Specifications:
- Battery: Requires two AAA (LR03) 1.5V Alkaline batteries. These should be replaced at the start of each season and are sufficient for at least the entire irrigation period.
- Lines: Manages up to 4 independent watering lines (1-2-3-4).
- Run Time: Maximum 60 minutes per line.
- Start Times: Up to 4 start times per day for each program.
- Rain Sensor RF Compatibility: The device can be integrated with a Rain Sensor RF, which, when activated, can interrupt or modify watering programs based on rainfall. The display indicates the sensor's status (EMPTY, FULL, or active/flashing if no information has been received for over 24 hours).
Usage Features:
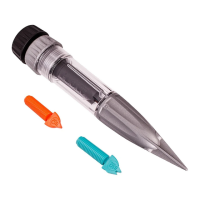
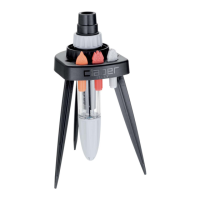
- Installation: The valve box can be installed below ground or on the surface. If buried, it should not be placed in areas with frequent foot traffic or mechanical passage (e.g., ride-on lawn mowers). Hydraulic connections are made using specific fittings for different pipe diameters.
- Battery Installation/Replacement: Involves unscrewing the valve box cover, removing the plastic cover on the water timer, taking out the water timer, unscrewing the battery compartment plug, replacing batteries (observing polarity), and reassembling.
- Programming Interface: The keypad allows scrolling through different programming pages (Clock, Run Time prog. A/B, Start Time prog. A/B, Weekly Schedule, Rain Sensor, Manual Test). The "EDITING" key enables modification of displayed parameters.
- Setting Current Day and Time: After battery installation, the display shows the default time (12:00) and Sunday. Users can adjust the time and day using the navigation keys, with a quick-scroll feature for holding down the keys.
- Setting Run Time: Users can set the watering duration for each line within programs A and B. If a line is not to be used in a cycle, its run time can be set to OFF.
- Setting Start Times: Up to four daily start times can be set for each program.
- Setting Weekly Schedule: Users select the specific days of the week on which programs A, B, or both should run.
- Test/Manual Watering: From the TEST page, users can manually activate specific valves for a set duration (default 5 minutes, adjustable). The display shows the remaining manual watering time. Manual watering can be stopped prematurely.
- Enabling/Disabling Programs: Programs A and B can be activated, deactivated, or set to OFF. This feature helps manage seasonal watering needs or simplify programming by hiding unused program pages. Caution is advised if both programs are assigned to the same day, as simultaneous opening of two lines might impact water flow if the system's capacity is insufficient.
- Reset Function: Factory settings can be restored by simultaneously pressing and holding two specific keys until "12:00" appears on the display. This requires complete reprogramming afterward.
Maintenance Features:
- Cleaning: The outside of the valve box and control module should be cleaned with a soft cloth dampened with water or a mild detergent. Abrasive pads, scourers, or acid detergents should not be used.
- Winterization/Inactivity: During winter or long periods of inactivity, the tap or gate valve upstream should be closed. The control module should be accessed, and all four lines manually opened in sequence to discharge pressure. The water timer should be removed and stored in a dry area where the temperature does not fall below 3°C. Batteries should also be removed.