Battery Charging
The DC output is used for charging 12volt batteries ONLY.
To charge a 12volt battery, proceed as follows.
ENSURE the generator is switched off by turning the engine control switch to the STOP
position
Using suitable cables (not supplied), connect one end of the negative lead to the
negative terminal (BLACK) on the generator, and the other to the negative terminal on
the battery.
Connect one end of the positive lead to the positive terminal (RED) on the generator,
and the other end to the positive on the battery.
Remove the battery caps and check the water level, top up with distilled water if required,
Refit the caps, leaving slightly loose if battery not the sealed type, this will prevent the
build up of dangerous gasses.
T urn the engine control switch to the run position, pull the recoil starter handle to start the
engine.
NOTE:
the charging time depends very much on the state of discharge! e.g. a fully discharged
12v-40Ah auto battery will take approx 5 to 6 hours to fully charge, the charge level can
be checked using a hydrometer to measure the specific gravity in each cell.
Take care when handling auto batteries as they contain acid, always wear protective
gloves and goggles when doing so.
Always refer to specific battery manufacturers instructions before commencing any
maintenance.
Circuit Breakers
Both circuit breakers AC and DC are designed to cut the electric current when the
current exceeds its limit or a malfunction occurs in the connected appliance.
The circuit breaker buttons are transparent with an internal coloured button which will
pop out in the event of an overload etc.
Before attempting to reset the relevant circuit breaker, switch the generator OFF, locate
and rectify the reason for the tripped breaker .
Once the fault is rectified, restart the generator, wait for a couple of seconds, depress the
breaker button, the internal coloured button should remain IN when the breaker button
is released.
If the circuit breaker continually trips out, and the cause cannot be traced, contact your
nearest Clarke dealer for advice, alternatively, have the connected appliance checked
by a qualified electrician.
To determine if the fault lies with the appliance or the generator itself, try connecting
another appliance, if the breaker still trips out, the fault is clearly within the generator, if it
doesnt trip, then the appliance must be at fault.
NOTE:
When charging a large capacity battery, DC output will exceed the limit and the DC
circuit breaker will trip out and cut the current, this is normal, if this does happen, wait a
few minutes, then reset the circuit breaker to resume charging, this applies only when
charging large capacity batteries.
WARNING
Always ensure any appliances are switched OFF/disconnected
before starting the generator.
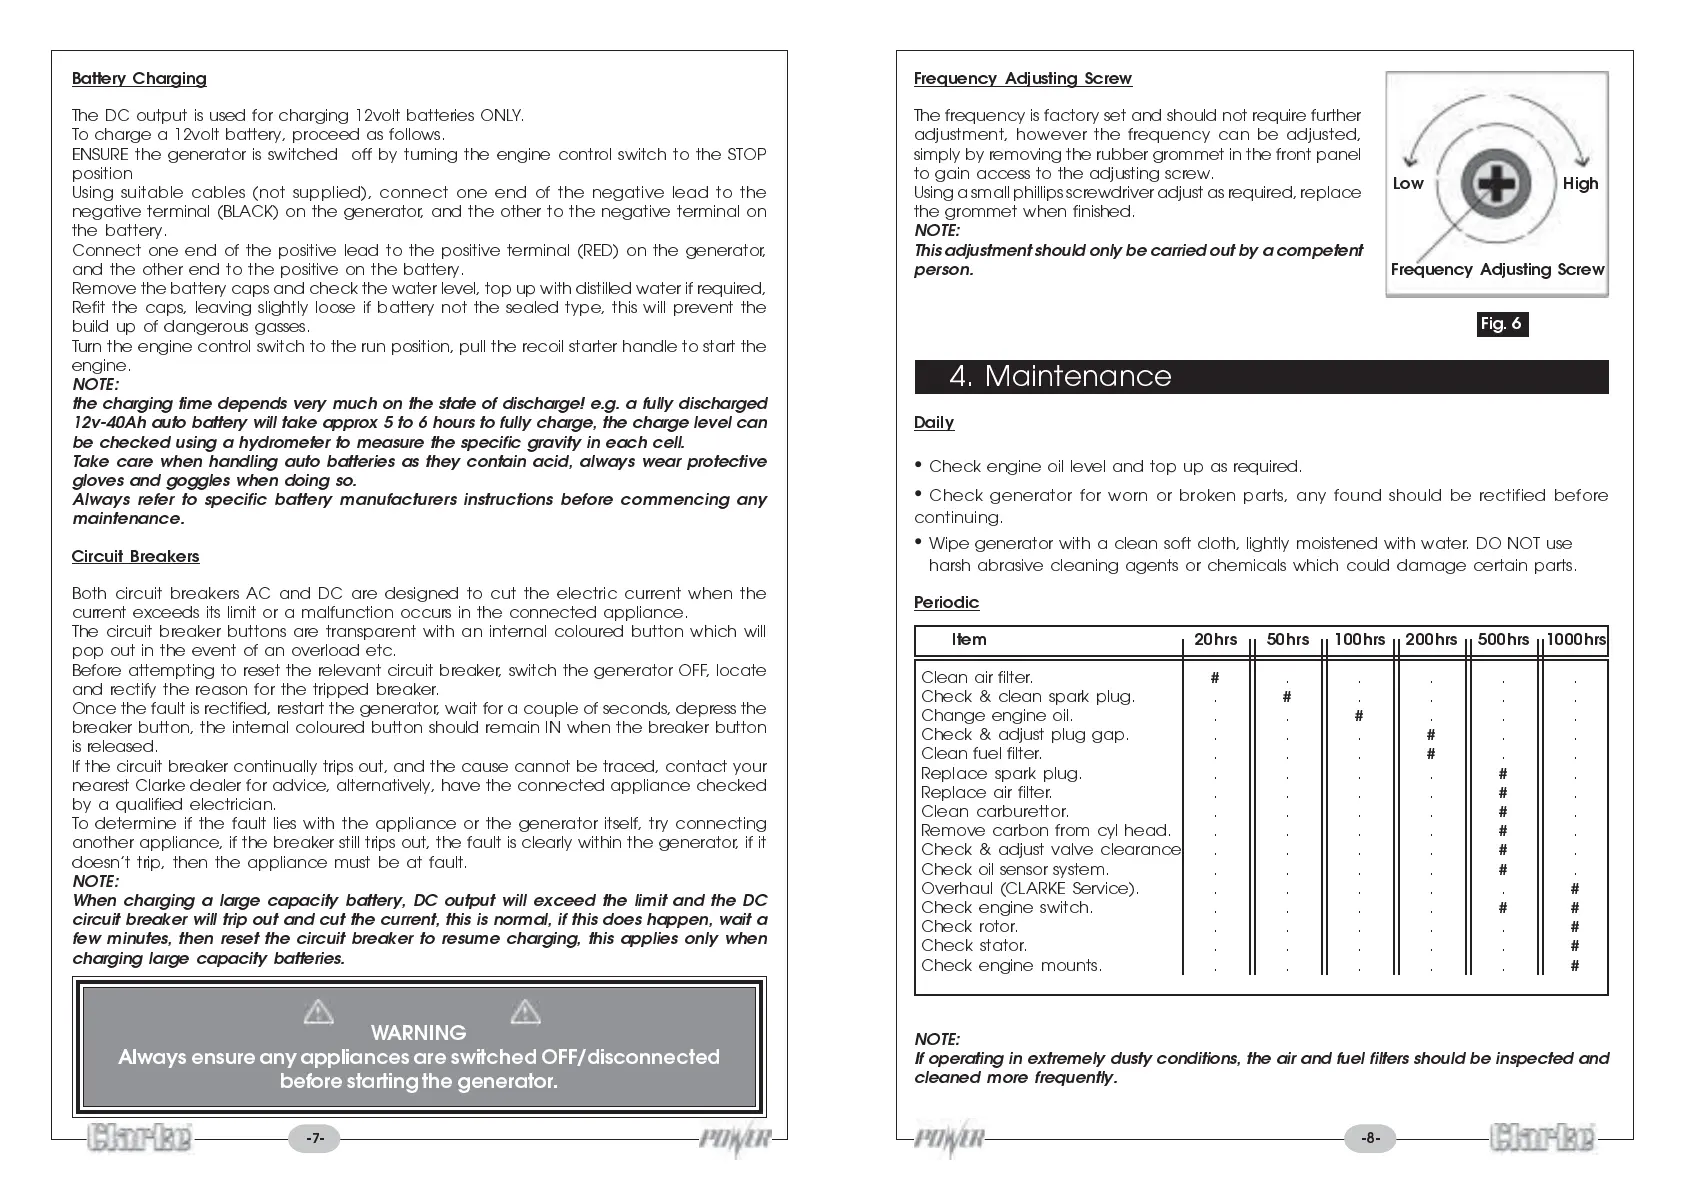
Frequency Adjusting Screw
HighLow
Frequency Adjusting Screw
The frequency is factory set and should not require further
adjustment, however the frequency can be adjusted,
simply by removing the rubber grommet in the front panel
to gain access to the adjusting screw.
Using a small phillips screwdriver adjust as required, replace
the grommet when finished.
NOTE:
This adjustment should only be carried out by a competent
person.
4. Maintenance
Daily
Check engine oil level and top up as required.
Check generator for worn or broken parts, any found should be rectified before
continuing.
Wipe generator with a clean soft cloth, lightly moistened with water. DO NOT use
harsh abrasive cleaning agents or chemicals which could damage certain parts.
Periodic
Item 20hrs 50hrs 100hrs 200hrs 500hrs 1000hrs
Clean air filter.
#
.....
Check & clean spark plug. .
#
....
Change engine oil. . .
#
...
Check & adjust plug gap. . . .
#
..
Clean fuel filter. . . .
#
..
Replace spark plug. ....
#
.
Replace air filter. ....
#
.
Clean carburettor. ....
#
.
Remove carbon from cyl head. ....
#
.
Check & adjust valve clearance. ....
#
.
Check oil sensor system. ....
#
.
Overhaul (CLARKE Service). .....
#
Check engine switch. ....
##
Check rotor. .....
#
Check stator. .....
#
Check engine mounts. .....
#
Fig. 6
NOTE:
If operating in extremely dusty conditions, the air and fuel filters should be inspected and
cleaned more frequently.
-7- -8-
 Loading...