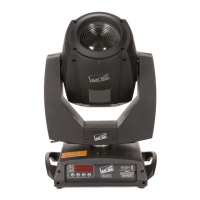
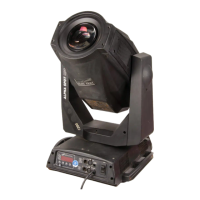
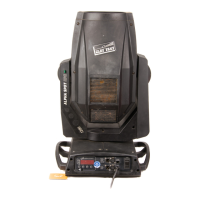
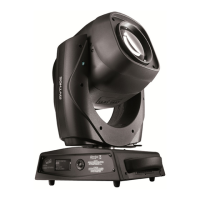
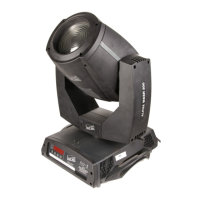
The Claypaky Arolla Profile MP is a sophisticated lighting fixture designed for professional use, offering a range of advanced features for installation, operation, and maintenance. As an "AN OSRAM BUSINESS" product, it emphasizes quality and performance.
Function Description:
The Arolla Profile MP is a moving head projector capable of producing a variety of lighting effects. It can be installed on the floor, on a truss, or on the ceiling or wall, providing flexibility for different event setups. The fixture is controlled via DMX or Art-Net signals, allowing for precise manipulation of its movements and effects. Its primary function is to provide dynamic and high-quality illumination, suitable for concerts, theatrical productions, and other live events. The projector features a comprehensive control panel with a display and user buttons for programming and managing its menu, including setting the DMX address, configuring operating options, accessing information, and performing manual controls and tests.
Important Technical Specifications:
The fixture has physical dimensions of approximately 480 mm (18.89") in height, 412 mm (16.22") in width, and 480 mm (18.90") in depth when measured from the base to the top of the head in one orientation. In another orientation, it measures 593 mm (23.35") in height, 347 mm (13.66") in width, and 360 mm (14.17") in depth from the base. The base itself is approximately 250 mm (9.84") deep.
Power input is rated at 740 VA, protected by a T10A 250V fuse.
Control signal input/output is via 5-pin DMX IN and DMX THRU connectors, and an Ethernet port for Art-Net.
The device uses rotating gobos with specific dimensions: Ø 22.9 mm, a maximum image size of 17 mm, and a thickness of 1.1 mm. It exclusively uses dichroic glass gobos, not metal gobos.
The product contains an internal light collimation system.
It includes a rechargeable battery, which should be disposed of according to regulations at the end of its life.
Usage Features:
- Installation Flexibility: Can be placed on the floor (using rubber feet), mounted on a truss, or attached to a ceiling or wall. When not on the floor, a safety cable (Cod. 105041/003, available on request) must be securely fitted to the support structure and connected to the fixing point at the center of the base.
- Pan and Tilt Mechanism: Features lock and release mechanisms for both Pan (every 90°) and Tilt (every 45°) movements, facilitating safe transport and setup.
- Power Connection: Connects to the mains supply using a standard power cable.
- Control Signal Connection: Utilizes EIA RS-485 compliant cables (2-pole twisted, shielded, 120 Ohm impedance, 22-24 AWG, low capacity) with XLR type 5-pin male/female connectors for DMX. A terminating plug with a 120 Ohm resistance (minimum 1/4 W) between terminals 2 and 3 is required for the last projector in a DMX chain. Wires must not contact each other or the metal casing of connectors; the casing should be connected to the shield braid and pin 1.
- Startup Sequence: Upon switching on, the projector performs a self-resetting of effects, displaying information such as model, firmware version, date, hour, and DMX address.
- Control Panel: Equipped with a display and buttons for comprehensive programming and management. The display operates in "rest status" (showing DMX address) and "setting status." If no key is pressed for about 30 seconds in setting status, it reverts to rest status, canceling unconfirmed changes.
- Display Reversal: The display can be inverted by simultaneously pressing the UP and DOWN keys in rest mode, a setting that is memorized.
- Address Setting: The DMX starting address (1 to 512) can be set via the control panel, even when the projector is switched off, by pressing the RIGHT button to momentarily activate the display.
- Menu Navigation: The control panel buttons (LEFT, RIGHT, UP, DOWN, OK) are used to navigate the menu:
- OK: Confirms values, activates functions, or enters sub-menus.
- DOWN: Decreases values or moves to the next item.
- UP: Increases values or moves to the previous item.
- LEFT: Returns to the top level.
- RIGHT: Enters the successive menu.
- Menu Structure: Includes "Setup" (setting options), "Option" (operating options), "Informations" (counters, software version), "Manual Control" (test and manual functions), "Test" (effect function checks), and "Advanced" (for trained technical personnel).
- Gobo Orientation: Specific instructions and diagrams are provided for correctly orienting coated glass gobos, distinguishing between coated and uncoated sides to ensure proper projection.
Maintenance Features:
- Opening Covers: Instructions are provided for opening the head covers, which involves a 1/4 turn mechanism.
- Periodical Cleaning: Essential for optimal operation and performance. Frequency depends on usage and environment (dust, humidity, salinity).
- General Cleaning: Use a soft cloth with detergent liquid for cleaning glass components (reflectors, lenses, filters).
- CMY/Colour Filters Assembly: Requires careful cleaning to prevent rapid deterioration.
- Annual Service (recommended by a qualified technician):
- General cleaning of internal parts.
- Restoring lubrication of all friction-prone parts with Claypaky-supplied lubricants.
- General visual check of internal components, cabling, and mechanical parts.
- Electrical, photometric, and functional checks, and eventual repairs.
- Effects Module Removal: Detailed steps are provided for extracting effect modules. It is crucial to grasp modules by their support structure, not by delicate details, to prevent damage. Reinsertion follows the reverse order of removal.
- Rotating Gobo Replacement: Instructions for replacing rotating gobos, emphasizing the use of dichroic glass gobos only.
- Battery Removal: Instructions for removing the rechargeable battery, with a reminder for environmentally responsible disposal.
- Troubleshooting Guide: A table of common problems, possible causes, and remedies is included:
- Projector will not switch on: Check mains supply voltage, call authorized technician if electronics are non-operational.
- Defective projection: Call authorized technician if light source is exhausted/defective, or if electronic circuits are faulty.
- Reduced luminosity: Clean lenses (if dust/grease deposited), call authorized technician if lenses are broken.
- Control issues: Replace faulty/disconnected signal transmission cables, check addresses (if incorrect addressing).