CB780E/CB784E RELAY MODULES WITH VALVE PROVING
750-234 17 32-00150—03
Mounting Keyboard Display
Module
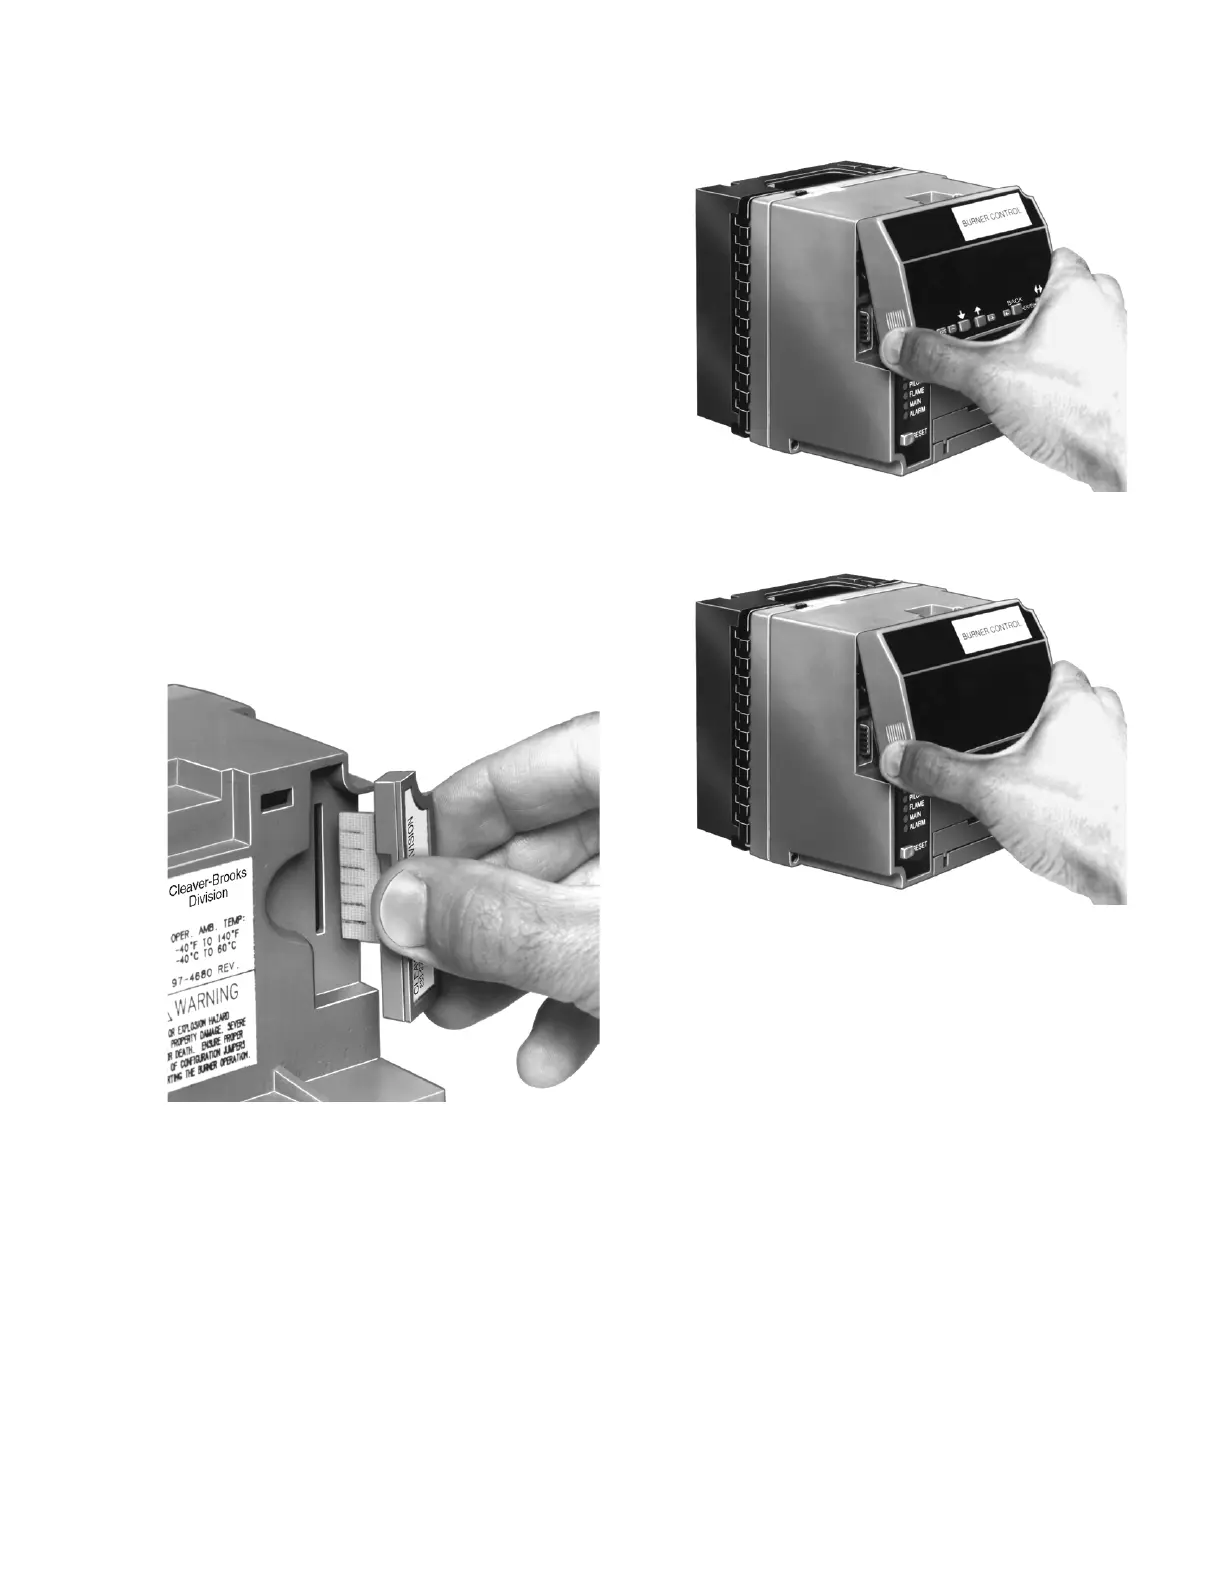
1. Align the two interlocking ears of the Keyboard Dis-
play Module with the two mating slots on the
CB780E/CB784E; see Fig. 16.
2. Insert the two interlocking ears into the two mating
slots and with a hinge action push on the lower cor-
ners of the Keyboard Display Module to secure it to
the CB780E/CB784E.
3. Verify the Keyboard Display Module is firmly in
place.
Mounting Data ControlBus™
Module
1. Align the two interlocking ears with the two mating
slots on the CB780E/CB784E; see Fig. 17.
2. Insert the two interlocking ears into the two mating
slots and push on the lower corners of the DATA
CONTROLBUS MODULE™ to secure it to the
CB780E/CB784E.
3. Be sure the DATA CONTROLBUS MODULE™ is firmly
in place.
Fig. 15. Purge card installation.
Fig. 16. Keyboard Display Module installation.
Fig. 17. Data ControlBus™ mounting.
Remote Mounting of Keyboard
Display Module.
1. The Keyboard Display Module can be mounted
either on the face of a panel door or on other remote
locations; see Fig. 18.
2. When mounting the Keyboard Display Module on
the face of a door panel, closely follow these instruc-
tions:
a. Select the location on the door panel for flush
mounting. Pay attention to the insertion dimen-
sion of the two Keyboard Display Module screws,
two interlocking ears and the two plug-in con-
nectors to allow for sufficient clearance, 1/4 inch
minimum inward from the surface of the door
panel.
b. Use the Keyboard Display Module as a template;
see Fig. 50. Mark the two screw locations, two
interlocking ear locations and two plug-in con-
nector locations. Drill the pilot holes for the
mounting screws. Provide for two holes on the
door panel for the interlocking ears and plug-in
connector holes.
c. Mount the Keyboard Display Module securing
the two no. 4 screws.