4
Step 6
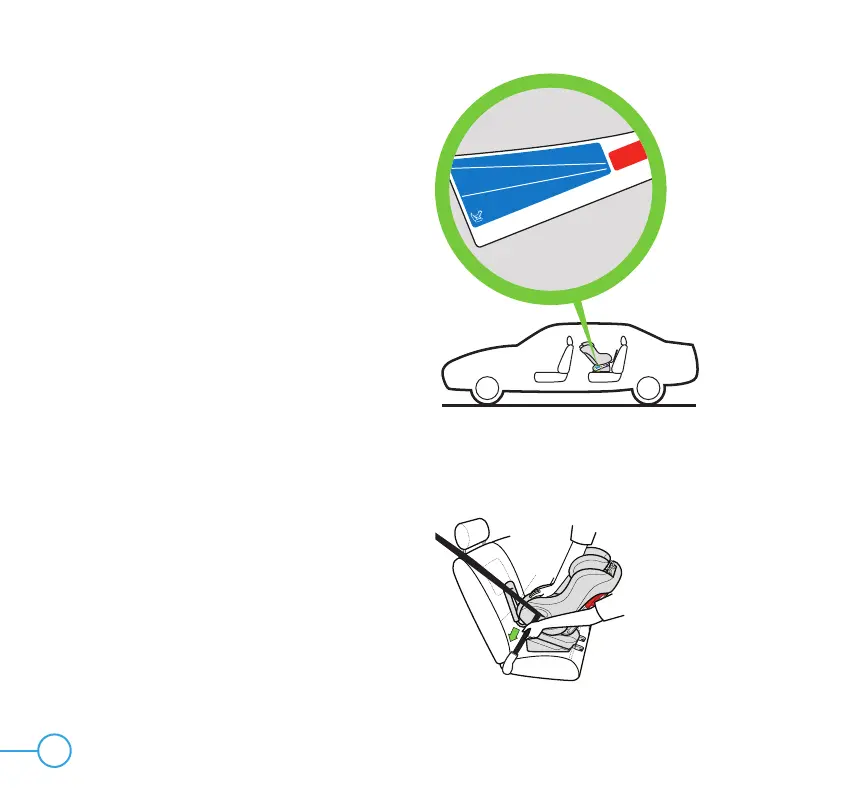
Position the seat so that the Rear-Facing Level
Reference Line appropriate for the child’s
weight is parallel with the ground as shown
in Figure 5.
• If using with an infant under 22 lb
(10 kg), position the seat with the more
reclined Reference Line (top line) parallel
to the ground.
• If using with an older child who is over
10 kg (22 lb), position the seat with the
more upright Reference Line (bottom
line) parallel to the ground.
Step 7
Switch the the lap portion of the lap/shoulder
belt to the automatic locking mode by pulling
the lap portion of the lap/shoulder belt all the
way out by holding the webbing and pulling
upwards, as shown in your vehicle manual.
Step 8
Tighten vehicle belt to secure the car seat
• Press down in center of car seat to
depress the vehicle cushion and pull
down on lap portion of inflatable lap/
shoulder belt to tighten as shown in
Figure 6.
Figure 6
Child seat is properly reclined in Rear-Facing mode when the line
appropriate for the child’s weight is parallel to the ground
USE THIS LINE FOR INFANTS UNDER 22 lbs (10 kg)
USE THIS LINE FOR CHILDREN BETWEEN 22 - 50 lbs (10 - 22.7 kg)
Rear-Facing
1
3
• To Release Rigid LATCH Connectors: Fully extend Connectors, then pull Red Rigid LATCH Release Handles.
2
Forward-Facing Rear-Facing
Child seat is properly reclined in Rear-Facing mode when the line
appropriate for the child’s weight is parallel to the ground
USE THIS LINE FOR INFANTS UNDER 22 lbs (10 kg)
USE THIS LINE FOR CHILDREN BETWEEN 22 - 50 lbs (10 - 22.7 kg)
Rear-Fac ing
1
• To Release Rigid LATCH Connectors: Fully extend Connectors, then pull Red Rigid LATCH Release Handles.
Forwa rd-Facing
Figure 5