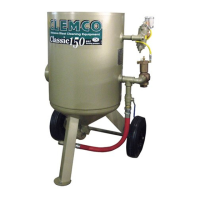
MODELS 1028 & 1042 BLAST MACHINES Page 9
© 2013 CLEMCO INDUSTRIES CORP. www.clemcoindustries.com Manual No. 04124, Rev. K
4.3 Monthly Inspection
4.3.1 With the air off, before blasting, inspect the
following:
Check the pop-up valve’s urethane coating for
cracks and grooves. Replace the pop-up valve at
the first sign of wear. See Section 5.3.
Inspect the rubber pop-up seal, and replace at the
first sign of wear, drying, or cracking. See Section 5.4.
5.0 SERVICE MAINTENANCE
WARNING
Failure to observe the following before
performing any maintenance could cause
serious injury or death from the sudden release
of compressed air.
Depressurize the blast machine.
Lockout and tagout the compressed air
supply.
Bleed the air supply line to the blast
machine.
5.1 Removing damp abrasive from the blast
machine.
5.1.1 To clear a minor blockage caused from damp
abrasive, during operation, rapidly open and close the
choke valve several times.
5.1.2 For more difficult blockages, proceed as follows:
See Section 5.2 to check for obstructions in the metering
valve.
5.1.3 With the blast machine depressurized,
disconnect the blast hose and remove the gasket from
the quick coupling on the machine.
5.1.4 Place the machine so that the outlet is pointed
away from any objects or persons.
WARNING
Place the machine so that the outlet is pointed
away from any objects or persons. Stand clear
of the path of exiting abrasive. It may come out
at high velocity. Impact from exiting abrasive
could cause severe injury.
5.1.5 Close the choke valve and fully open the
abrasive metering valve. Pressurize the machine to
force out any damp abrasive.
5.1.6 When the obstruction has been cleared,
depressurize the machine. Remove the nozzle and
nozzle washer, and reconnect the hose. Open the choke
valve and close the abrasive metering valve. Pressurize
the machine to clear the hose. When the hose is
cleared, depressurize the machine so the nozzle and
nozzle washer can be attached.
WARNING
The threads on the nozzle and nozzle holder
must be inspected each time the nozzle is
secured to the holder. A loose fitting nozzle
may eject under pressure and could cause
severe injury. Check the threads for wear, and
make sure the nozzle holder securely holds the
nozzle. The nozzle washer must also be
inspected for wear. When nozzle washers are
worn, abrasive could erode nozzle threads.
5.1.7 With the hose cleared, start the machine using
procedures for manual blasting per Section 3.3, or
blasting with remote controls per Section 3.4.
5.2 Clearing obstructions in the abrasive
metering valve and blast machine.
5.2.1 If the nature of the obstruction permits emptying
the machine of abrasive, follow the instructions per
Section 3.7.
5.2.2 Turn off the compressed air supply. Lockout and
tagout the air supply, and bleed the air supply line to the
blast machine.
5.2.3 Remove the inspection plate and check the
inside of the machine for obstructions from foreign
objects.
5.2.4 Check the inside of the machine for signs of
moisture. If moisture is present, condensation is in the
compressed air, and must be eliminated.
5.2.5 Make sure the inspection door gasket is in good
condition and that it is correctly in place before bolting
the door onto the machine.
5.2.6 Check to make sure all inspection door and
hoses are secure before starting the compressed air
supply.
5.3. Replacing the Pop-Up Valve, Figure 3
5.3.1 All service on the pop-up valve must be done
with the compressed air off and the air supply locked-out
and tagged-out.
 Loading...