BNP
®
55 SUCTION BLAST CABINET Page 19
© 2019 CLEMCO INDUSTRIES CORP. www.clemcoindustries.com Manual No. 23350, Rev G, 02/19
7.4 View-Window Replacement
WARNING
Do not use plate glass for replacement view
windows. Plate glass shatters on impact and
can cause severe injury. Use only genuine
ZERO
®
laminated replacement glass.
7.4.1 Remove the two window-frame nuts located on
the upper edge of the window frame and swing the
window frame open. If the frame is to remain open, for
cleaning or other reasons, remove it, per Section 7.6.
7.4.2 Remove the old window.
7.4.3 Inspect the window-frame gaskets on both the
window frame and on the cabinet. If either gasket is
damaged, replace it, per Section 7.5.
7.4.4 Install a view-window cover lens, per Section
7.3.
7.4.5 Set the new window (cover lens down) squarely
over the window opening, making sure that all edges of
the window are centered and overlapping the window
gasket, and that the window is resting on the lower
support tabs.
7.4.6 Swing the window frame into place and tighten
the frame nuts.
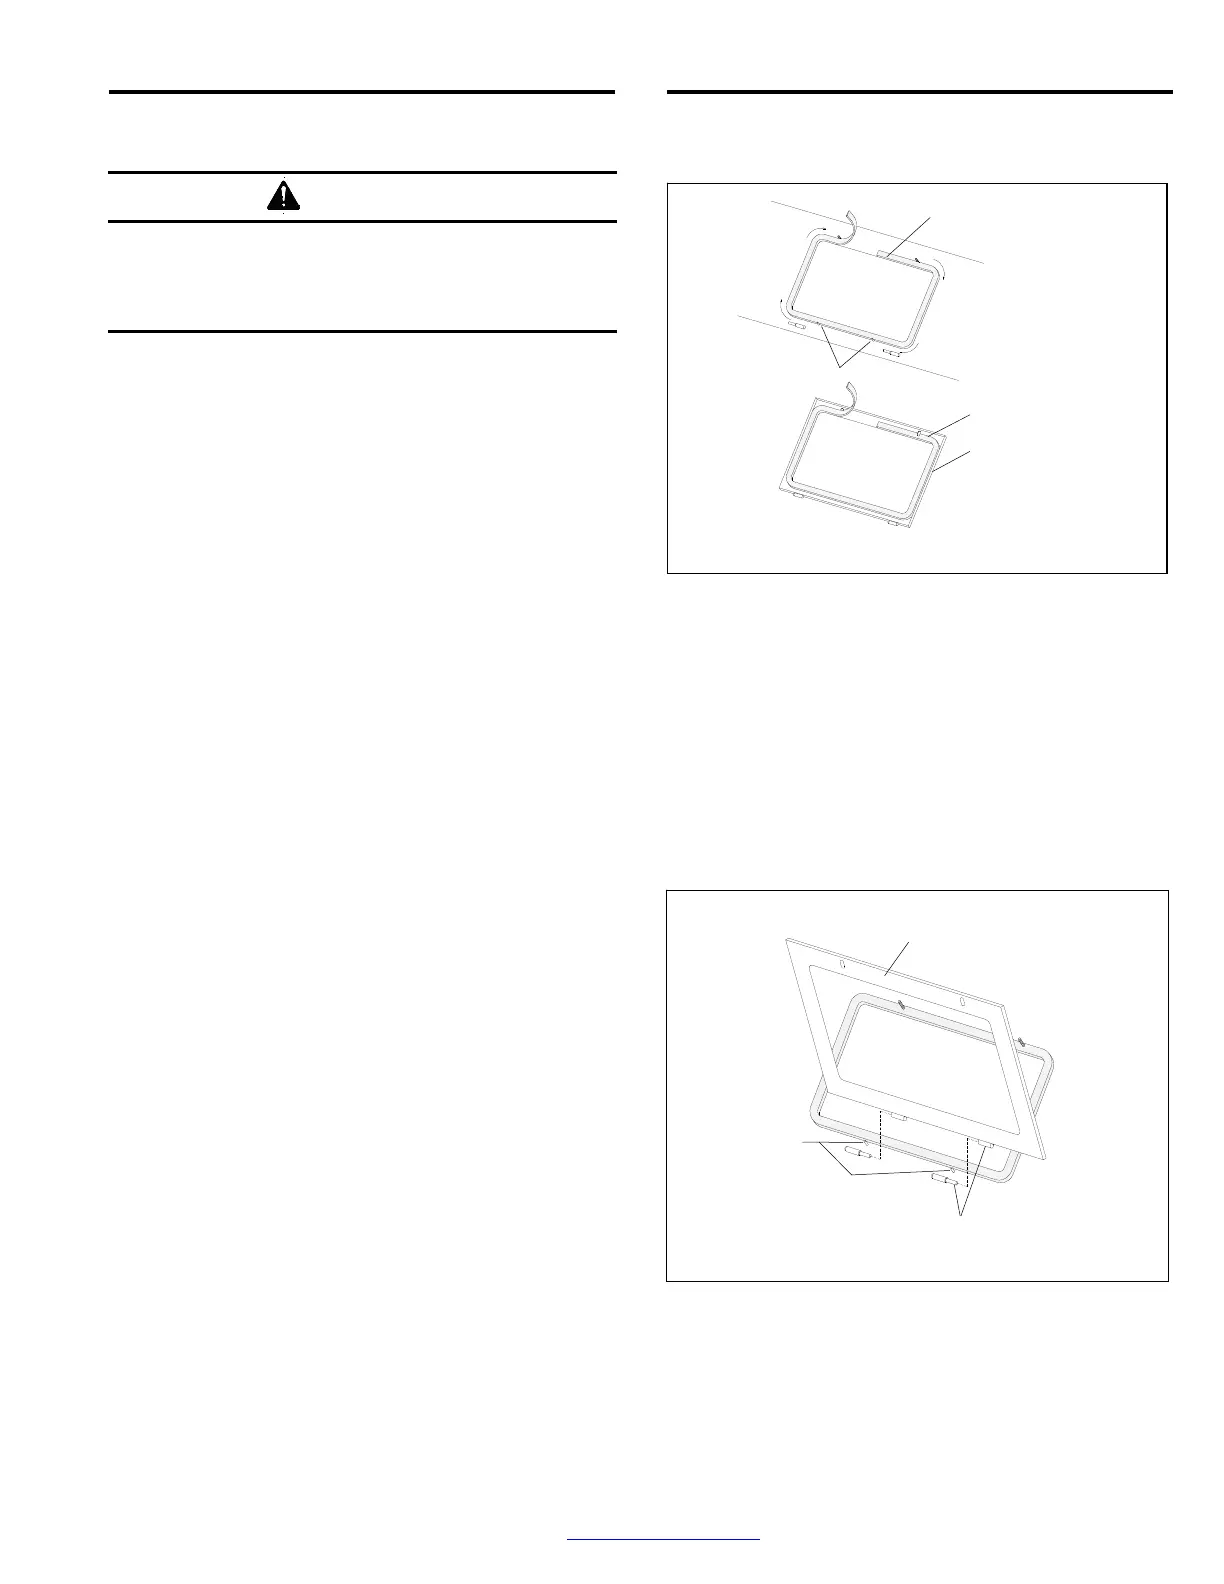
7.5 Window-Gasket Replacement ‒ Figure 22
7.5.1 Inspect the gaskets when changing the view
window. Replace the window-frame gasket and cabinet-
window opening gasket at the first sign of media leakage
around the view window, or if gaskets are worn or
otherwise damaged.
7.5.2 Remove the window and window frame, per
Section 7.6.
7.5.3 Remove all the old gasket material and clean
the surfaces of the cabinet and window frame.
7.5.4 Peel a short section of adhesive backing from
the 5/16-thick strip gasket and adhere the gasket to the
center of the top edge of the window opening, as shown
in Figure 22. Peel additional backing as needed and
work the strip around the radius of each corner, pressing
it firmly to bond. Trim the gasket to fit and compress the
ends to seal.
7.5.5 Using 5/32-thick strip gasket, repeat the
process on the underside of the window frame.
Figure 22
7.5.6 Trim around the window-frame bolt slots as
needed.
7.6 Window-Frame Removal ‒ Figure 23
7.6.1 Remove the two window-frame nuts located on
the upper edge of the window frame and swing the
window frame open.
7.6.2 Remove the window to prevent breakage.
Figure 23
7.6.3 Pivot the window frame up or down until tension
is off the frame hinges.
7.6.4 To remove, slide the frame to the right. The
hinges separate, as shown in Figure 23.
Cabinet Front
5/16 x 3/4 Gasket
Pivot the frame up or down
until tension is removed
from the hinges.
Support Tabs
Support Tabs
Window Frame
5/32 x 3/4 Gasket
Slide the frame to the right
to separate the hinges.