EasyManua.ls Logo

Clevo P750TM1 User Manual

Clevo P750TM1
2 pages
To Next Page IconTo Next Page
Page #1 background imageLoading...
Page #1 background image
1. What you get:
3. Tools and Parts you need before you start: (not included in GPU upgrade kit)
2. What you get:
4. Extras: (can be bought separately)
A. RTX20XX MXM3.1 GPU Module (X-bracket &
proper vBIOS Installed)
B. GPU Power Cable | P/N: 6-43-P7750-210-1
Length: 110mm / 4.3in
C. Screws (2pcs) Silver | P/N: 6-35-B2125-4R2
D. Thermal Pad28.12x4.5x3.6mm
Blue Protective Film
E. Thermal Pad 47x34.5x3.6mm
Over Capacitors Yellow Protective film
F. Thermal Paste
G. Updated Standard BIOS/EC (via Email) if required
H. P750TM1 Heatsink | P/N: 6-31-P75F3-202
Thermal Pads (attached)
I. Screws (4 pcs) Black | P/N: 6-35-82125-6RA
Precision Slotted and Phillips
Screwdriver
ESD Strap
ESD Mat
Thermal Paste
RTX20XX CPU+GPU
Heatsink [P750TM1]
WIHA 261/PH1x60
P/N:6-31-P75F3-202
P750TM1 RTX 2080/2070/2060 GPU UPGRADE KIT 5/28/19
P750TM1 RTX 2080/2070/2060 HEATSINK UPGRADE KIT 5/28/19
Question and Answer IconNeed help?

Do you have a question about the Clevo P750TM1 and is the answer not in the manual?

Clevo P750TM1 Specifications

General IconGeneral
BrandClevo
ModelP750TM1
CategoryLaptop
LanguageEnglish

Summary

GPU Upgrade Kit Components

RTX20XX MXM3.1 GPU Module

GPU module with X-bracket and VBIOS installed.

GPU Power Cable

Power cable for GPU, 110mm/4.3in length.

Mounting Screws and Thermal Materials

Includes silver screws, thermal pads, and thermal paste.

Updated Standard BIOS/EC

BIOS/EC update, delivered via email if required.

Heatsink Upgrade Kit Components

P750TM1 Heatsink Unit

Heatsink unit with attached thermal pads.

Heatsink Mounting Screws

Black screws for mounting the heatsink unit.

Required Tools and Parts

Screwdriver and ESD Protection

Precision screwdriver and ESD strap/mat for safe handling.

Additional Thermal Paste

Thermal paste for heat transfer.

Optional Extras

BIOS and Driver Storage

USB drive for drivers and BIOS.

Additional Thermal Management

Extra thermal pads and thermal compound.

Mounting Brackets and Power Adapters

Includes X-bracket, AC adapters, and extra screws.

Installation Steps Overview

Initial Laptop Preparation

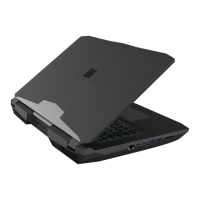
Unlock and remove the battery and bottom case.

Component Removal and Preparation

Remove existing heatsink, GPU, and prepare thermal pads.

New Component Installation

Install new GPU, thermal pads, thermal paste, and heatsink.

Final Reassembly

Reinstall heatsink screws, bottom case, and battery.

Related product manuals