997-060180-1
1
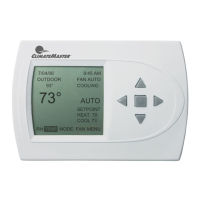
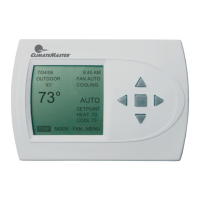
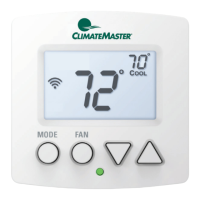
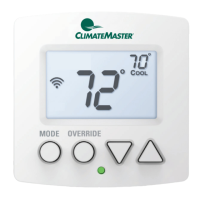
Review PROGRAM and HOLD sections to know effects of changing the set point
3
PROGRAM MENU
SAVE
MONDAY
TUESDAY
WEDNESDAY
THURSDAY
FRIDAY
SATURDAY
SUNDAY
WEEKDAYS
WEEKENDS
COPY
SELECT OPTION ∇∆
⊲ PREVIOUS
EVERY DAY
EVERY DAY
WAKE HEAT COOL FAN
70 78 AUTO
LEAVE
8:00A 62 85 AUTO
RETURN
5:00P 70 78 AUTO
SLEEP
10:00P 62 82 AUTO
SAVE
⊲ PREVIOUS
6:00A
SECURITY LOCKOUT
TEMP ADJUST ONLY
SELECT OPTION ∇∆
⊲ PREVIOUS
TOTAL KEYPAD LOCKOUT
SECURITY LOCKOUT
ENTER PIN NUMBER
0 0 0 0
CHANGE NUMBER ∇∆
⊲ PREVIOUS
3. Use the up and down arrows ▲▼ to increase or decrease the contrast
level.
4. Press the center button to accept the new setting.
BACKLIGHT ON TIME
This thermostat has a two color backlight feature. Anytime a button is
pressed, the blue backlight stays on for a certain amount of time. A red
backlight is visible if you are selecting Emergency Heat mode. You can
adjust the amount of time the backlight stays on in the menu options.
1. From the Main Menu, scroll to MENU and press the center button ■ on
the keypad.
2. Select SETINGS → SCREEN SETTINGS →BACKLIGHT ON TIME
3. You can change the backlight on time by using to up and down arrows
▲▼. 30, 60, 90, 120, and ON (all the time) are your choices. Press the
center button to save the new backlight on time.
II. PROGRAMMING YOUR THERMOSTAT (programmable
models only)
PROGRAMMING A DAY OR A SERIES OF DAYS
After selecting the programming screen, you have the option of
programming everyday, weekdays, weekends, or individual days. Once
you’ve selected a certain day to program, a screen appears that allows you
to set the time, heat setting, cool setting, and fan operation for each event.
1. From the Main Menu, scroll to MENU and press the center button ■ on
the keypad.
2. Select PROGRAM
3. You can program each day differently
by going through each day and
personalizing them. Or, you can program
everyday the same by scrolling to
EVERYDAY. Or, you can program
the weekdays or weekends the same by
selecting the appropriate menu item.
4. To program everyday the same, select
EVERYDAY and then press the center
button ■.
5. Using the right arrow button ►, highlight
the WAKE time, and change to desired
time by using the up and down arrow ▲▼
buttons. Move to the next entry by using
the right arrow button ►. To change the
HEAT set point, use the up and down
arrows. Continue this process until all settings are to your liking.
6. To save these setting, scroll to SAVE, and press the center button ■.
COPYING A PROGRAM FROM ONE DAY TO ANOTHER
In the PROGRAM menu, there is an option to COPY. The option can
be used to copy the program from one day to another day. After COPY
is selected, the thermostat will prompt you for which day to copy from.
Next, it will prompt you for which day to copy the program to. After
these selections, it will then confirm what is being copied to where. At
this point you have the option of canceling the copy process, by pressing
◄ to return to the copy menu, or saving what you have by pressing the
center button ■. The SAVED screen will appear returning you to the
copy menu. Pressing ◄ will return you to the PROGRAM menu.
Pressing ◄ again will return you to the MAIN MENU.
V. ADVANCED SETTINGS
SECURITY LOCKOUT
This thermostat has the option to set security
features to lockout everything but the adjustment
of the temperature or a total keypad lockout.
1. From the Main Menu, scroll to MENU and
press the center button ■ on the keypad.
2. Select SECURITY LOCKOUT.
3. Select whether you want to lockout everything
but TEMP ADJUST ONLY or TOTAL
KEYPAD LOCKOUT.
4. Either selection will bring you to the Enter Pin
Number screen.
5. Using the up and down arrows ▲▼, select a
pin number to lock out the thermostat. The
right arrow ► moves you to the next pin digit.
6. Once you’ve entered the 4-digit pin number, press the center button ■ to
save the pin. The screen will display LOCKED and return to the main
Screen.
7. Once you return to the Main Screen, in the upper left of the screen will
alternate between LOCKED and the date and time.
8. If you selected TEMP ADJUST ONLY, you will only be able to adjust
the set point temperature. Any other operation will require the pin
number to unlock the thermostat.
9. Once unlocked, you’ll have to set a pin number again to lockout the
thermostat again.
OFFSETS
1. MENU → SETTINGS → OFFSETS
TEMPERATURE OFFSETS
This option allows calibration (or deliberate miscalibration) of the room
temperature sensor(s). There are various reasons why the displayed
temperature would be adjusted to a higher or lower value. NOTE: Do
not adjust for 30 minutes after installation because board may be heated
by handling. The selected number is the number of degrees, plus or
minus, which will be added to actual temperature. The numbers can
range between -5˚ and +5˚. Default values are set to 0˚ offset.
Temperature Offset
Remote Indoor Offset (if sensor is attached)
Outdoor Offset (if sensor is attached)
HUMIDITY OFFSET
This option allows calibration of the humidity sensor. Adjustments can
range between -10% and +10%. Default is 0% offset.
ANTICIPATOR
This adjustment controls the sensitivity and cycle rate of the
thermostat. Higher numbers decrease the cycle rate. Lower numbers
increase the cycle rate. Default value is 4, and the range is 0-9.
DIFFERENTIAL
This adjustment will vary the number of degrees, from the set point,
before a call for heating or cooling is made. Adjustments can range
between 1˚ and 4˚ differential. Default is 2˚ offset. (If your set point is
70˚F in heating, your thermostat will not call for heat until the
temperature is 68˚F, with a 2˚ differential).
CYCLES PER HOUR
This feature will not allow more than the specified number of equipment
cycles per hour. Values can range from 4 or 6 (or 1 cycle every 15 minutes
(default) or 1 cycle every 10 minutes, if 6 is set). Factory default setting is 4.
This default selection will provide optimum performance in nearly all
installations.
MENU → SETTINGS → CYCLES PER HOUR
AUTO CHANGEOVER
With auto changeover, the thermostat automatically switches itself from
heating to cooling, or vise versa, based on the setpoints. When setting up the
thermostat you have to enter both a cooling setpoint and a heating setpoint.
The thermostat will also prevent the user from setting the cooling setpoint
lower than the heating setpoint. Mode is set to AUTO for this operation to
work.
MENU → SETTINGS → AUTO CHANGEOVER
Auto Changeover Time - This setting sets the minimum off time before the
thermostat can change from one mode to another.
Default is 60 minutes. Range is from 0-120 minutes
in 15 minute increments.
Auto or Manual Change – Default is AUTO. If MANUAL is chosen, you will
need to change from heating to cooling or vise versa.
When MANUAL is set, AUTO is removed from the
MODE screen as a choice.
PROGRAM SETTINGS
1. MENU → SETTINGS → PROGRAM SETTINGS
SMART RECOVERY
Smart recovery is a feature of your thermostat designed to save energy by
gradually adjusting temperatures. When it’s time for a programmed

 Loading...