36
Notions on refrigerant piping connection
6.1.4 Connect the pipes
When connecting the refrigerant pipes, be careful not to
use excessive torque or perform other operations that
may damage them. First connect the low pressure pipe
and then the high pressure pipe.
l
WARNING
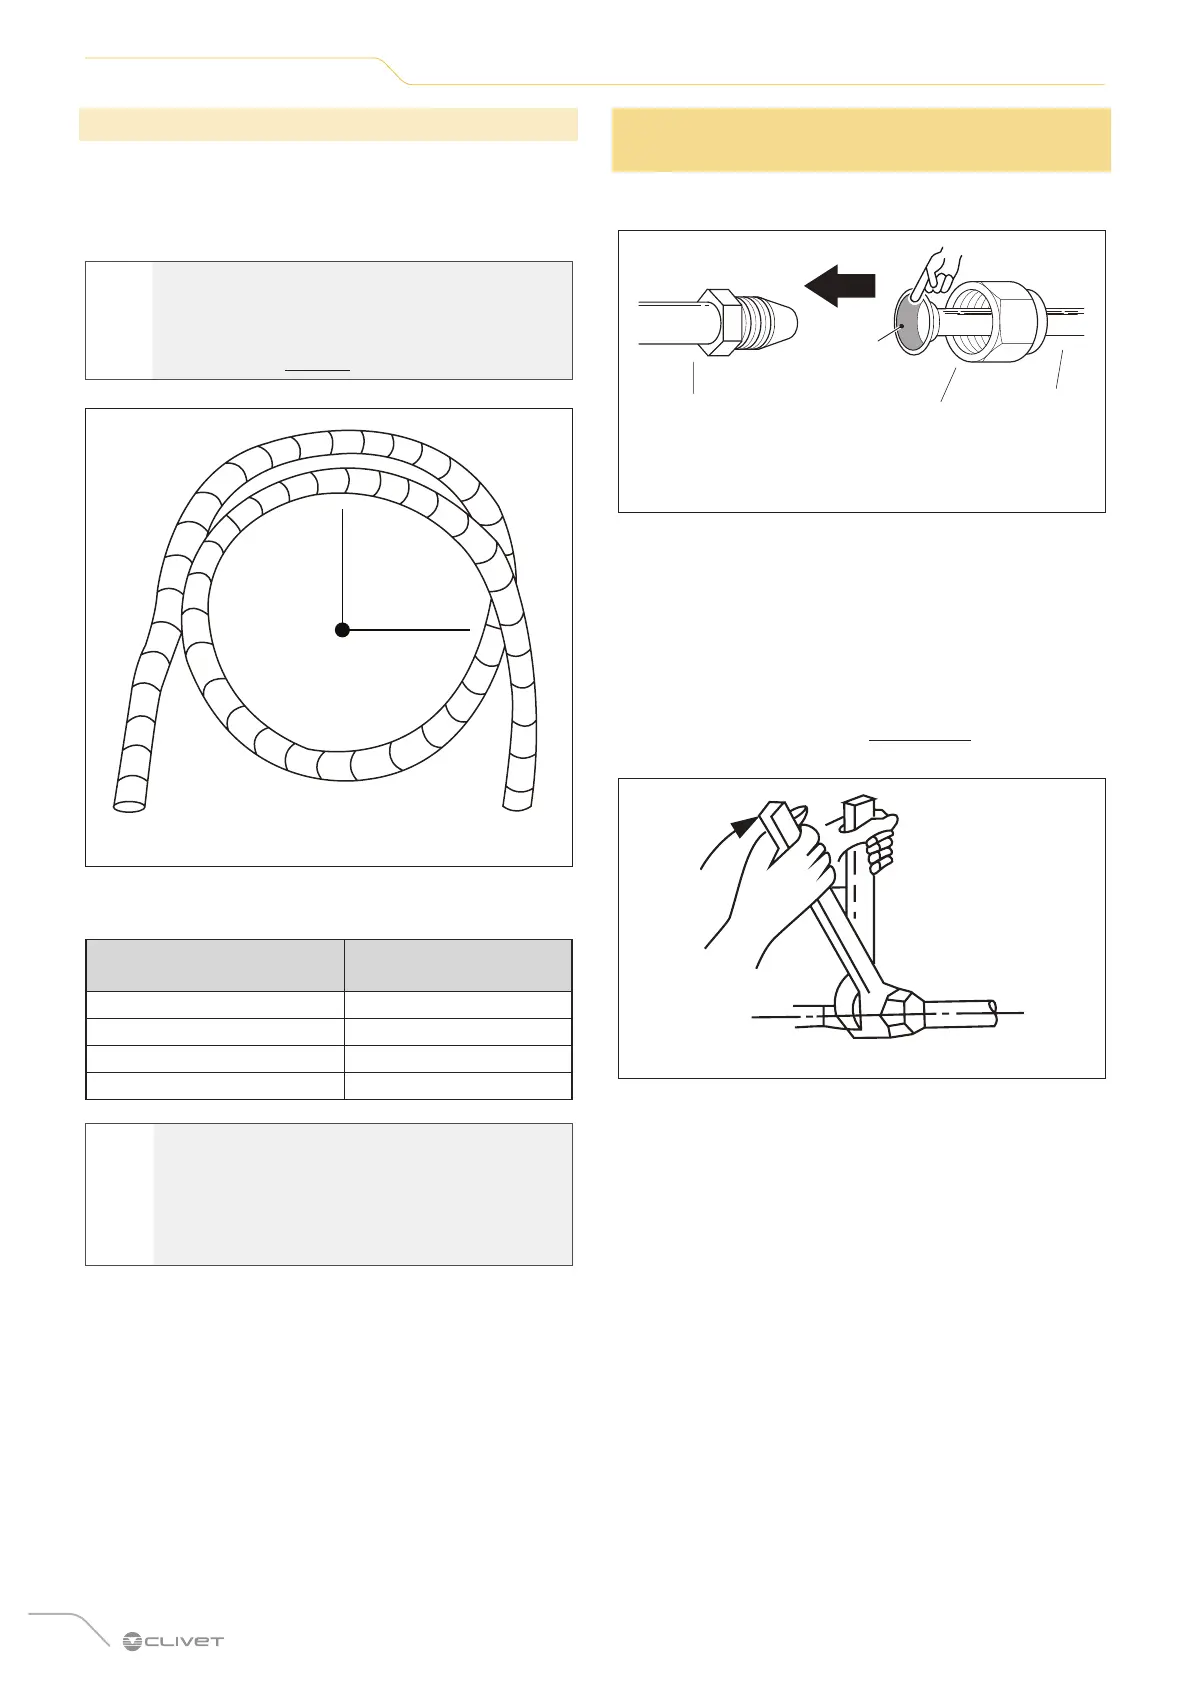
When bending the connection pipes of the
refrigerant piping, observe a minimum radius
of 10 cm. See “Fig. 31”.
Radius > 10 cm
Fig. 31
TORQUES
Outer diameter of the pipe
(mm)
Tightening torque
(N•m)
Ø 6.35 (Ø 1/4") 14.2 - 17.2
Ø 9.52 (Ø 3/8") 32.7 - 39.9
Ø 12.7 (Ø 1/2") 49.5 - 60.3
Ø 15.9 (Ø 5/8") 61.8 - 75.4
m
CAUTION
DON'T USE EXCESSIVE TORQUE.
Excessive force can cause the nut to break or
damage the refrigerant piping. Do not exceed
the torque values shown in the table.
6.2 Connecting the pipes to the indoor
unit
1 Align the centre of the two pipes to be connected.
A
Indoor unit
piping
Flared nut Pipe
Fig. 32
2 Apply a little lubricating oil only to the inner surface of
the countersink (A).
3 Screw the flared nut by hand as far as possible.
4 Then fit the spanner round the nut.
5 Holding the nut firmly on the unit piping, use a torque
wrench to tighten the countersunk nut according to
the torque values in table “TORQUES”. Slightly loosen
the flared nut, then tighten it again.
Fig. 33
 Loading...