For closets smaller than 78”, the closet rods can be cut to size
using a hacksaw. Use care not to cut the ends with the holes.
For closets smaller than 78”, the closet rods can be cut to size
using a hacksaw. Use care not to cut the ends with the holes.
For closets smaller than 78”, the closet rods can be cut to size
using a hacksaw. Use care not to cut the ends with the holes.
STEP 7
ÉTAPE 7
PASO 7
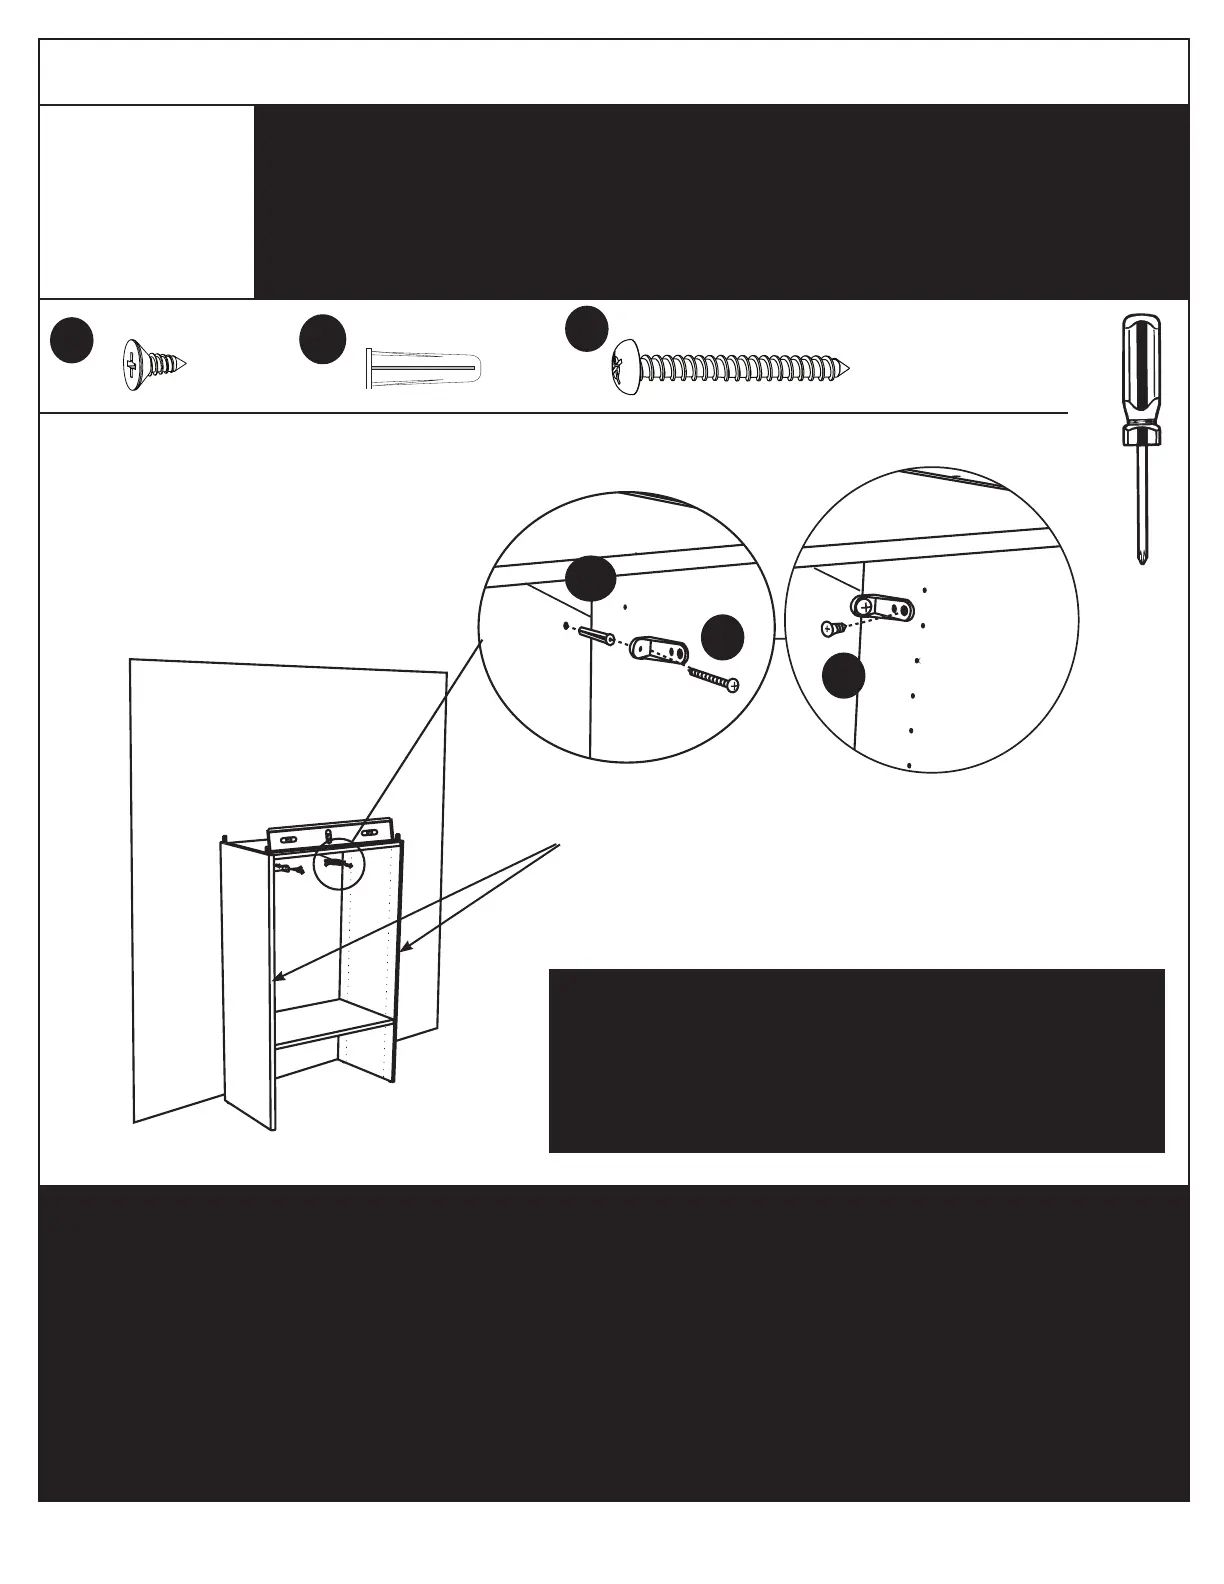
NOTE:
• Insert wall anchor into hole and secure
L-bracket to wall with wall screw.
• Drill 1/16 in. pilot hole and secure L-
bracket to side panel with L-bracket
screw.
• Repeat Step 6 (previous page) and
Step 7 to secure second L-bracket to
opposite side of unit.
REMARQUE :
• Insérer une douille d’ancrage dans le
trou et fixer le support en L au mur à
l’aide d’une vis murale.
• Percer un trou de guidage de 1,5 mm et
fixer le support en L au côté à l’aide de la
vis du support en L.
• Répéter l’étape 6 (page précédente) et
l’étape 7 pour fixer l’autre support en
L du côté opposé du module.
NOTA:
• Inserte el tarugo de pared en el agujero
y fije el soporte en forma de L a la pared
con el tornillo de pared.
• Perfore un agujero piloto de 1,5 mm y fije
el soporte en forma de L al panel lateral
con un tornillo de soporte en forma de L.
• Repita el paso 6 (página anterior) y el
paso 7 para fijar el segundo soporte
en forma de L en el lado opuesto de la
unidad.
Attach unit to wall.
Fixer le module au mur.
Una la unidad a la pared.
GG
JJ
HH
x2
x2
x2
FINISHED EDGES TO FRONT!
BORDURES OUVRÉES À
L’AVANT!
BORDES TERMINADOS
HACIA EL FRENTE
GG
HH
JJ
14
See “HELPFUL HINTS - Installing L-Bracket” on page 5 for detailed
information.
Consulter les directives détaillées sur l’installation des supports en L
dans les « CONSEILS UTILES » de la page 5.
Vea “CONSEJOS PRÁCTICOS – Instalación del soporte en forma de L”
de la página 5 para obtener información detallada.
TRADITIONAL INSTALLATION INSTALLATION CONVENTIONNELLE INSTALACIÓN TRADICIONAL