EasyManua.ls Logo

ClosetMaid 3-Shelf Stackable Organizer - User Manual

Default Icon
24 pages
Print Icon
To Next Page IconTo Next Page
Loading...
3-Shelf Stackable Organizer
Rangement Empilable à 3 Tablettes
Organizador Apilable de 3 Estantes
BEFORE BEGINNING | AVANT DE COMMENCER | ANTES DE EMPEZAR
INSTALLATION INSTRUCTIONS DIRECTIVES D’INSTALLATION INSTRUCCIONES DE INSTALACIÓN
What you will need:
Vous aurez besoin de :
Va a necesitar:
© 2019 ClosetMaid LLC | Ocala, FL 34471 | 1-800-874-0008 | www.closetmaid.com
Please read all instructions carefully.
Familiarize yourself with all parts (see
“PARTS”) and check quantities.
Follow all safety precautions (see
“SAFETY PRECAUTIONS”).
Prière de lire avec soin toutes les directives
fournies.
Se familiariser avec les pièces nécessaires
à l’installation (voir « PIÈCES ») et vérifier
les quantités présentes.
Respecter toutes les consignes de sécurité
(voir « CONSIGNES DE SÉCURITÉ »).
Lea todas las instrucciones cuidadosamente.
Familiarícese con todas las piezas (VEA
“PIEZAS”) y verifique las cantidades.
Siga todas las precauciones de seguridad (vea
“PRECAUCIONES DE SEGURIDAD”).
01-18361-00 3/19
This unit may be installed as a
stand-alone unit (Traditional
Installation) or as part of a
ShelfTrack
system (Hanging
Installation). Please be sure
to follow instructions for your
installation type only.
Ce module peut être installé de
manière indépendante
(installation conventionnelle) ou
comme composant du système
ShelfTrack
(installation
suspendue). S’assurer de bien
suivre les directives convenant
au type d’installation recherché.
Esta unidad debe instalarse
como una unidad independiente
(instalación tradicional) o como
parte del sistema ShelfTrack
(instalación para colgar).
Asegúrese de seguir las
instrucciones correspondientes
a su tipo de instalación.
Question and Answer IconNeed help?

Do you have a question about the ClosetMaid 3-Shelf Stackable Organizer and is the answer not in the manual?

Summary

Safety Precautions

Parts List

Helpful Hints and Tips

Part Identification

Guidance on identifying and locating all product parts for assembly.

Cam Lock Installation

Instructions for properly installing cam locks into panels for secure assembly.

Tightening Cam Locks

Procedure for fully tightening cam locks to ensure a secure and stable assembly.

L-Bracket Installation

Steps for correctly installing L-brackets to secure the unit to the wall safely.

Hand Tightening Screws

Recommendation for hand-tightening screws to prevent overtightening and damage.

Traditional Installation Guide

Step 1: Install Cam Locks on Shelves

Procedure for inserting cam locks into all fixed and adjustable shelves.

Step 2: Install Cam Posts on Side Panels

Procedure for screwing cam posts into the designated holes on side panels.

Step 3 A: Attach Fixed Shelves

Connecting the large fixed shelves to the side panels using cam locks.

Step 3 B: Attach Fixed & Adjustable Shelves

Connecting fixed and adjustable shelves to side panels with cam locks.

Step 4: Install Bottom Nuts and Feet

Inserting bottom nuts and leveling feet into the base of the side panels.

Step 5: Attach Gussets to Back

Securing triangular gussets to the back of the unit for structural stability.

Step 6: Align & Drill for L-Bracket

Positioning the L-bracket and drilling the pilot hole in the wall.

Step 7: Attach Unit to Wall

Securing the organizer unit to the wall using L-brackets and screws.

Step 8: Install Adjustable Shelf & Caps

Placing the adjustable shelf and installing hole covers or plugs on the top.

Hanging Installation Guide

Step 1: Install Cam Locks on Shelves

Procedure for inserting cam locks into all fixed and adjustable shelves.

Step 2: Install Cam Posts on Side Panels

Procedure for screwing cam posts into the designated holes on side panels.

Step 3: Attach Fixed Shelves to Side Panels

Connecting the large fixed shelves to the side panels using cam locks.

Step 4: Attach Gussets to Back

Securing triangular gussets to the bottom back of the unit for stability.

Step 5: Attach Bottom Brackets to Side Panels

Securing bottom brackets to the side panels using nuts and screws.

Step 6: Attach Top Brackets to Side Panels

Securing top brackets to the side panels using Euro screws.

Step 7: Install Small Shelf & Caps

Placing the small adjustable shelf and installing hole covers or plugs.

Step 8: Secure Unit onto Hang Tracks

Lifting and attaching the organizer unit to the ShelfTrack™™ hang tracks.
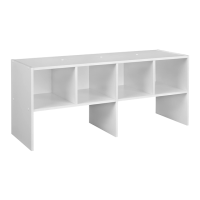
ClosetMaid 3-Shelf Stackable Organizer Specifications

General IconGeneral
Product NameClosetMaid 3-Shelf Stackable Organizer
CategoryIndoor Furnishing
Number of Shelves3
StackableYes
Assembly RequiredYes
MaterialWood
ColorWhite

Related product manuals