EasyManua.ls Logo

ClosetMaid 4549 User Manual

ClosetMaid 4549
8 pages
To Next Page IconTo Next Page
Page #1 background imageLoading...
Page #1 background image
INSTALLATION INSTRUCTIONS
| DIRECTIVES D’INSTALLATION | INSTRUCCIONES DE INSTALACIÓN
© 2018 ClosetMaid LLC | Ocala, FL 34471 | 1-800-874-0008 | www.closetmaid.com
01-34003 10/18
Please read all instructions carefully.
Familiarize yourself with all parts
(see “PARTS”) and check quantities.
Follow all safety precautions
(see “SAFETY PRECAUTIONS”).
Prière de lire avec soin toutes les
directives fournies.
Se familiariser avec les pièces
nécessaires à l’installation
(voir « PIÈCES ») et vérifier les
quantités présentes.
Respecter toutes les consignes
de sécurité (voir « CONSIGNES DE
SÉCURITÉ »).
Lea todas las instrucciones
cuidadosamente.
Familiarícese con todas las
piezas (vea “PIEZAS”) y verifique
las cantidades.
Siga todas las precauciones de
seguridad (vea “PRECAUCIONES
DE SEGURIDAD”).
BEFORE BEGINNING AVANT DE COMMENCE ANTES DE EMPEZAR
4-Cube Organizer
Organisateur 4 Cube
Organizador de 4 cubos
4549 | 4550 | 4552 | 4556
What you will need:
Vous aurez besoin de:
Va a necesitar:
01-33003-CM HC 4 CUBE.indd 1 10/11/18 2:39 PM
Question and Answer IconNeed help?

Do you have a question about the ClosetMaid 4549 and is the answer not in the manual?

ClosetMaid 4549 Specifications

General IconGeneral
Product TypeCloset Organizer
BrandClosetMaid
Model Number4549
ColorWhite
Adjustable ShelvesYes
Assembly RequiredYes
Shelf Depth12 inches
Shelf Width24 inches

Summary

Installation Instructions

Before Beginning Assembly

Read all instructions, familiarize with parts, and check quantities before assembly.

Safety Precautions

General Safety Warnings

Covers warnings for small parts, moving, overloading, climbing, TV stands, stacking, and wall hanging.

Tip-Over Prevention

Instructions for preventing furniture tip-over by securing the unit to the wall and proper placement of heavy items.

Parts Identification

Hardware List

Lists and illustrates all hardware components required for assembly, including screws, dowels, and brackets.

Product Components

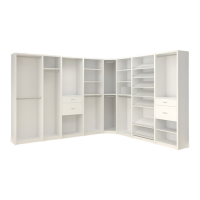
Identifies the main product panels such as side, top/bottom, divider, and shelf components.

Assembly Steps

Step 1: Insert Dowels

Insert dowels into the divider panels, noting one panel has dowels on only one side.

Step 2: Connect Panels

Connect the divider panels and the top/bottom panels, ensuring dowels interlock.

Step 3: Secure Side Panels

Secure each side panel using hex screws and apply hardware stickers.

Step 4: Secure Unit to Wall

Fasten the unit to the wall using L-brackets, screws, and wall studs for stability.
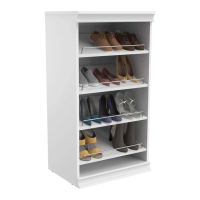
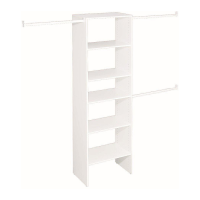
Related product manuals