8
Secure unit to the wall.
Fixez l’unité au mur.
Asegure la unidad a la pared.
STEP 4
ÉTAPE 4
PASO 4
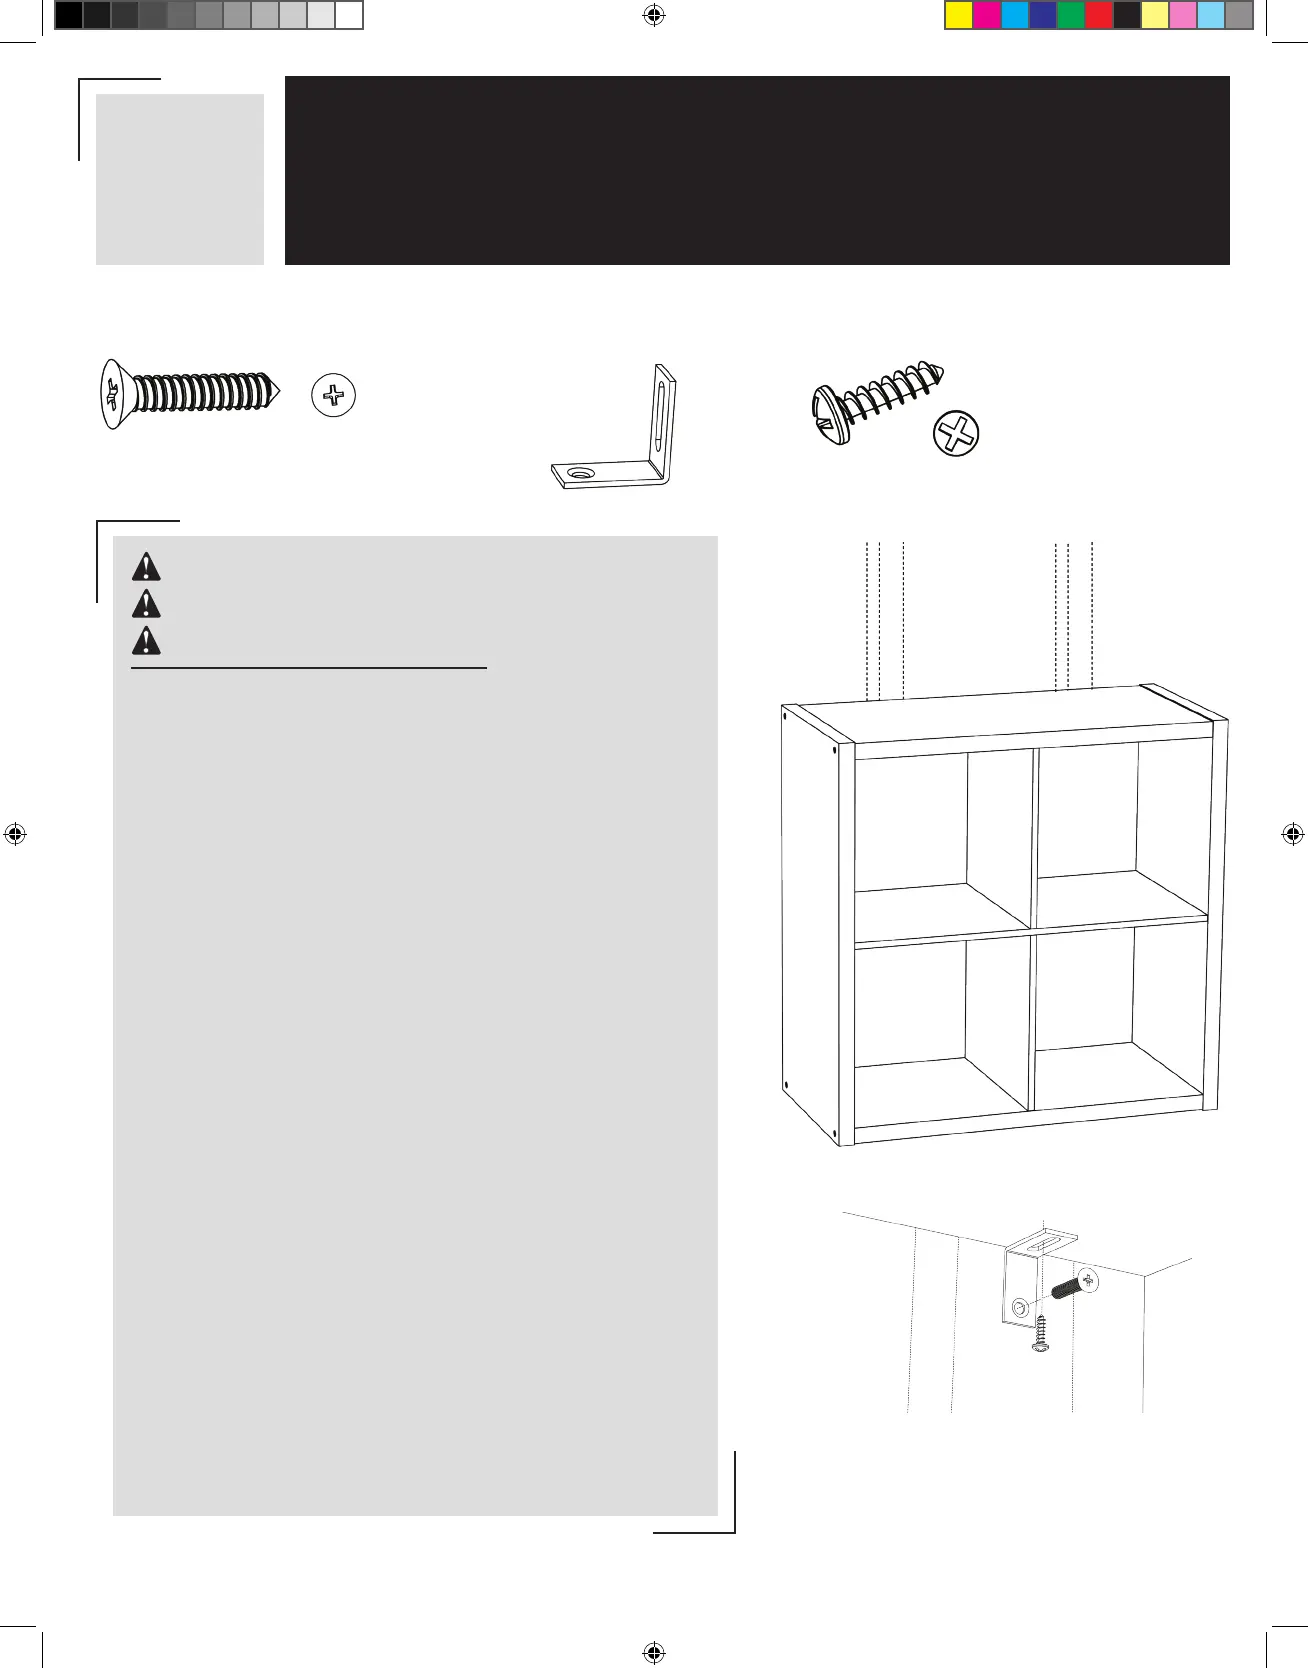
Top Panel
Wall Stud
(H3)
(H4)
L-Bracket Screw (H3) x 2 #10 x ⁄” Wall Screw (H4) x 2 #10 x 1 ⁄”L-Bracket (H5) x 2
WARNING
AVERTISSEMENT
ADVERTENCIA
All Units MUST be fastened to a wall.
Toutes les unités DOIVENT être fixées à un mur.
Todas las unidades DEBEN sujetarse a una pared.
Instructions:
• Align unit with wall stud.
• Place screw hole end of L-bracket against wall stud. Use 1 ⁄”
screw to secure L-bracket to wall.
• Use ⁄” screw to secure L-bracket to top panel. L-bracket
must be mounted no more than 1 ⁄” from edge of panel.
Directives:
• Aligner l’unité avec le montant mural.
• Placez l’extrémité du trou de vis du support en L contre
le poteau mural. Utilisez 1 1/2 “vis pour fixer le support en
L au mur.
• Utilisez une vis de 1/2 ”pour fixer le support en L au panneau
supérieur. Crochet en L doit être monté à au plus 1 1/2 po du
bord du panneau.
Instrucciones:
• Alinee la unidad con el perno de pared.
• Coloque el extremo del orificio del tornillo del soporte en L
contra el perno de la pared. Utilizar 1 1/2 “ tornillo para fijar
el soporte en L a la pared.
• Use un tornillo de 1/2 ”para fijar el soporte en L al panel
superior. Soporte en L debe montarse a no más de 1 1/2 ”
del borde del panel.
01-33003-CM HC 4 CUBE.indd 8 10/11/18 2:39 PM