EasyManua.ls Logo

ClosetMaid Selectives User Manual

ClosetMaid Selectives
47 pages
To Next Page IconTo Next Page
Page #1 background imageLoading...
Page #1 background image
Standard Kit Instruction Manuals
© 2020 ClosetMaid LLC | Ocala, FL 34471 | 1-800-874-0008 | www.closetmaid.com
4/2020
Tower
Page 2
10 in. Drawer Page 18
5 in. Drawer
Page 29
Doors
Page 40
Top Shelf Brackets
Page 47
Question and Answer IconNeed help?

Do you have a question about the ClosetMaid Selectives and is the answer not in the manual?

ClosetMaid Selectives Specifications

General IconGeneral
BrandClosetMaid
ModelSelectives
CategoryIndoor Furnishing
LanguageEnglish

Summary

Selectives Standard Kit Manuals

Tower Kit Instructions

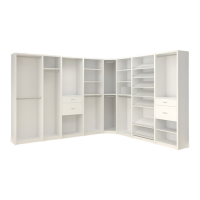
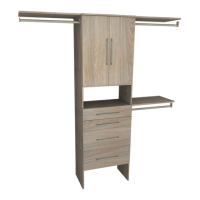
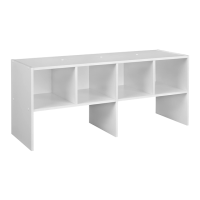
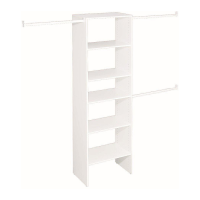
Manual for Tower kit installation.

10 in. Drawer Kit Instructions

Manual for 10 in. Drawer kit installation.

5 in. Drawer Kit Instructions

Manual for 5 in. Drawer kit installation.

Doors Kit Instructions

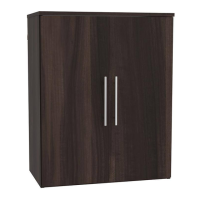
Manual for Door kit installation.

Top Shelf Brackets Kit Instructions

Manual for Top Shelf Brackets installation.

Closet Kit Installation Overview

General Safety Precautions

Product Hazard Warnings

Key warnings about small parts, stability, and misuse.

Closet Kit Parts Identification

Main Cabinet Components

Identification of primary structural parts like panels and shelves.

Hardware and Fasteners

Identification of screws, locks, dowels, and other hardware.

Assembly Tips and Techniques

Cam Lock Installation and Use

Step-by-step instructions for installing and tightening cam locks.

Important Information and Options

Shelf Placement for Drawer Units

Instructions for adjusting shelf placement for drawer installation.

Wall Mounting and Fastening

L-Bracket Installation Guide

Detailed instructions for securely attaching L-brackets to walls.

Step 2: Cam Post Installation

Step 3: Attaching Fixed Shelves

Connecting Fixed Shelves to Panels

Securing large fixed shelves between side panels.

Step 4: Attaching Gussets

Gusset Attachment Procedure

Securing corner gussets to the back of the unit.

Step 5: Base Unit Assembly

Step 6: Securing Base Unit to Wall

L-Bracket Wall Mounting Steps

Detailed steps for attaching the base unit to the wall.

Step 7: Attaching Top Unit

Step 8: Installing Rod Brackets

Rod Bracket Placement and Installation

Measuring and installing rod brackets on unit sides.

Step 9: Installing Hanging Rods

Hanging Rod Installation Procedure

Hooking rods onto brackets and securing to wall.

Step 10: Installing Adjustable Shelves

10 in. Drawer Kit Installation Overview

10 in. Drawer Kit Parts Identification

Drawer Assembly Tips and Techniques

Step 1: Drawer Frame Assembly

Step 2: Drawer Bottom and Cam Locks

Step 3: Drawer Front and Handle Assembly

Step 5: Attaching Drawer Slides

Step 6A: Attaching Single Drawer to Base

Step 6B: Attaching Multiple Drawers to Base

5 in. Drawer Kit Installation Overview

5 in. Drawer Kit Parts Identification

General Drawer Assembly Tips

Drawer Cam Lock Techniques

Tips for installing and tightening cam locks on drawers.

Step 1: Drawer Frame Assembly (5 in. Kit)

Connecting Drawer Sides to Back

Attaching drawer sides to the drawer back panel.

Step 2: Drawer Bottom and Cam Locks (5 in. Kit)

Step 3: Drawer Front and Handle Assembly (5 in. Kit)

Step 5: Attaching Drawer Slides (5 in. Kit)

Securing Drawer Slides to Drawer

Attaching the small part of the glide to the drawer.

Door Kit Installation Overview

Door Kit Parts Identification

Door Hinge Installation and Adjustment

Door Hinge Preparation and Installation

Separating and attaching door hinges.

Door Alignment Adjustment Guide

Adjusting door hinges for proper alignment.

Step 1: Door Hinge and Knob Attachment

Separating and Attaching Door Hinges

Separating hinge parts and attaching to door panel.

Step 2: Attaching Door to Base Unit

Top Shelf Brackets Installation

Related product manuals