Table of contents
34
466790 V_02/06/2010
GB
Translation of the original instructions
Table of contents
1. Safety instructions . . . . . . . . . . . . . . . . . . . . . . . . . . . . . . . . . . . . . . . . . . . . . . . . . . . . . . . . . . . . 35
1.1. General safety instructions ............................................................................................ 35
1.2. Safety instructions for working with compressed air and blasting guns .......................... 36
1.3. Safety information for paint spraying ............................................................................ 36
1.4. Operating pressure vessels ........................................................................................... 37
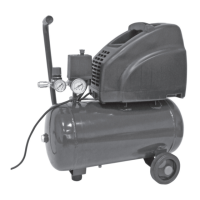
2. Layout . . . . . . . . . . . . . . . . . . . . . . . . . . . . . . . . . . . . . . . . . . . . . . . . . . . . . . . . . . . . . . . . . . . . . . 38
3. Scope of use . . . . . . . . . . . . . . . . . . . . . . . . . . . . . . . . . . . . . . . . . . . . . . . . . . . . . . . . . . . . . . . . . 38
4. Technical data . . . . . . . . . . . . . . . . . . . . . . . . . . . . . . . . . . . . . . . . . . . . . . . . . . . . . . . . . . . . . . . . 38
5. Points to note when setting up the compressor . . . . . . . . . . . . . . . . . . . . . . . . . . . . . . . . . . . . . 38
6. Assembly and starting . . . . . . . . . . . . . . . . . . . . . . . . . . . . . . . . . . . . . . . . . . . . . . . . . . . . . . . . . 39
6.1. Fitting the wheels(3) .................................................................................................... 39
6.2. Fitting the supporting foot(4) ....................................................................................... 39
6.3. Fitting the air filter(1) ................................................................................................... 39
6.4. Replacing the oil sealing plug(14) ................................................................................ 39
6.5. Voltage ........................................................................................................................ 39
6.6. On/Off switch(8) ......................................................................................................... 39
6.7. Adjusting the pressure: (Fig. 1) ...................................................................................... 39
6.8. Setting the pressure switch .......................................................................................... 40
6.9. Mounting the transport handle (Figures 10, 11) .............................................................. 40
7. Replacing the power cable . . . . . . . . . . . . . . . . . . . . . . . . . . . . . . . . . . . . . . . . . . . . . . . . . . . . . . 40
8. Cleaning and maintenance . . . . . . . . . . . . . . . . . . . . . . . . . . . . . . . . . . . . . . . . . . . . . . . . . . . . . . 40
8.1. Cleaning ....................................................................................................................... 40
8.2. Condensation water ..................................................................................................... 40
8.3. Safety valve(10) .......................................................................................................... 41
8.4. Check the oil level at regular intervals ........................................................................... 41
8.5. Changing the oil ........................................................................................................... 41
8.6. Cleaning the intake filter(1) .......................................................................................... 41
8.7. Storage ........................................................................................................................ 41
8.8. Ordering replacement parts .......................................................................................... 41
9. Disposal and recycling . . . . . . . . . . . . . . . . . . . . . . . . . . . . . . . . . . . . . . . . . . . . . . . . . . . . . . . . . 42
10. Possible causes of failure . . . . . . . . . . . . . . . . . . . . . . . . . . . . . . . . . . . . . . . . . . . . . . . . . . . . . . 42
Appendix . . . . . . . . . . . . . . . . . . . . . . . . . . . . . . . . . . . . . . . . . . . . . . . . . . . . . . . . . . . . . . . . . . . . . . 135
Claims for defects ............................................................................................................. 136
WARNING– To reduce the risk of injury, read the operating instructions!
Wear ear defenders.
The effects of noise can result in a loss of hearing.
Beware of electrical voltage
Beware of hot parts
466790.book Seite 34 Freitag, 25. Juni 2010 9:58 09
 Loading...