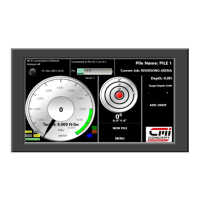
*We suggest before you
begin, that you zero any
value you see in the left circle
by touching within the circle
and pushing zero calibration.
You can center the bullseye
by touching anywhere within
that circle and touching
CENTER BULLSEYE.
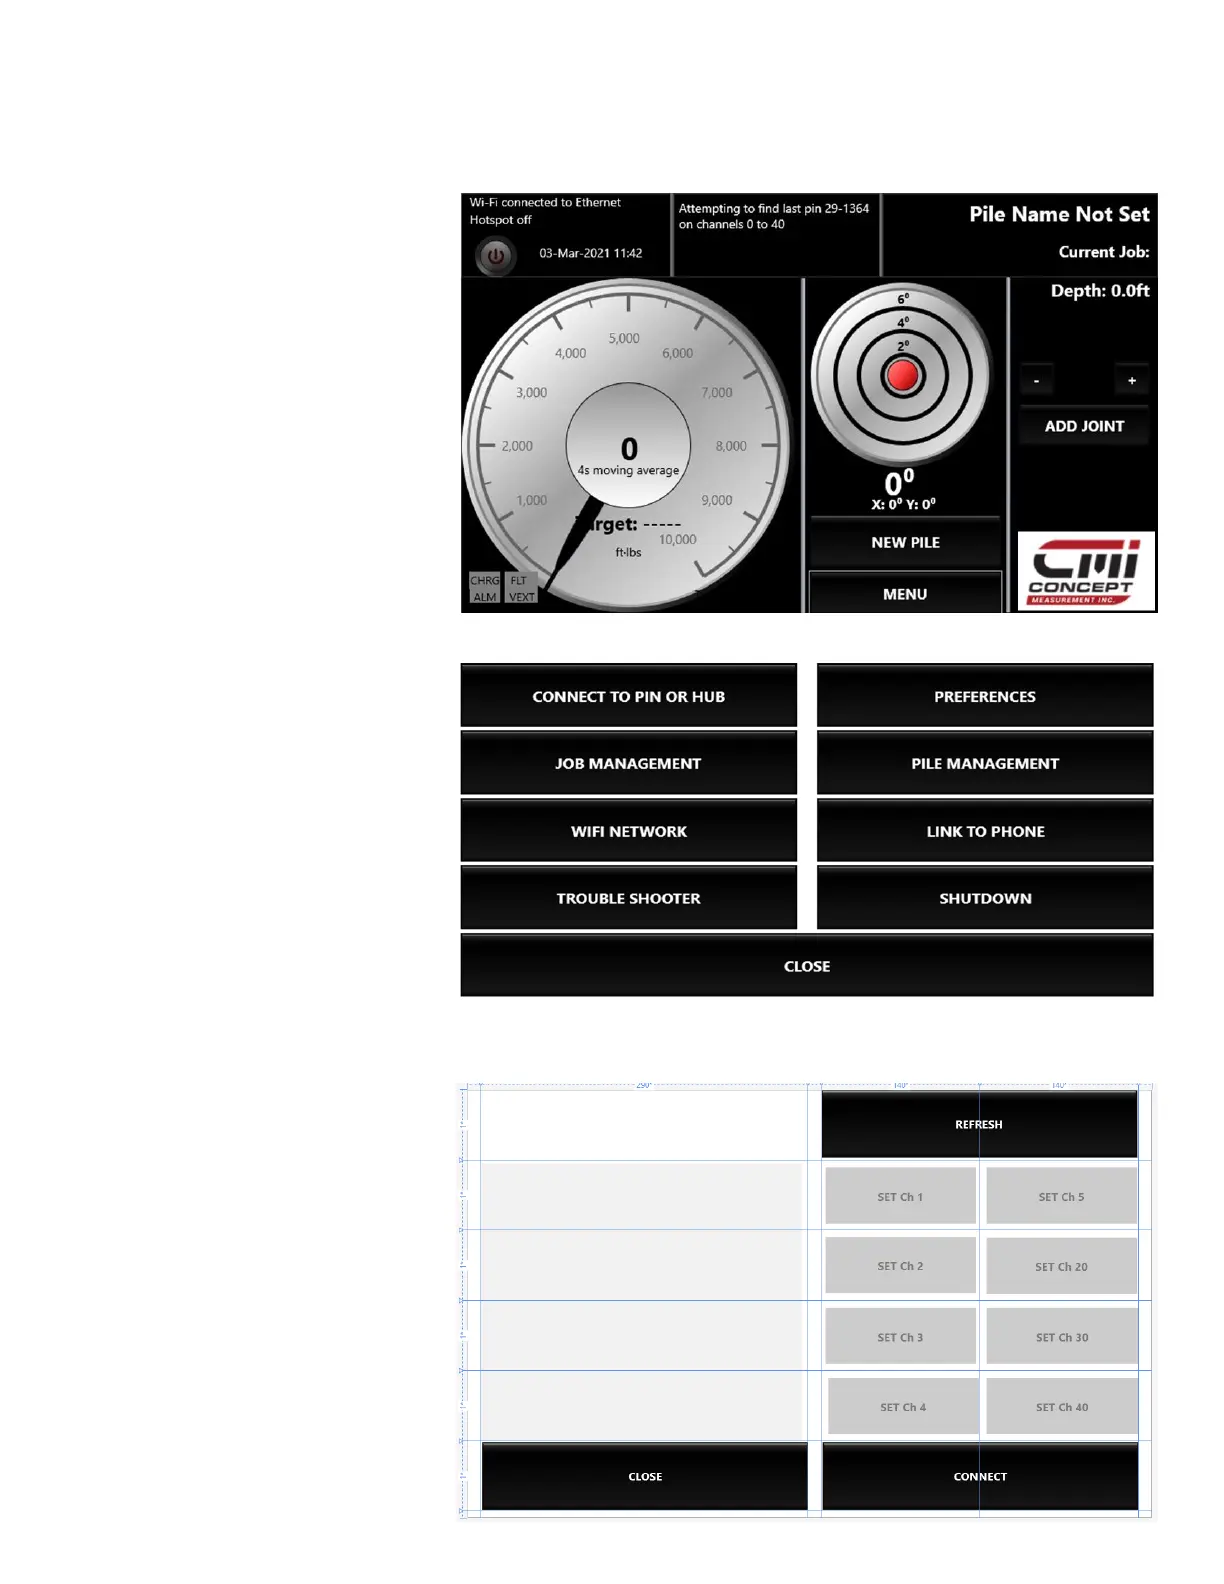
To connect to Hub:
1. Touch MENU
2. Touch CONNECT TO PIN
or HUB.
3. Wait for the display
to find the Hub. Once
found a serial number
will appear in the top
middle of the display.
4. Touch the serial number
to highlight it blue.
5. Touch CONNECT, wait
until you see the serial
number and the battery
voltage in the top
middle of display.
*We recommend changing the
channel to 30-40. To do this
touch CONNECT TO HUB, touch
to highlight the serial number
you are connecting to, select
channel 30-40. This can take
up to 3 minutes as it must go
through all the channels. Once
it connects you will see at the
top middle of the screen STAY
CONNECTED TO HUB and there
will be a serial number and a
battery voltage.
CMI 7” Display Operating Guide
Connect to Hub.
 Loading...