P. 2
ACCESSPORT INSTALLATION
IMPORTANT!
For installation purposes, it is important to ensure that the
vehicle’s battery has adequate power for both the Accessport and the ECU.
Because of this, it is recommended that all in-car electronics and vehicle lights
are turned o during the installation process to reduce drain on the vehicle’s
battery. For improved safety during installation, a car battery charger can be
connected to the vehicle during the installation process
Getting Started:
1. You will need the Accessport and
OBD-II cable to perform the installation.
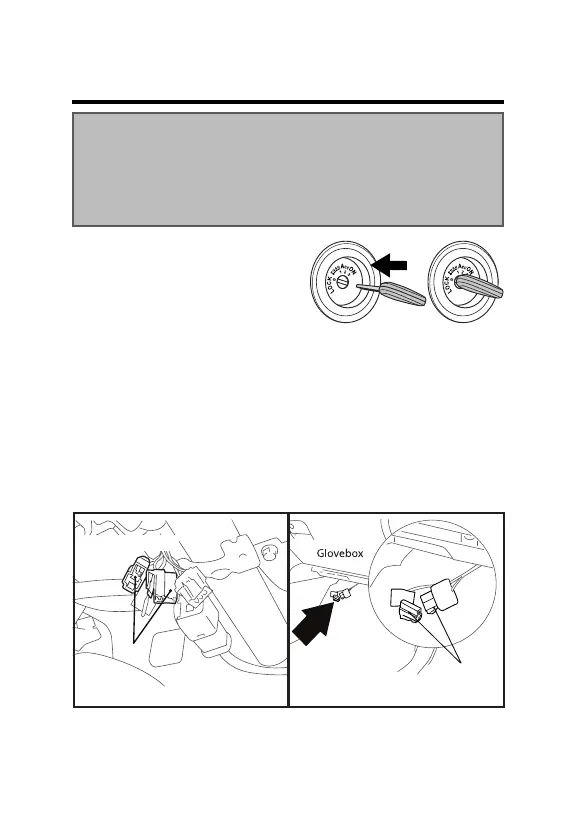
Insert the key into the vehicle’s ignition
and leave it in the OFF position.
2. For Subaru models utilizing a SUB-001 or SUB-002 (not required on
SUB-003) Accessport, locate the green Test Mode connectors under the
driver’s side dash to the left of the steering column (see diagram). With the
connectors located, enable Test Mode by plugging the two connectors into
each other. To ensure Test Mode was successfully enabled, turn the key to
the ON position but do not start the engine. You may hear the radiator fans
cycling on/o as well as the fuel pump cycling and the ‘Check Engine’ light
should blink. THIS IS A NORMAL FUNCTION OF TEST MODE. Once Test Mode
is veried, turn the key back to the OFF position and continue.
NOTE: The Test Mode connectors must be connected whenever changing
a base map.
Driver’s Side Door
Steering
Column
[STI, WRX & Forester test mode connectors] [Legacy & Outback test mode connectors]
CONNECT
CONNECT