What’s in the box?
To maintain the Ingress Protection of the EXPLORER 540 and to avoid cables
accidentally being disconnected, all cable connections are made inside the
small compartment at the back of the EXPLORER 540.
• Use the provided Torx bit to open the small compartment at the back
of the terminal.
• Useaatbladescrewdriver(max.2mmwide)topressdownthe
spring-loaded terminals.
• Useaatbladescrewdriver(max.3.5mmwide)tounscrewandfasten
thescrewterminals.
1. Leadthecable(s)throughthecablegland(s)andgasket(s)(suitablefor
cablediameter5-10mm).Makesurethecableglandsttightly.
2. Connect the cables accor-
dingtoyourconguration.
Seethereverseofthisguide
forpinoutandexamplecon-
gurationdrawing.
The RJ-45 connector of the
LANcablecanpassthrough
thecablegland.(seepicture)
3. IfyouarenotusingPoEto
powertheEXPLORER540,
connectapowercable
betweentheDCinputterminalsandanexternalbatteryorpowersupply.
4. Whenallcablesareconnected,mountthecoverforthecompartment
andtightenthescrewswiththeincludedTorxbit.
Important!Ifyouonlyneedtoinstallonecable,mounttheprovidedblind
plugintheunusedholetomaintaintheIngressProtection(IPgrade)ofthe
terminal.
Step 2: Connect cables
Step 3: Install the EXPLORER 540
Thefollowingitemsareincludedinthe
delivery:
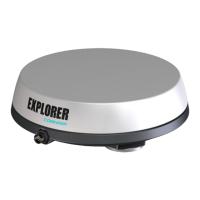
• EXPLORER 540 terminal
• Polemountkit
• 2Cableglandsand1Blindplug
• TorxbitSizeTX10(tamper
resistant,1/4”Hexdrive)for
mounting/dismountingthecover
for the small compartment
• Installationguide(thisguide)
EXPLORER540Userandintegrator’smanual(partno.98-148232)aswell
asotherlanguageversionsofthisinstallationguideareavailablefordown-
loadattheSelfServiceCenter.Gotowww.cobham.com/satcomandselect
ServiceandSupport>CobhamSATCOMServiceandSupport>24-7Self
ServiceCenter/TechnicalDownloads.
Apolemountkitisincludedinthedelivery.TomounttheEXPLORER540on
apole,doasfollows:
1. AttachthebaseofthepolemountbrackettotheEXPLORER540using
theincludedHexLkeyonthe4
screws.Caution! Max.lengthofthe
screwsis9mm!Longerscrewscan
damage the EXPLORER 540.
2. Unscrewtwoofthelongscrewsfrom
thepolemountkittoleaveoneside
open for the pole.
3. Placethepolemountkitwiththe
EXPLORER540aroundthepoleas
shown.
4. Remountthetworemaininglong
screws.Donottightenthescrews
completelyuntilyouhavepointed
the antenna.
5. Powerupthesystem.
ObservetheLEDbetweenthecable
glands(seeLEDdescriptiononthe
back).
• LEDashingrapidlygreen:
Startingup
• LEDashingyellow:Pointing
• LEDsteadyyellow:Warning!
See Vericaton on the back.
6. WhenLEDashesyellow:Turnand
tilttheEXPLORER540andusethe
pointingsoundtoobtainthehighest
possiblesignalstrength.(continuous
sound=bestsignal)
7. Whenyouhavethehighestpossible
signalstrength.tightenallthescrews
to keep the EXPLORER 540 in the
pointed position.
TheEXPLORER540willautomatically
exit the pointing process once it has
detectedastableBGANsignal.
8. When the pointing process has en-
ded,theLEDchangesasfollows:
• LEDashinggreen:Verifyingnetworkconnection
• LEDsteadygreenandthenoff:Ready-installationprocesshasended
successfully.TheLEDisdisabled(off)afterafewminutes.
IftheLEDissteadyyellow,theinstallationfailedandthereisawarning.
IfyoucanconnectacomputerlocallytotheEXPLORER540,youcanusethe
webinterfacetofollowtheprogressonscreen,seeanywarnings,andrestart
the installation if necessary. See Verication on the back.
EXPLORER 540
Installation guide
YouneedaBGANSIMcardforeitherM2Morstandardclass2services.To
inserttheSIMcard,doasfollows:
NOTE:MakesuretheEXPLORER540
is notpoweredwhenyouinsertor
removetheSIMcard!
1. Open the cover for the small com-
partment at the back of the EXPLO-
RER540.UsetheincludedTorxbit
tounscrewthescrews.
2. LocatetheSIMholderinthe
middle of the compartment.
3. SlidethelocktoreleasetheSIM
holder.
4. LifttheendoftheSIMholderand
inserttheSIMcardasshown.
5. LowertheSIMcardholderwith
theSIMcardinsertedandlockit.
6. Whenallcablesareconnected,put
the cover back on and tighten the
screws.
Step 1: Insert SIM card
Disclaimer: Any responsibility or liability for loss or damage in connection with the use of this product and the accompanying documentation is disclaimed
by Thrane & Thrane A/S. The information in this manual is provided for information purposes only, is subject to change without notice and may contain
errors or inaccuracies. The manuals are periodically revised and updated. Anyone relying on this information should acquire the most current version e.g.
from cobham.com/satcom or from the distributor. Thrane & Thrane A/S is not responsible for the content or accuracy of any translations or reproductions,
in whole or in part, of this manual from any other source. Thrane & Thrane A/S trading as Cobham SATCOM.
Copyright © 2016 Thrane & Thrane A/S. All rights reserved.
X2:Ethernet,
RJ-45
X1: Ethernet,
Spring-loaded
terminals
X4:DCinput,
Screwterminals
X5: I/O,
Spring-loaded
terminals
X6:USBMicroB
(inthesidewall-
notvisiblehere)
EXPLORER 540 terminal
with pole mount kit
X7:ChassisGND,
Screwterminal
LED=
LED=