- 10 -
6.2 OPERATING THE ON/OFF SWITCH
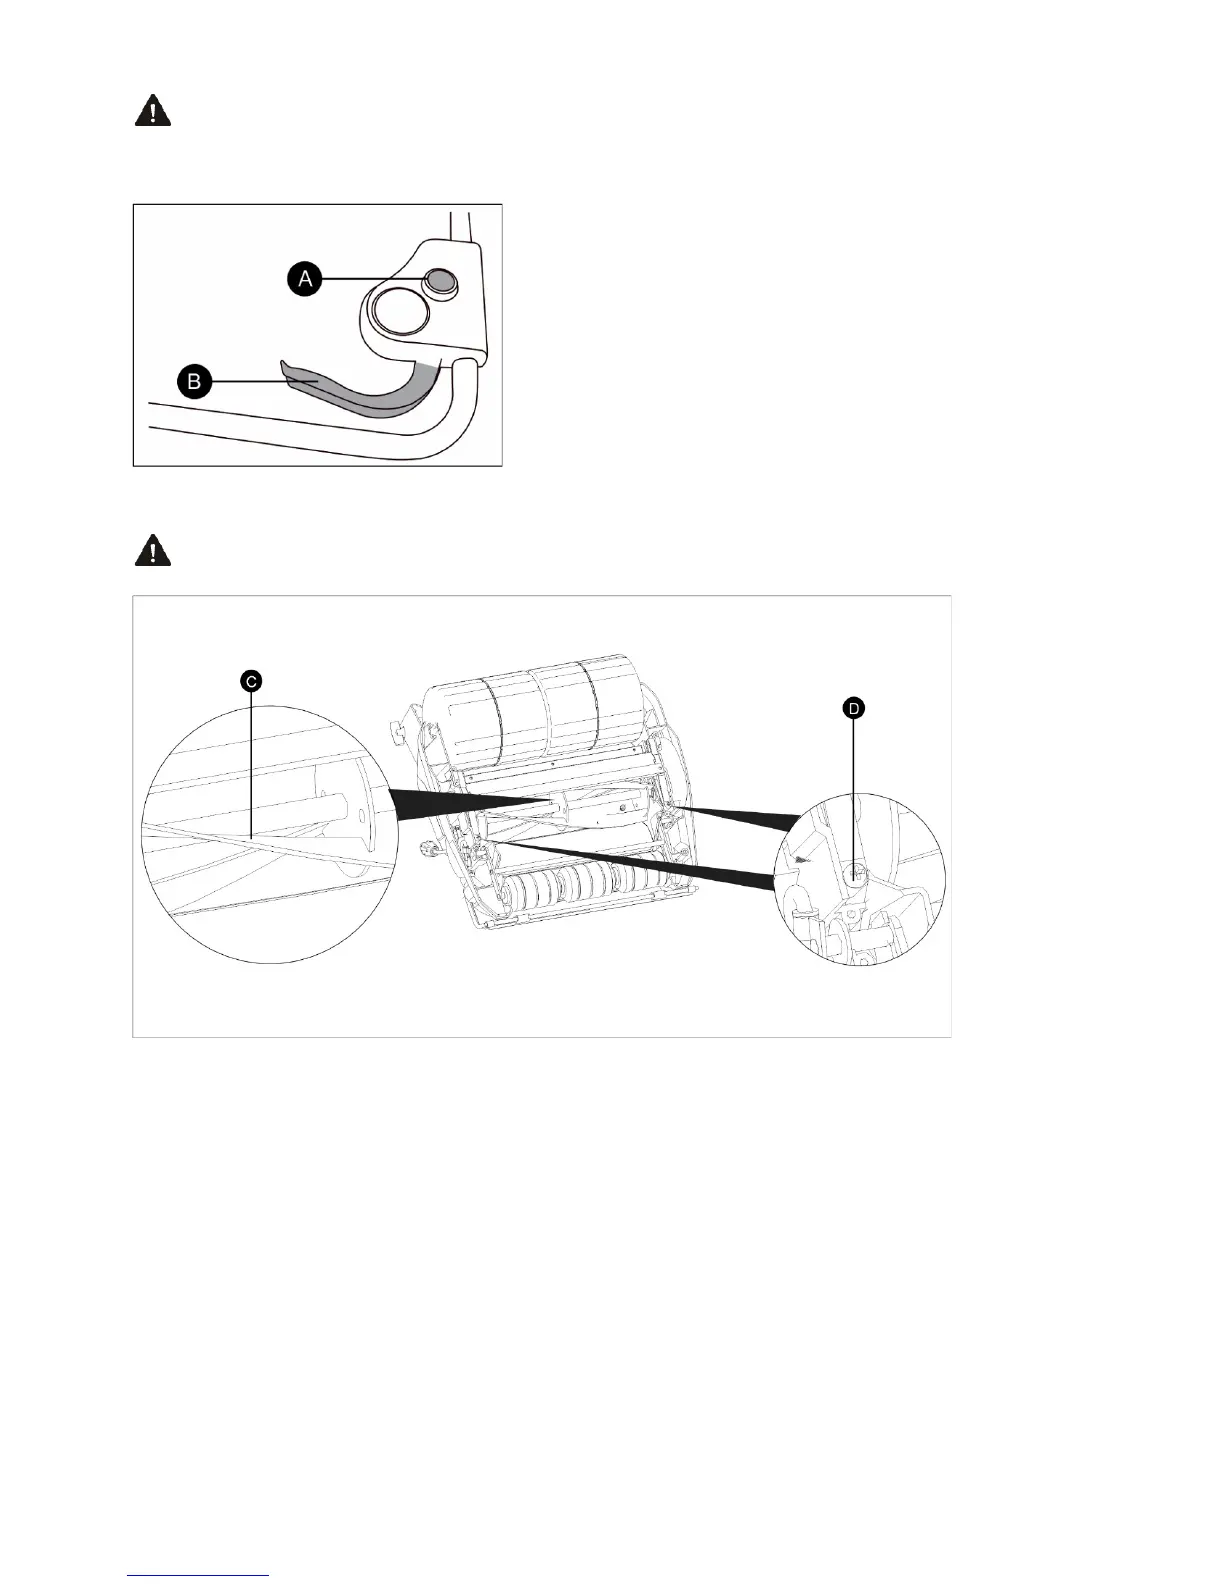
WARNING: THE MOWER IS FITTED WITH A TWO STAGE SAFETY SWITCH. ENGAGE THE LOCK
SWITCH BEFORE PULLING THE LEVER.
TO SWITCH ON:
1. Press the switch lock button (A)
2. Pull the switch lever (B) and release the switch lock button (A)
TO SWITCH OFF:
Release the switch lever (B)
6.3 ADJUSTING THE BOTTOM BLADE AND CUTTING CYLINDER
WARNING: FIRST UNPLUG THE POWER SUPPLY AND WEAR GLOVES
The cylinder mower has two sets of the blades. The cylinder blade (c) and the bottom blade. The two blades cut
the grass in a similar way to a pair of scissors and provide a clean cut when correctly adjusted. The bottom blade
adjustment screw (D) allows the distance from the two blades to be adjusted.
1. Turn the mower upside down as shown above. To close the gap between the cylinder and the bottom blade
turn the adjustment screw on each clockwise a small amount.
2. Wearing gloves carefully test that the blades are just in contact by rotating the cylinder by hand. If the blades
are too difficult to rotate then adjust the screws anti-clockwise. Repeat the process and ensure that both sides
are adjusted to a similar gap.
3. The final test involves a sheet of paper (approximately 0.12mm thick). Insert the paper between the two blades,
then rotate the cylinder to check if the paper cleanly cuts. Check across the width of the blade, cuts sharply.
Adjust as necessary to achieve a scissor like cut finish.
4. Once adjusted correctly, turn the mower back onto its correct side and power the mower. Test the mower cuts
cleanly. It will be necessary to periodically re-test and adjust the bottom blade to ensure it cuts cleanly.
 Loading...