Page 8 For technical questions, please call 1-888-866-5797. Item 57647
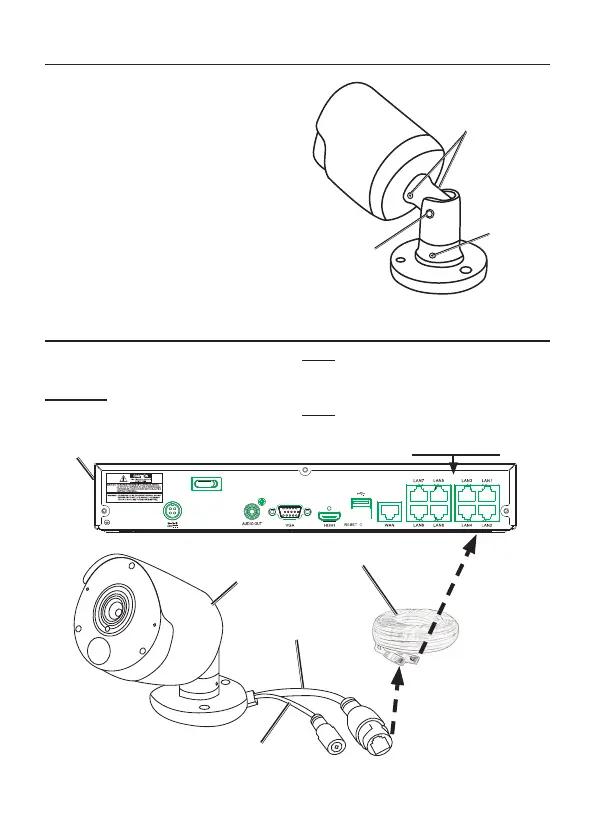
Camera Adjustment
1. Using an Allen wrench (sold
separately), loosen the Position
Screws (one on each side) and
rotate the Camera as needed
so that the recorded image is
properly orientated. Once aligned,
tighten the screws securely.
2. Loosen the Vertical Screw and tilt the
Camera up or down. Once the Camera
is aligned, tighten screw securely.
3. Loosen the Horizontal Screw
and pan the Camera left or right.
Once the Camera is aligned,
tighten screw securely.
Position
Screws
Vertical
Screw
Horizontal
Screw
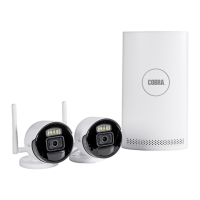
Cable Connection
Using the RJ45 Cable, connect
the Camera to the NVR.
CAUTION! Route the cable so
as to avoid a tripping hazard.
Note: The RJ45 cable carries power
from the NVR to the Camera and
video from the Camera to NVR.
Note: The Service Cable is for factory
service only. Not for normal use.
CAM7CAM7 CAM5CAM5
CAM8CAM8 CAM6CAM6
CAM3CAM3
CAM4CAM4
CAM1CAM1
CAM2CAM2WANWAN
AUDIO OUTAUDIO OUT VGAVGA
48V48V
NVR
Camera
RJ45 Cable
Service Cable
Camera Inputs
RJ45 Cable, 60ft.