Configuraci6n
Usted
puede
seleccionar
el
menu
de
configuraci6n
en
el
menu
principal.
0
mantenge
pulsado
al
bol6n
MENU
para
entrar
en
al
menu
de
configuraci6n.
Del menu de configuracl6n
Zoom
Intervalo
detiempo
Efeclo
de
transicion
Escriba
Ampliar
imagenes.
Mantenga
pulsado
el
bot6n
MENU
para
entrar
en
el
menu
de
configuraci6n.
establecer
la
opci6n
de
ZOOM
como
en,
a
continuaci6n,
pulse
el
bot6n
MENU
de
nuevo
para
salir
del
menu
de
configu-
raci6n,
ahora
usted
puede
pulsar
repetldamenle
el
bot6n
ENTRAR
Establezca
el
intervalo
de
time.Enter
SlideShow
esta
opci6n,
pulse
el
baton
arriba
I
abajo
para
ajustar
el
intervalo
de
tiempo.
Eslablecer
el
efecto
de
Iranslclon.
Escriba
esta
opcl6n,
pulse
el
bot6n
arriba
I
abajo
para
ajustar
el
efeoto
de
translci6n.
Coloque
Is
cinta
muestra
de
las
imagenes
como
fondo
de
escritorio
de
coincidencias
y
de
pantalla
completa.
automatica
de
denim I
'=J
5Se9
Azar
~
de
Isle
Fuera
0
0
0
Ingles
12. Grounding or Polarization: This product may be
equipped
with a
alternating-current line plug that has one blade wider
than
the other. This plug
will only fit into the power outlet
in
one direction. This
is
a safety feature. If you
are unable
to
insert the plug fully into the outlet, try
reversing
the direction
of
the plug. If the plug should still fail to fit, contact
an
electrician to replace the
obsolete outlet.
Do
not defeallhe safely purpose
of
the
polarized plug.
13.
Power-Cord Protection: Power supply cords should
be
routed so thallhey are
not likely
to
be walked
on
or pinched
by
Items placed
upon
or against them,
paying particular attention to cords at plugs, convenience receptacles,
and
at
the point which they exit from the product.
14.
Protective Attachment Plug: The product may be
equipped
with an attach-
ment plug with overload protection. This is a safety
feature.
See the operating
instructions for replacement or directions to reset
the
protective device. If
replacement
of
the plug is required, be sure the service technician has
used
a replacement plug that has the same overload protection
as
the original plug
as specified
by
the manufacturer.
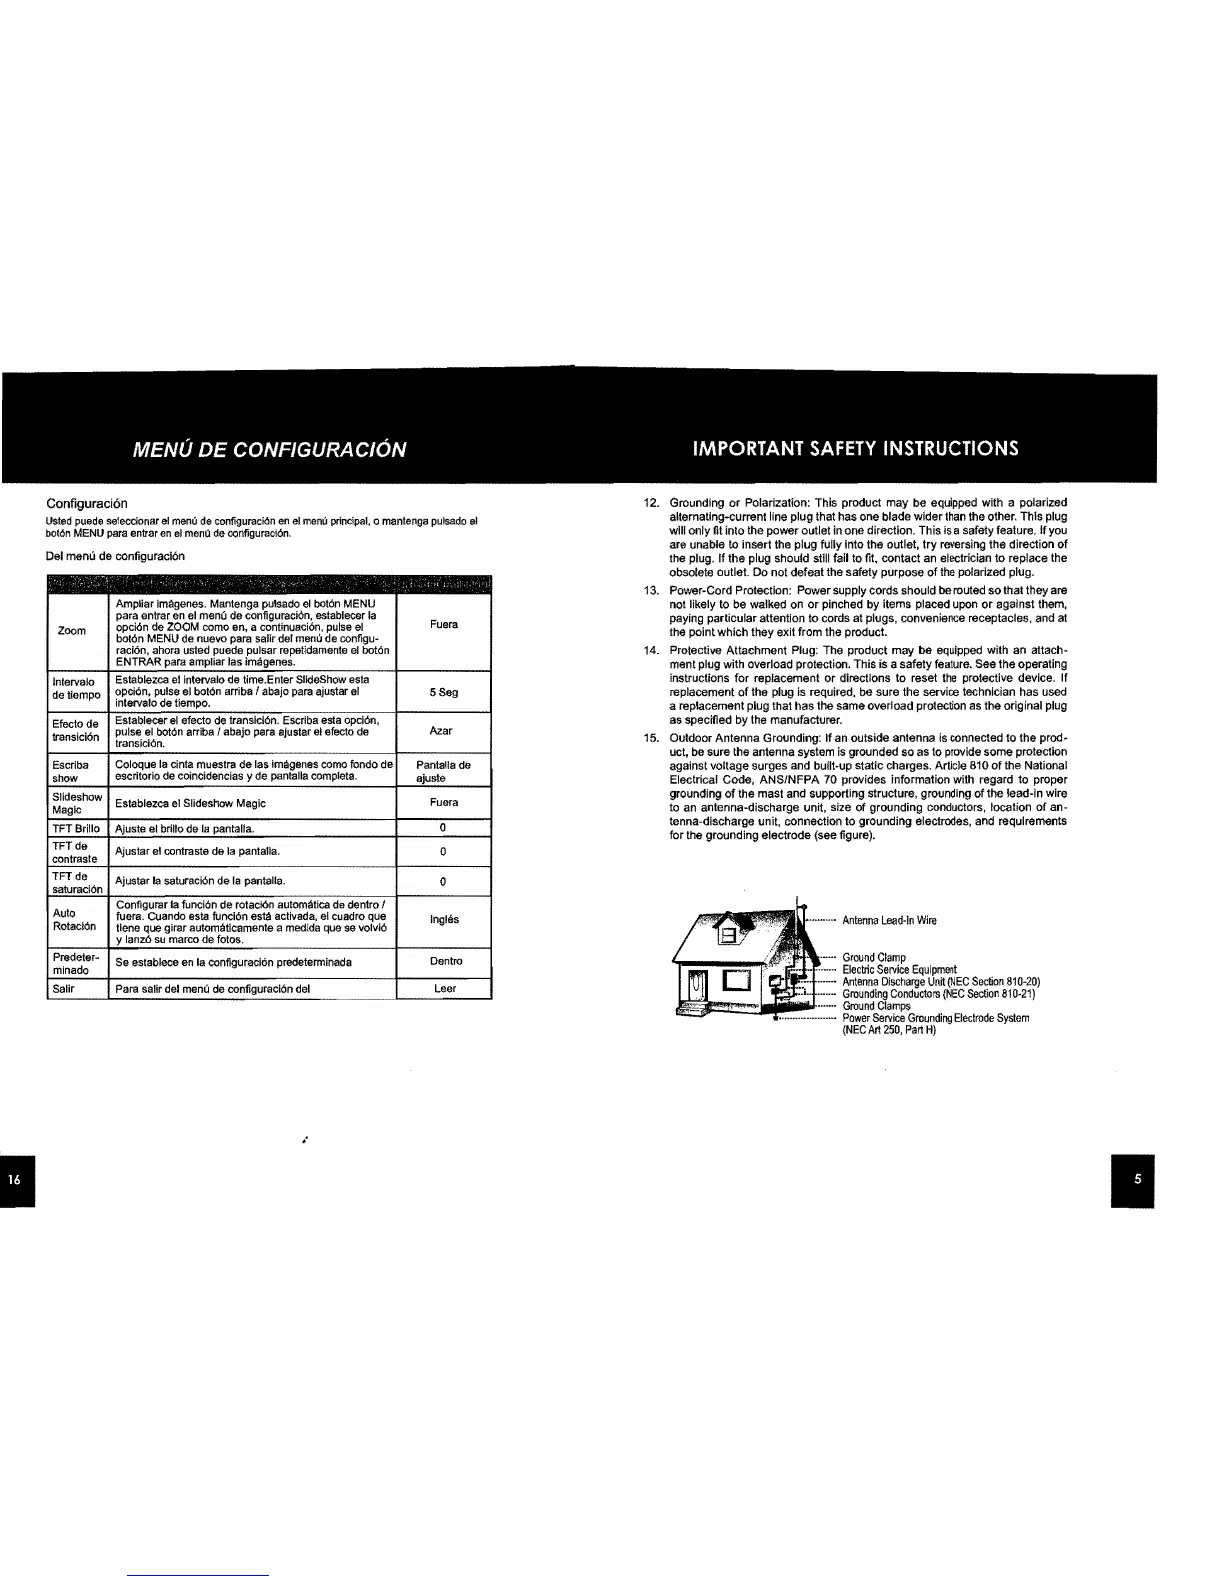
15.
Outdoor Antenna Grounding: If
an
outside antenna
is
connected to the prod-
uct,
be
sure the antenna system
is
grounded so
as
to
provide
some protection
against voltage surges
and
built-up static charges. Article
810
of
the National
Electrical Code, ANS/NFPA
70
provides Information with regard to proper
grounding
of
the mast and supporting structure, grounding of the lead-in wire
to
an
antenna-discharge unit, size of grounding conductors, location of an-
tenna-discharge unit, connection to grounding electrodes,
and
requirements
for the grounding electrode (see figure).
Antenna
Lead-In
Wire
Ground
Clamp
Electric
Service
Equipment
Antenna
Discharge
Unit
(NEC
Section
810-20)
Grounding
Conductors
(NEC
Section
810-21)
Ground
Clamps
r.::;::;._...........
Power
Service
Grounding
Electrode
System
(NEe
Art
250,
Part
H)
"