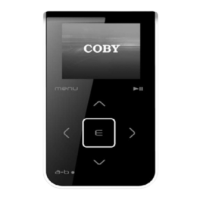
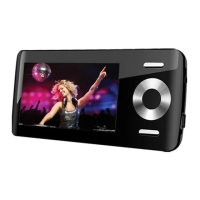
The COBY MPC7082 is a portable MP3 player designed for enjoying digital music and video files on the go. This setup guide provides comprehensive instructions for transferring audio and video content to the device, as well as common troubleshooting solutions to ensure a smooth user experience.
Audio Transfer and Management
The primary function of the COBY MPC7082 is to play MP3 and WMA audio files. The device leverages Windows Media Player 11 (WMP11) for efficient content management and transfer from your computer.
Ripping Music from CDs:
To get music onto your COBY MP3 player from physical audio CDs, you'll use WMP11 to "rip" the tracks. This process converts the audio from the CD into a digital format (MP3 or WMA) that can be stored on your computer and subsequently transferred to the player.
- Launching WMP11: Begin by opening Windows Media Player 11. This is typically found by clicking the "Start Menu" button, then "All Programs," and finally "Windows Media Player."
- Inserting an Audio CD: Once WMP11 is open, insert an audio CD into your computer's CD-ROM drive. If your computer has an active internet connection, WMP11 will automatically attempt to retrieve and display album information, such as the artist, album title, and track names. This feature enriches your music library with metadata, making it easier to organize and identify your songs.
- Initiating the Rip Process: Navigate to the "Rip" tab within WMP11. Here, you will see a list of tracks from your inserted CD. You can select individual "Titles" to rip, or if you wish to rip the entire album, ensure all tracks are checked.
- Setting Rip Options (Optional but Recommended): Before starting the rip, you have the option to configure settings that affect the quality and format of your ripped music.
- Format: It is recommended to select "Format > mp3" to ensure compatibility with a wide range of devices, including your COBY MP3 player. While WMA is also supported, MP3 is a more universally recognized format.
- Bit Rate: For optimal audio quality and file size balance, a "Bit Rate > 128 Kbps" is suggested. A higher bit rate generally results in better sound quality but larger file sizes, while a lower bit rate yields smaller files but potentially reduced audio fidelity.
- Save Location: WMP11, by default, saves your ripped music files to your "My Documents > My Music" folder. If you prefer a different location, you can change the directory by selecting "More Options." This allows you to customize where your digital music library is stored on your computer.
- Starting the Rip: After configuring your desired settings, click the "Rip" button again and select "Rip" to begin the conversion process. WMP11 will then convert the audio CD tracks into MP3 or WMA files. This process will take a few minutes, depending on the number of tracks and the speed of your computer's CD-ROM drive. A progress indicator will show the status of the ripping process (e.g., "Ripping (30%)"). Once completed, the ripped files will be saved in your designated music folder.
Transferring MP3/WMA Files to Your COBY Player:
Once you have digital music files (MP3 or WMA) on your computer, you can transfer them to your COBY MP3 player using WMP11. This process is often referred to as "syncing."
- Launch WMP11: Open Windows Media Player 11 on your computer.
- Connect Your COBY Player: Connect your COBY MP3 player to a USB port on your computer using the provided USB cable. WMP11 should automatically detect your COBY player. You will see an icon representing your device (e.g., "MP-C951 Generic") appear in WMP11, indicating its storage capacity and remaining space.
- Browse Your Music Library: In WMP11, navigate to your music library to choose the songs you want to sync. You can browse by artist, album, genre, or use the search bar to quickly find specific tracks. Double-clicking an icon in the library will allow you to choose a specific view of your music.
- Select Songs to Sync:
- Search: Use the search bar (e.g., "lion") to locate specific songs or artists.
- Selection: Click on a track to select it for synchronization. To select multiple tracks, hold down the CTRL or SHIFT key on your keyboard while clicking on the desired tracks.
- Drag and Drop: Once selected, drag the chosen tracks from your music library to the "Sync List" area on the right side of the WMP11 interface. This list represents the songs that will be transferred to your COBY player.
- Start Sync: After populating your Sync List, click the "Start Sync" button. WMP11 will then begin transferring the selected files to your COBY player. A status message will confirm that the files are being synchronized to the device.
- Disconnect Your COBY Player: Once the sync process is complete and WMP11 indicates that the files have been synchronized, you can safely unplug your COBY player from the USB port of your computer. Your player is now ready for you to enjoy your music.
Video Transfer and Conversion
The COBY MPC7082 also supports video playback, but often requires a specific file format (AMV). The setup guide outlines a process for converting your video files and transferring them to the player.
Installing the Conversion Utility:
To convert video files, you first need to install a dedicated conversion utility.
- Insert Driver CD: Insert the driver CD that came with your COBY MP3 player into your computer's CD-ROM drive.
- Locate Folder: Double-click on the "MP3set_V4.11" folder on the CD.
- Run Setup: Double-click on the "setup" file within that folder.
- Accept Agreement: Follow the on-screen prompts and accept the agreement to install the Video Conversion utility.
Running the Conversion Utility:
Once installed, you can launch the utility to convert your video files.
- Start Menu: Go to your "Start Menu."
- All Programs: Select "All Programs."
- MP3 Player Utilities: Select "MP3 Player Utilities 4.11."
- AMV Converter: Select "AMV Converter."
Converting Video:
The AMV Converter interface allows you to prepare your video files for the COBY player.
- Find and Select Video Files (Input Field): In the "Input" field of the AMV Converter, browse and select the video files you wish to convert.
- Select Output Directory: In the "Output" field, choose the directory where you want to save the converted AMV files.
- Set Start and End Points (Optional): The utility provides a visual timeline with a "green block." You can slide this block to set specific start and end points for your video, allowing you to convert only a segment of a longer video if desired. This is useful for trimming unwanted intros, outros, or specific scenes.
- Start Conversion: Click the button to "Start the conversion process." The utility will then process your video, converting it to the AMV format. A progress bar will indicate the conversion status.
Transferring Converted Video Files:
Once the video conversion is complete, the process for transferring these files to your COBY player is similar to transferring audio files.
- Copy and Paste or Drag and Drop: Simply copy and paste or drag and drop the converted AMV files from your computer's designated output folder directly to your COBY MP3 player's storage when it is connected via USB.
Troubleshooting
The setup guide also provides a helpful troubleshooting section to address common issues you might encounter with your COBY MP3 player.
No Power:
- Power Switch: Ensure the power switch, located on the back of the unit, is set to the "ON" position.
- Battery Level: If the battery level is too low, charge the unit using the provided charger or by connecting it to a USB port on your computer.
Music Does NOT Play or Freezes:
- DRM Protection: Make sure your WMA file(s) are not DRM (Digital Rights Management) protected. DRM-protected files may not play on unauthorized devices.
- Corrupted Files: The file(s) might be corrupted or damaged. Try playing a different file to confirm.
- Unsupported Format: The player supports specific formats (MP3, WMA, AMV for video). Unsupported file formats (e.g., ACC, WAV, M4A, etc., for audio) will not play. Ensure your files are in a compatible format.
- Unknown File (WMA with DRM): If a WMA file has DRM, it might be an "Unknown File" to the player.
- Request DRM Time: If a DRM-protected WMA file requires a license, you might need to "Request DRM Time" from the content provider.
No Sound After File Transfer:
- Headphone Connection: Ensure that the headphones are attached securely to the player's headphone jack. A loose connection can result in no sound.
- DRM Protection (Again): Double-check that your WMA file(s) are not DRM protected, as this can prevent playback even if the file is transferred.
- Unsupported Format (Again): Confirm that the audio files are in a supported format (MP3, WMA).
MP3 Player Not Recognized by the Computer:
- Check Connections: Verify that the USB cable is securely connected to both the player and the computer's USB port.
- Switch USB Ports: Try connecting the player to a different USB port on your computer. Sometimes, a specific port might be faulty or have power issues.
- Player Settings: Go into the MP3 player's "SETTINGS" menu and change the "Online Device" option from "Media Device" to "USB Disk." This setting dictates how the player communicates with the computer.
Video Conversion Error:
- Original File Playback: Ensure that the original video file(s) plays correctly on your computer using a standard media player. If the original file itself doesn't play, then the conversion utility won't be able to process it. You might need to obtain the correct codec for that file.
- Unsupported Format: The video conversion utility supports specific input formats. If your original video file is in an unsupported format, it will not convert successfully.
Customer Support:
If you continue to experience difficulties with your COBY MP3 player after trying these troubleshooting steps, you can contact Customer Care for further assistance. They are available Monday-Friday from 8:00 AM to 8:30 PM EST, and Saturday and Sunday from 9:00 AM to 5:30 PM EST. You can reach them via email at customerservice@cobyusa.com or techsupport@cobyusa.com, or by phone at 1-800-727-3592.